Indoor Plant Care Quick Tips (Do This First)
- Water only when the top 1–2 inches of soil are dry
- Place plants in bright, indirect light or suitable low light
- Use pots with drainage holes and a well-draining soil mix
- Fertilize during the growing season, not in winter
- Adjust watering and light based on season and environment
- Check leaves weekly for signs of stress or pests
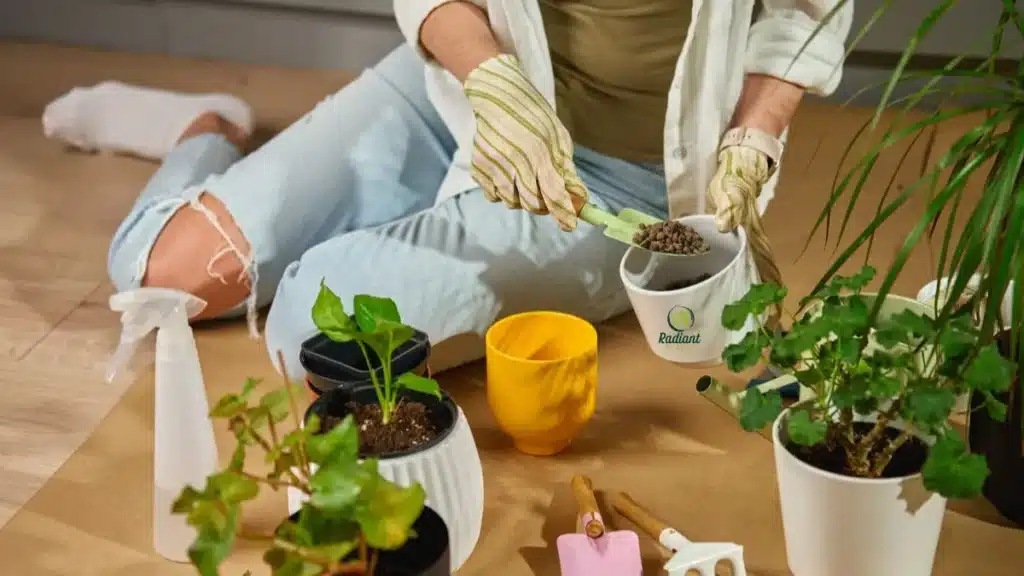
Indoor plant care means giving houseplants the right balance of light, water, soil drainage, humidity, and nutrients. Most indoor plants grow best in bright, indirect light, well-draining soil, and pots with drainage holes. Water when the top 1–2 inches of soil are dry, and adjust care by season and plant type.
Most beginners struggle with indoor plants not because they lack effort, but because small mistakes—like watering too often, placing plants in the wrong light, or using poor drainage—add up over time. Indoor plant care becomes much easier when you understand how these factors work together instead of guessing what your plant needs. In this guide, you’ll learn a simple, practical system to keep houseplants healthy, spot problems early, and fix them with confidence.
In This Article
What Indoor Plant Care Really Means (Simple System)
Indoor plant care means controlling five basic variables: light, water, soil, environment, and nutrients. If a houseplant starts struggling, the problem is usually not random—one of those five factors is off. Thinking about care this way makes indoor plant care much simpler, especially for beginners who feel like plants “suddenly” decline for no reason.
A lot of generic guides make plant care sound like a long list of separate chores. In real life, it works better as a simple system. Your plant does not care whether you memorized ten tips. It responds to conditions. If the light is wrong, growth slows or gets leggy. If the soil stays wet too long, roots suffer. If humidity is too low or the air is too dry from heat or AC, leaf edges may brown. If nutrients are missing during active growth, the plant may stall or look pale. That is why indoor plant care is less about doing more and more about adjusting the right variable at the right time.
Here is the easiest mental model:
- Light powers growth
- Water keeps tissues hydrated
- Soil supports roots and drainage
- The environment affects humidity, temperature, and stress
- Nutrients fuel new growth over time
A useful rule for beginners is this: when a plant looks bad, do not immediately blame watering. Water is the most common mistake, but not always the real cause. A pothos in a dark corner may stay wet too long because growth is slow. A succulent in a pot with poor drainage may rot even if you water “only once a week.” A peace lily near a heater may wilt from dry air and heat swings, not just thirst. That is where many people fail—they treat the symptom, not the condition causing it.
The 5-Factor Indoor Plant Care System
1. Light: Is the plant getting the right amount?
Light tells you how much energy the plant has to grow and use water. This is why two identical plants can behave completely differently in two rooms. One near a bright east-facing window may dry out steadily and put out new leaves, while another on a shelf far from the window may stay damp for days and slowly weaken—unless you choose species adapted to low light conditions like those in low light indoor plants for dim rooms.
What actually works:
Match the plant to the room, not just the label
Watch growth patterns, not just leaf color
Move plants based on the season if daylight changes a lot
What often fails:
Putting every plant in “bright indirect light” without understanding what that means
Keeping a plant too far from a window and assuming the room is still bright enough
Ignoring shorter winter days, when light levels can drop sharply
2. Water: Is the plant actually dry, or just looking stressed?
Watering is not about following a strict calendar. It is about checking soil moisture and watering as needed. This is one of the biggest mindset shifts in indoor plant care. Drooping can mean two opposite problems: dry roots or damaged wet roots, and those two issues often look similar at first unless you understand key overwatering warning signs in plants, but the fix is completely different.
What actually works:
Check the top 1–2 inches of soil before watering
Lift the pot to notice when it feels light or heavy
Adjust watering by season, pot size, light, and plant type
What often fails:
Watering every Sunday, no matter what
Giving small sips instead of watering thoroughly when needed
Assuming yellow leaves always mean underwatering
At Radiant Plants, we’ve found that beginners improve fastest when they stop asking, “How many days should I wait?” and start asking, “What is the soil telling me today?” That one shift prevents a huge number of care mistakes.
3. Soil: Can roots breathe and drain properly?
Soil is not just there to hold the plant upright. It controls airflow, drainage, and how long moisture stays around the roots. If the potting mix is dense or the container has no drainage hole, even a careful watering routine can still lead to trouble, including mold in the soil.
What actually works:
Use a potting mix suited to indoor plants
Choose containers with drainage holes
Repot when the soil compacts badly, or roots outgrow the pot
What often fails:
Using garden soil indoors
Leaving a nursery pot inside a decorative cachepot full of trapped water
Keeping a plant in an exhausted mix for too long
A beginner mistake that causes a lot of frustration is thinking “good soil” means “rich and dense.” For indoor plants, the better question is whether the mix drains well enough for that plant type. A tropical aroid, a snake plant, and a jade plant should not all sit in the same moisture profile long term., a snake plant, and a jade plant should not all sit in the same moisture profile long term.
4. Environment: What is the room doing to the plant?
The environment includes humidity, temperature, airflow, and seasonal indoor conditions. This is the factor many competitors under-explain, even though it affects everyday results. A plant near a drafty window in winter, a vent, or a heater can struggle even if your watering and light seem “correct.”
Real home examples:
- In winter, indoor heat often lowers humidity and dries leaf edges faster
- In summer, strong afternoon sun through the glass may scorch tender foliage
- Air conditioning can create dry, fluctuating conditions in some rooms
What actually works:
- Keep plants away from heating vents, radiators, and cold drafts
- Group humidity-loving plants together when possible
- Expect care needs to change when seasons change
What often fails:
- Treating January care and July care the same way
- Assuming a bathroom and a living room provide the same environment
- Ignoring stress from sudden temperature swings
This is also why “perfect care” on paper can still fail in a real apartment. The room is part of the care system.
Nutrients: Is the plant getting support for active growth?
Nutrients matter, but they are usually not the first thing to fix. Fertilizer helps during active growth, especially in spring and summer, but it cannot compensate for poor light, soggy soil, or environmental stress. A weak plant in the wrong conditions will not recover just because it was fed, which is why understanding indoor plant fertilizer timing and method is essential before adding anything.
What actually works:
Fertilize during active growth, not as a panic response
Use a balanced approach rather than overfeeding
Reduce or pause feeding when growth naturally slows in winter
What often fails:
Fertilizing a stressed or root-damaged plant
Feeding on a strict schedule year-round
Assuming more fertilizer means faster recovery
This is a major beginner trap: seeing pale leaves and reaching for fertilizer first. Sometimes the real issue is not nutrients at all, but light, watering, or root health.ue is low light, root stress, or old compacted soil. In other words, nutrients are part of the system, but they only work well when the other four factors are reasonably stable.
The Core Rule Beginners Should Follow
If your plant is struggling, check the five factors in order instead of guessing:
- Is the light appropriate?
- Is the soil too wet, too dry, or compacted?
- Is the pot draining properly?
- Is the room stressing the plant through dry air, heat, cold, or drafts?
- Is the plant in active growth and ready for nutrients?
This framework is useful because it stops random care changes. Many people see one yellow leaf, move the plant, water it, fertilize it, and repot it all in the same weekend. That usually creates more stress, not less. A better approach is to change one variable at a time and watch how the plant responds.
That simple system gives indoor plant care a clear structure: instead of memorizing endless tips, you learn how to read the plant and adjust the condition that is actually causing the problem.
How Often to Water Indoor Plants (Without Guessing)
Water indoor plants when the soil needs it, not on a fixed schedule. For most houseplants, the best method is to check whether the top 1–2 inches of soil are dry before watering. This approach is much more reliable than watering every few days, because light, temperature, humidity, pot size, and plant type all change how fast soil dries.
The biggest mistake beginners make is asking, “How many times a week should I water?” That sounds logical, but it usually leads to overwatering. A pothos in a bright room during summer may need water much sooner than the same pothos in winter or in a dim corner. Indoor plant care works better when you respond to soil moisture and plant conditions, not the calendar.
The best method: check the soil first
Before you water, test the soil. The easiest way is the finger test:
- Stick your finger about 1–2 inches into the soil
- If it feels dry at that depth, it is usually time to water
- If it still feels cool or damp, wait and check again later
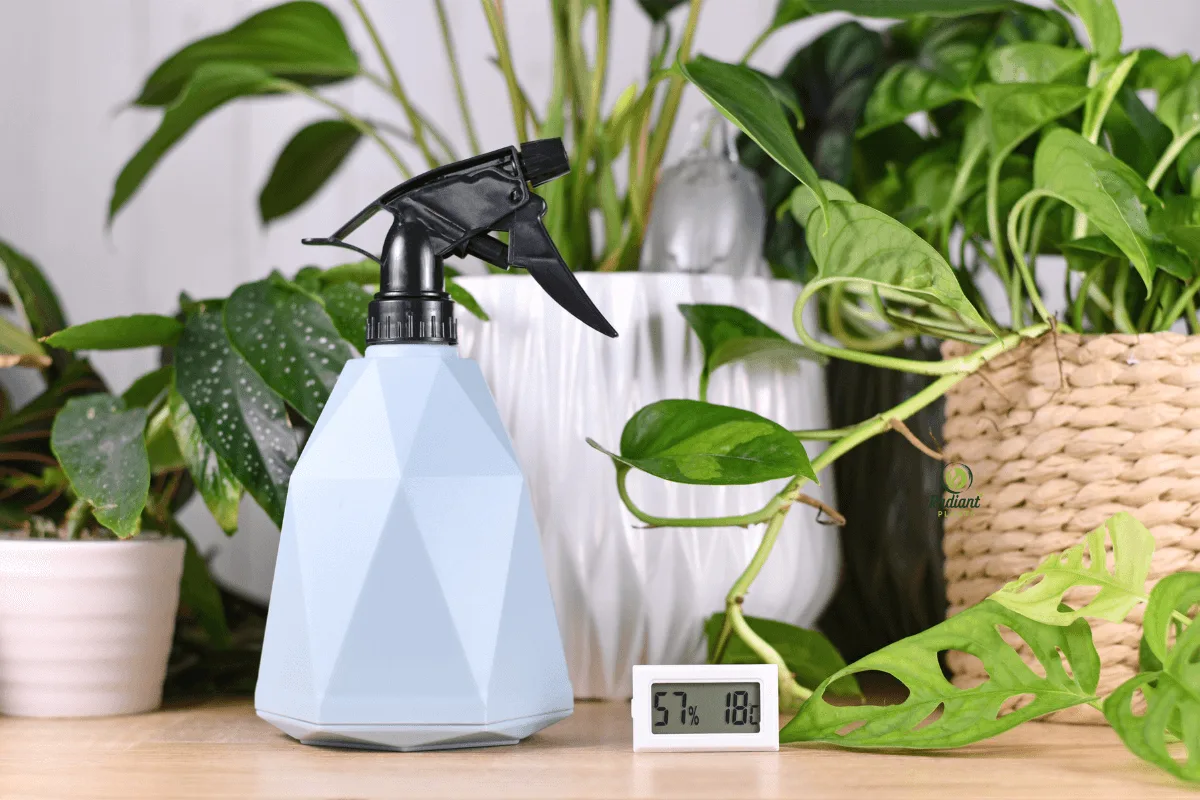
If you do not want to use your finger, a simple moisture meter can help, especially if you are caring for several plants. Just remember that meters are a tool, not a replacement for observation. Some cheaper meters can give inconsistent readings.
What actually works:
- checking the soil before every watering
- lifting the pot to learn the difference between light, dry soil and heavy, wet soil
- watching how long it takes your plant to dry out in your home
What often fails:
- watering “just in case.”
- Adding a little water every few days instead of watering thoroughly when needed
- Assuming a drooping plant always needs water
In real indoor conditions, we consistently see that people get better results when they treat watering like a soil check routine, not a reminder notification. Plants do not follow phone alerts. They respond to conditions.
Quick rules that make watering easier
Use these as practical guidelines:
- Water only when the top layer is dry, unless the plant prefers consistently moist soil
- Water thoroughly until excess drains out, then empty the standing water
- Do not let pots sit in water for long periods
- Check more often in spring and summer
- Check less often in winter, when many houseplants grow more slowly and use less water
A common beginner failure is watering too lightly. Small sips only wet the top surface and can leave deeper roots dry while still keeping the pot inconsistently moist. For most indoor plants, it is better to water fully when needed than to give frequent tiny amounts.
How to tell dry soil from wet soil
This is where many guides stay vague. Here is how to separate the signals more clearly.
Signs the soil is dry
- The top 1–2 inches feel dry and loose
- The pot feels noticeably lighter when lifted
- Soil may pull slightly away from the edge of the pot
- Some plants may start to look slightly droopy or less firm
Signs the soil is still wet
- Soil feels cool, dark, and damp below the surface
- The pot feels heavy
- The top may look dry, but deeper soil is still moist
- gnats, sour smells, or yellowing leaves may suggest the mix is staying wet too long
That last point matters. The surface can dry faster than the root zone, especially in larger pots. This is one reason people accidentally overwater. They see a dry top layer, water again, and keep the lower soil constantly wet.
Warning box: Overwatering is usually a soil problem, not “too much love.”
Overwatering does not always mean you watered too often by the calendar alone. It can also mean:
- The pot is too large for the plant
- The soil drains poorly
- The room is too dim, so the plant uses water slowly
- The pot has no drainage hole
- The plant is growing slowly because it is winter
This is an important distinction competitors often skip. A plant can be “overwatered” even if you are not watering constantly. If the soil stays wet too long, roots lose access to oxygen and start to decline.
How plant type changes watering needs
Not all indoor plants dry at the same speed, and this is where blanket advice causes problems.
Tropical foliage plants
Plants like pothos, monstera, philodendron, and peace lily usually like evenly moist-but-not-soggy conditions. They often do well when the top inch or two dries before watering again.
Succulents and cacti
Plants like jade, echeveria, lithops, and many euphorbia types need the soil to dry much more fully between waterings. Watering them like tropical plants is one of the fastest ways to cause rot.
Low-light plants
Snake plants and ZZ plants generally tolerate lower light and often use water more slowly, especially indoors, making them some of the best options among low-light indoor plants for dim rooms. In dim rooms, wet soil can linger longer than beginners expect.
Small plants vs large plants
A small terracotta pot in a bright window may dry fast. A large plant in a plastic pot across the room may stay wet much longer. Pot size and material can matter just as much as plant type.
A simple watering checklist
Before watering, ask:
- Is the top 1–2 inches of soil actually dry?
- Does the pot feel lighter than usual?
- Is this plant a tropical plant or a succulent?
- Is it growing actively right now, or is it winter?
- Does the pot have drainage holes?
- Is the plant in bright light or a low-light spot?
If several answers suggest the plant is still holding moisture, wait.
Real home scenarios beginners run into
Scenario 1: The low-light living room plant
You water every Sunday, but the plant is far from the window and gets limited light. The soil still feels damp by the next weekend, but you water anyway. A few weeks later, leaves start yellowing. The problem is not that the plant “needs more water.” The problem is that low light slowed water use, and the roots stayed too wet.
Scenario 2: The sunny kitchen shelf
A smaller plant near a bright window dries much faster, especially in summer. If you water it by the same schedule as the living room plant, it may dry out too much between waterings. Same house, different conditions, different watering pattern.
Scenario 3: Winter confusion
Your plant needed water every 6–7 days in summer, but now it is January, and the soil stays moist much longer. Many people keep the same routine year-round, which leads to avoidable stress. Seasonal change matters in indoor plant care, even inside the house.
If the plant looks stressed, diagnose before watering
This is where clarity matters most.
A drooping plant with bone-dry soil likely needs water.
A drooping plant with wet, heavy soil may already be suffering from overwatering or poor root health.
Yellow leaves with wet soil point in a different direction than yellow leaves with dry, shrunken soil.
So before you react, check:
- soil moisture
- pot weight
- drainage
- light level
- whether the plant has been sitting wet for too long
That small pause can save a plant faster than rushing in with more water.
Light Requirements for Indoor Plants (Beginner Guide)
Most indoor plants do best in bright, indirect light, while a smaller group can tolerate low light but usually grow more slowly. The biggest lighting mistake in indoor plant care is assuming “near a window” automatically means the plant is getting enough usable light. In real homes, light changes by window direction, distance from the glass, season, and anything blocking the sun.
Light is what powers growth, so it affects almost everything else in your care routine. A plant in stronger light usually uses water faster and grows more actively. A plant in weaker light often stays wet longer, stretches toward the window, and becomes more vulnerable to overwatering. This is why lighting problems often get mistaken for watering problems.
The light types beginners should actually understand
Here is the simplest way to think about indoor plant light:
Light type | What it means | Best for | Common mistake |
|---|---|---|---|
Bright indirect light | Strong light near a window, but no harsh sun hitting leaves for long periods | Most tropical houseplants like pothos, monstera, philodendron, and many peperomias | Placing the plant too far from the window and still calling it “bright.” |
Medium light | Moderate natural light, often a few feet from a bright window | Many adaptable houseplants | Assuming medium light is enough for fast growth |
Low light | A room with limited natural light, but not total darkness | ZZ plant, snake plant, some dracaena | Believing low light means “no light.” |
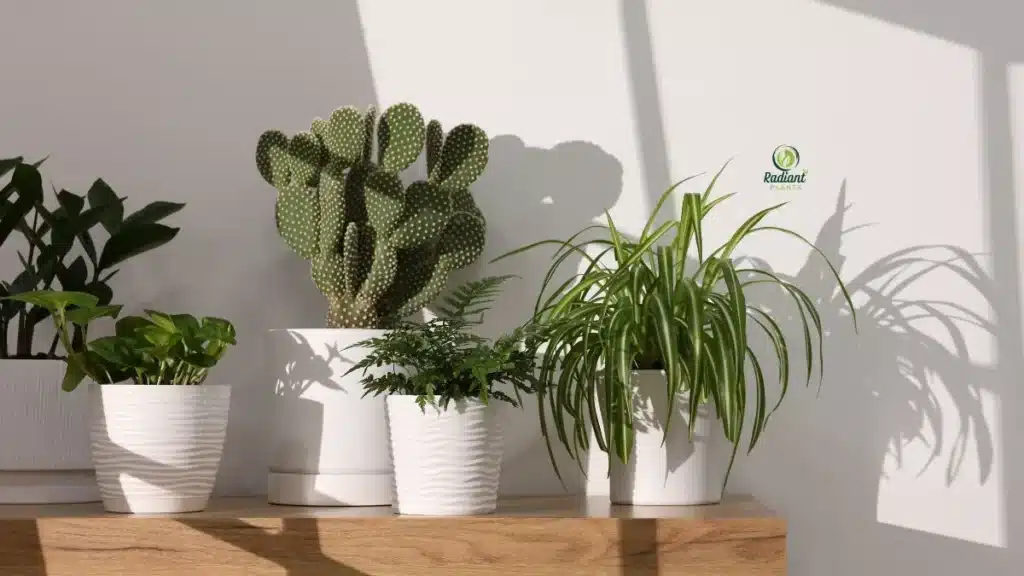
Direct sun | Strong sunlight hitting leaves, especially from south- or west-facing windows | Some succulents, cacti, and sun-loving plants | Putting tender tropical foliage in harsh midday sun |
A useful clarification competitors often skip: low light does mean no light. If you can comfortably read in the spot during the day without turning on a lamp, there is at least some usable light. But a dark hallway corner or a spot far from any window is often too dim for long-term healthy growth without supplemental lighting.
Bright indirect light vs low light
This phrase confuses people more than almost any other in indoor plant care.
Bright indirect light
Bright indirect light usually means:
- The plant is close to a bright window
- The room feels well-lit for much of the day
- direct rays are filtered, softened, or limited
- The plant receives strong ambient light without leaf scorch
Good real-home examples:
- next to an east-facing window
- a few feet back from a south-facing window with a sheer curtain
- near a bright west-facing window where intense late-day sun is softened
Low light
Low light usually means:
- The room has natural light, but it is limited or indirect
- The plant is farther from the window
- Light levels are lower for much of the day
- growth may be slower, and watering needs are lower
Good real-home examples:
- a bedroom with one smaller north-facing window
- a plant placed several feet away from a bright window
- an office corner that still gets some daylight but no strong sun
What actually works:
- choosing plants that match the room instead of forcing every plant into the same spot
- moving plants closer to windows before assuming they need more water or fertilizer
- expecting slower growth in lower light
What often fails:
- buying a “low light plant” and placing it in a truly dark area
- Assuming a bright white room equals bright plant light
- Leaving a plant in the same winter position as summer, even when daylight drops
At Radiant Plants, we’ve found that many beginners think they have a watering problem when they really have a light problem. Once the plant is moved closer to a window, the growth pattern, soil drying time, and leaf color often make much more sense.
What window direction really means
Window direction changes the strength and duration of light indoors. This can vary by region, season, weather, nearby buildings, and window coverings.
North-facing windows
- usually provide the gentlest and coolest light
- Often best for shade-tolerant or low-light-tolerant plants
- It may be too weak for faster growth in winter
Best for:
- snake plant
- ZZ plant
- some dracaena
- plants you want to maintain, not push for rapid growth
East-facing windows
- provide softer morning light
- They are often one of the easiest options for many houseplants
- works well for many tropical foliage plants
Best for:
- pothos
- philodendron
- peperomia
- many beginner-friendly indoor plants
South-facing windows
- usually provide the strongest light indoors
- They are great for brighter-light plants
- may need filtering for sensitive foliage, especially in hot seasons
Best for:
- succulents
- cacti
- many brighter-light tropicals if protected from harsh midday exposure
West-facing windows
- Give hotter, stronger afternoon light
- can work well, but may be too intense for delicate leaves without some protection
Best for:
- higher-light plants
- plants acclimated slowly to stronger conditions
A beginner mistake that causes a lot of confusion: placing a monstera in the center of a room with a south-facing window and assuming that is the same as south-window light. It is not. Light drops faster indoors than many people expect, especially once you move several feet away from the glass.
Signs your plant is getting too little light
Diagnose the light issue before changing everything else.
Look for:
- long, weak, stretched growth
- smaller new leaves
- slow or stalled growth during the growing season
- leaning toward the window
- faded variegation in some variegated plants
- The soil is staying wet for too long because the plant is using less water
What this can look like at home:
- Your pothos stops trailing much and gets sparse between leaves
- Your succulent starts stretching instead of staying compact
- Your dracaena survives, but barely grows for months
Too little light is often subtle at first. The plant may not collapse, but it gradually loses shape, color, and vigor.
Signs your plant is getting too much light
Too much light looks different from too little light, and separating the two matters.
Look for:
- bleached or faded patches on leaves
- crispy brown or white scorch marks
- curling or scorched leaf edges on sensitive plants
- sudden stress after moving a plant into much stronger sun
What this can look like at home:
- A peace lily near a hot west-facing window develops scorched patches
- A philodendron placed directly in harsh midday summer sun starts bleaching
- A plant moved from a dim shelf straight into full sun declines quickly
This is where diagnosis matters. Brown leaves can come from dry air, underwatering, fertilizer burn, or too much sun. The difference is location and pattern. Sun damage often appears on the side facing the window and can look patchy or bleached, while dry-air damage usually affects edges and tips more generally.
Real room examples that make light easier to judge
Bright living room with filtered sun
A plant placed near a large south-facing window with a sheer curtain is often in bright indirect light. Many tropical houseplants do well here.
Small bedroom with one north-facing window
This is usually lower light. A snake plant or ZZ plant may do fine, but a succulent or variegated monstera may struggle over time.
Kitchen windowsill with direct sun
Great for many succulents and herbs, but some foliage plants may burn if they are not acclimated gradually.
Home office far from the window
Even if the room feels pleasant to you, the plant may be receiving much less light than you think. This is a common reason “easy” plants stop growing.
When grow lights make sense
Grow lights are useful when your home does not provide enough consistent natural light, especially in winter or in rooms with weak window exposure. They are also helpful if you want to grow brighter-light plants in spaces that would otherwise be too dim.
Consider grow lights when:
- Your plant is several feet from the only window
- Winter days are short, and your plant stalls every year
- You want to keep variegated or brighter-light plants indoors
- Your only available rooms are dim for much of the day
What actually works:
- using grow lights to supplement weak natural light
- placing the light at a reasonable distance from the plant
- running it consistently rather than randomly
What often fails:
- buying a light but placing it too far above the foliage
- using it for a few hours here and there without consistency
- assuming any decorative bulb is strong enough for plant growth
Expert tips for getting indoor light right
- Start by observing the room at different times of day. Morning light, afternoon light, and winter light can feel very different.
- Move plants gradually. A sudden jump from low light to intense sun can stress foliage fast.
- Use growth as feedback. Healthy new leaves, steady growth, and normal soil drying are better clues than labels alone.
- Match watering to light. Stronger light usually means faster drying and more active growth.
- Recheck plant placement seasonally. A spot that worked in June may be too dim in January.
One overlooked point: the goal is not always maximum light. The goal is the right light for that plant in that room. Once you understand that, the rest of indoor plant care gets much easier because watering, fertilizing, and troubleshooting all become more accurate.
Soil, Pots, and Drainage (Root Health Basics)
For most indoor plants, the best setup is a pot with drainage holes and a well-draining potting mix designed for containers. Good indoor plant care starts below the surface, because even perfect watering habits will not save a plant sitting in dense soil or a pot that traps water around the roots.
This is one of the most overlooked parts of beginner plant care. People focus on watering frequency, but roots care more about how long the mix stays wet and whether they can still get oxygen. If the soil is too dense or the pot cannot drain, moisture lingers too long, and root problems become much more likely.
Why drainage holes matter so much
A drainage hole is not a small detail. It is one of the easiest ways to prevent root rot and chronic overwatering. When you water thoroughly, the extra water needs a way to leave the pot. Without that exit, the bottom of the container can stay wet far longer than the top looks.
What actually works:
- using nursery pots or decorative pots with real drainage
- watering until excess runs out, then emptying the saucer or cachepot
- choosing pot size based on root mass, not just appearance
What often fails:
- planting directly into a sealed decorative pot
- Assuming a layer of rocks at the bottom, “creates drainage.”
- picking a pot that is much too large for the plant
A common beginner mistake is thinking, “I’ll just be careful and water less.” That sounds reasonable, but it usually creates a new problem: part of the root ball may stay too wet while other parts never get evenly watered. In practice, a pot with no drainage makes watering harder, not easier.
Warning box: no drainage hole = higher root rot risk
If a pot has no drainage hole, the risk is not just “a little extra moisture.” The real problem is that water can collect in the lower root zone, where you cannot easily see it. That can lead to:
- roots staying wet too long
- sour-smelling soil
- fungus gnats
- yellow leaves
- drooping even when the soil is wet
- slow decline that looks confusing at first
This is important because many people misread these symptoms as a sign the plant needs more water. In reality, the roots may already be stressed from poor drainage.
Potting mix vs garden soil
Indoor plants should usually go in potting mix, not garden soil. Potting mix is made for containers, where airflow and drainage matter much more. Garden soil is typically too dense for indoor pots, compacts easily, and can stay wet longer than most houseplants can tolerate.
Potting mix
A good indoor potting mix is usually:
- lighter and airier than outdoor soil
- better at balancing moisture and drainage
- easier for roots to spread through in a container
Some plants may need different textures. For example:
- Tropical foliage plants often prefer a mix that holds some moisture but still drains well
- Succulents and cacti usually need a faster-draining mix
- Orchids and some specialty plants may need a bark-heavy medium rather than standard potting mix
Garden soil
Garden soil usually causes problems indoors because it:
- compacts in containers
- drains more slowly
- reduces airflow around roots
- may carry pests or pathogens
Competitors often stop at “use well-draining soil,” but what beginners really need to hear is this: the right mix depends on how long you want moisture to stay around the roots. That is a more useful way to think about soil than memorizing brand names.
How to tell if your current setup is holding too much water
Diagnosis matters here because many soil and pot problems look like watering mistakes.
Signs the mix may be too heavy or the pot may be draining poorly:
- Soil stays wet for many days after watering
- The pot feels heavy much longer than expected
- leaves yellow while the soil still feels damp
- The top dries, but the bottom remains soggy
- roots smell sour, or the soil has a musty odor
- Fungus gnats keep appearing
Signs the mix may be drying too fast:
- water runs straight through without soaking in
- The soil pulls hard away from the edge of the pot
- plant wilts quickly and repeatedly
- The pot feels extremely light within a day or two in strong light
Those are two different problems, and the fixes are different. A plant declining in soggy soil does not need less water alone—it may need a different pot, a better mix, or more light. A plant drying too fast may need a slightly different soil structure, a larger pot, or more frequent checks.
Choosing the right pot
The best pot is not always the prettiest one. In indoor plant care, the most useful pot is the one that helps you manage moisture well.
Good beginner pot choices
- Plastic pots: hold moisture longer, useful for plants that like more even moisture
- Terracotta pots: dry faster, useful for plants that dislike staying wet
- Ceramic pots with drainage: good middle ground, depending on shape and glaze
What actually works:
- matching pot material to the plant’s watering preferences
- starting with the function before decor
- using a nursery pot inside a decorative cover pot, then removing excess water after watering
What often fails:
- keeping plants permanently in oversized containers
- using a beautiful pot with no holes and hoping careful watering will solve it
- repotting into a much bigger pot “to give roots space.”
At Radiant Plants, we’ve found that oversized pots cause more beginner problems than undersized ones. A pot that is too large holds extra wet soil around roots that the plant cannot use yet, which often leads to slow decline instead of faster growth.
Repotting basics beginners should know
Most indoor plants do not need frequent repotting, but they do need it when the root system outgrows the container or the soil breaks down. Repotting is less about “giving the plant a fresh start” and more about restoring healthy root conditions.
Basic repotting rules:
- move up only one pot size in most cases
- Use fresh potting mix suited to the plant type
- Avoid repotting into a huge container
- Water after repotting, then let the plant adjust
- Do major repotting during active growth when possible, usually in the spring or early summer, for many houseplants
A real-home scenario: someone sees roots peeking out, buys a pot three times larger, packs it with dense soil, and waters normally. A few weeks later, the plant looks worse. The issue was not reporting itself. There was too much soil staying wet around a small root ball.
How to tell if a plant is root-bound
A root-bound plant has roots that have filled the pot so tightly that water, airflow, and growth start to suffer.
Common root-bound signs:
- roots circling heavily inside the pot
- roots growing out of drainage holes
- Water runs through very quickly
- The plant dries out unusually fast
- growth slows even during the growing season
- The root ball comes out in a tight mass that holds the pot’s shape
But here is an important nuance competitors often miss: not every slow-growing plant needs repotting. Slow growth can also come from low light, winter dormancy, poor nutrition, or a stressed root system. The difference is in the root ball and watering behavior. If the plant dries out extremely fast and the roots are densely packed, root-bound is more likely. If the soil stays wet too long and roots look sparse or unhealthy, the problem may be poor drainage instead.
Quick checklist: soil, pot, and drainage basics
Before blaming your watering routine, check this:
- Does the pot have at least one drainage hole?
- Is the plant in potting mix, not garden soil?
- Does the mix stay wet too long after watering?
- Is the pot only slightly larger than the root ball?
- Does the plant show root-bound signs?
- Is the pot material helping or hurting moisture control?
- Are you adjusting soil and pot choice for the plant type?
That checklist solves a lot of “mystery” plant problems faster than changing your watering schedule again. When roots have the right mix, the right pot, and a clear path for excess water to escape, the rest of indoor plant care becomes much easier to manage.
Fertilizing Indoor Plants the Right Way

Yes, most indoor plants benefit from fertilizer, but only when they are actively growing and only in the right amount. Fertilizer supports new leaves, stems, and roots, but it does not fix poor light, soggy soil, or root damage. In indoor plant care, feeding works best as a support tool, not as a rescue shortcut.
This is one of the most misunderstood parts of houseplant care because beginners often assume fertilizer is like “plant food” in the simplest sense: more food, more growth. In reality, fertilizer only helps when the plant has enough light, healthy roots, and the right moisture balance to use those nutrients well. A plant sitting in low light in January will not suddenly thrive because you fed it. A stressed plant with root rot will not recover faster from extra fertilizer. In fact, feeding at the wrong time often makes things worse.
When indoor plants need fertilizer
For most houseplants, the best time to fertilize is during the active growing season, which is usually spring and summer and sometimes early fall, depending on the plant and your indoor conditions. That is when plants are producing new growth and can actually use extra nutrients.
In practical terms:
- Fertilize when you see steady new leaves or active growth
- Reduce feeding when growth slows
- Pause or greatly reduce fertilizer in winter for many common houseplants
Seasonal context matters more than many competitors explain. A pothos near a bright window may still grow lightly indoors year-round, but many houseplants slow down noticeably in shorter winter days. That is why indoor plant care should follow the plant’s growth, not a rigid year-round feeding calendar.
What actually works:
- feeding during active growth
- scaling back in winter
- watching the plant’s pace instead of following a generic monthly rule blindly
What often fails:
- fertilizing because the label says to, even when the plant is clearly not growing
- feeding stressed plants first instead of fixing light, soil, or watering
- using the same routine in July and January
At Radiant Plants, we’ve found that beginners usually get better results by feeding less often, but more intentionally. Most indoor plants suffer more from overdoing fertilizer than from missing a feeding or two.
How often should you fertilize indoor plants?
There is no single perfect schedule for every plant, because frequency depends on:
- plant type
- light level
- season
- growth rate
- fertilizer strength
- potting mix and how often the plant is watered
A fast-growing monstera in bright light may use nutrients more actively than a snake plant sitting in a dim bedroom. A plant under a grow light may keep growing longer into fall than one in a darker room.
A useful beginner approach is:
- Fertilize lightly and consistently during active growth
- Avoid feeding dormant or barely growing plants
- Always follow dilution guidance carefully, and consider starting at a lower strength than the package maximum if you are new
A common beginner mistake is trying to “catch up” with a strong dose after forgetting for weeks. That often stresses the roots more than it helps the plant.
The main types of fertilizer
You do not need to memorize complicated chemistry to choose a useful fertilizer, but it helps to understand the basic categories.
Liquid fertilizer
Liquid fertilizers are diluted in water and applied during watering. These are often the easiest for beginners because:
- They are simple to control
- They can be adjusted based on season and growth
- They work well for regular, lighter feeding
Good for:
- most common houseplants
- people who want flexibility
- plants in active growth
Slow-release fertilizer
Slow-release fertilizers release nutrients gradually over time. These can be convenient, but they are less flexible if your plant’s conditions change.
Good for:
- growers who prefer fewer applications
- stable growing conditions
Potential downside:
- harder to adjust quickly if the plant slows down or shows stress
Specialized fertilizers
Some fertilizers are marketed for bloomers, succulents, orchids, or foliage plants. These can be useful in some cases, but beginners often do well with a balanced, general-purpose fertilizer appropriate for indoor plants unless a plant has very specific needs.
Competitors often overcomplicate this section. What matters most for beginners is not finding a “magic formula.” It is choosing a reasonable fertilizer and applying it at the right time, in the right amount, under the right growing conditions.
How to tell whether your plant may need nutrients
Nutrient issues are often harder to diagnose than watering or light problems, so this is where people jump to the wrong conclusion.
Possible signs a plant may benefit from feeding:
- active growing season, but growth feels weak or slower than expected
- smaller new leaves than usual
- Pale growth after the basics are already dialed in
- The plant has been in the same potting mix for a long time and is otherwise healthy
But diagnose carefully first. Pale leaves or stalled growth can also come from:
- low light
- root-bound stress
- poor drainage
- underwatering or overwatering
- seasonal slowdown
That distinction matters. A plant in dim light may look underpowered, but fertilizer will not solve the core problem. A plant in soggy soil may look pale because the roots are stressed, not because it is “hungry.”
Common fertilizing mistakes beginners make
Feeding a stressed plant first
This is probably the biggest mistake. If a plant is yellowing, drooping, or sitting in wet soil, fertilizer is usually not the first fix. Check light, soil moisture, drainage, and root health before adding nutrients.
Overfertilizing for faster growth
More fertilizer does not mean more growth. It often means salt buildup, root stress, and burned leaf tips.
Fertilizing in winter without a reason
Many indoor plants grow more slowly in winter because of lower light and shorter days. Feeding heavily during that period can create more stress than benefit.
Using fertilizer to compensate for poor conditions
Fertilizer cannot replace bright light, proper watering, or healthy roots. It helps a good system work better. It does not fix a broken one.
Applying fertilizer to very dry soil
Feeding dry roots can increase the risk of fertilizer burn. It is usually better to apply fertilizer when the plant is already properly hydrated or during a normal watering routine, depending on the product guidance.
Warning signs of overfertilization
Overfertilization is more common indoors than many people realize because houseplants grow in a limited amount of soil. Excess nutrients can accumulate in that small space over time.
Signs to watch for:
- brown or crispy leaf tips
- white crust on the soil surface or pot rim
- Sudden leaf yellowing after feeding
- wilting even though the soil is not dry
- slowed growth despite continued fertilizing
A useful clarification competitors often miss: brown tips do not always mean fertilizer burn. They can also come from dry air, inconsistent watering, or mineral buildup from hard water. The difference is context. If the issue appears after a recent feeding and you see salt crust on the soil, overfertilization becomes more likely. If it happens mainly in winter near a heating vent, dry air may be the bigger factor.
Real-home examples
Bright room, active growth
You have a philodendron putting out new leaves every few weeks in spring. Light is good, the pot drains well, and watering is consistent. This is a good time for light, regular feeding.
Dim winter corner
Your ZZ plant is alive but not growing much in January. Soil stays moist for a long time, and the room gets limited daylight. Fertilizer is probably not the priority here. Light and watering rhythm matter more.
The plant looks weak after overwatering
A peace lily is drooping and yellowing in wet soil. Adding fertilizer here often makes the situation worse. Root health has to come first.
Expert tips for feeding indoor plants the right way
- Feed plants that are growing, not just existing
- Start lighter than you think you need
- Match fertilizer use to light level and season
- Reassess if a plant is stressed instead of automatically feeding it
- Flush or refresh the potting mix occasionally if buildup becomes a concern
A simple rule makes this section easier: fertilize healthy plants to support growth, not unhealthy plants to force recovery. Once you think about feeding that way, fertilizer becomes much more useful and much less risky.
Common Indoor Plant Care Mistakes to Avoid
Most indoor plants do not die because they are “hard to grow.” They decline because a few common care mistakes keep stressing the roots, leaves, or growing conditions over time. In indoor plant care, the biggest problems usually come from too much water, poor light, no drainage, ignoring seasonal changes, and overfertilizing.
This matters because plant decline is often slow at first. A houseplant may look “mostly fine” for weeks while the real problem builds underneath the soil or in the wrong corner of the room. By the time yellow leaves, drooping, or brown tips show up, the mistake has often been happening for a while.
1. Overwatering
Overwatering is still the most common beginner mistake, but it helps to define it clearly. Overwatering does not always mean you water too often by the calendar. It often means the roots are staying wet too long because of low light, dense soil, poor drainage, a pot that is too large, or cooler seasonal conditions.
What actually works:
- checking the soil before watering
- watering based on dryness, not a schedule
- letting excess water drain fully
What often fails:
- watering every Sunday, no matter what
- adding small sips “just in case.”
- Assuming drooping always means thirst
A real-home example: a pothos in a dim living room may stay moist far longer than a pothos near a bright kitchen window. If both get watered the same way, the lower-light plant is much more likely to run into root stress.
2. Wrong light placement
Light mistakes are often misdiagnosed as watering problems. A plant in the wrong spot may grow slowly, lean toward the window, lose leaf size, or stay wet too long because it is not using much water. On the other hand, a delicate plant in harsh direct sun may scorch or bleach.
What actually works:
- matching the plant to the room’s light level
- moving plants closer to windows before changing everything else
- Reassessing plant placement when the seasons change
What often fails:
- putting every plant in the middle of the room because it “looks good there.”
- assuming “near a window” means enough light
- calling a dark corner “low light.”
At Radiant Plants, we’ve found that many beginners keep adjusting watering, fertilizer, and humidity when the real issue is that the plant simply is not getting the right light. Once placement improves, many “mystery problems” become easier to solve.
3. Using pots with no drainage
A beautiful pot without a drainage hole can quietly create one of the hardest problems to fix. Water collects in the lower root zone, where it stays out of sight. The surface may look dry, but the bottom of the pot may still be wet enough to damage roots.
What actually works:
- using a pot with drainage holes
- placing a nursery pot inside a decorative cachepot
- emptying any standing water after watering
What often fails:
- planting directly into sealed decorative containers
- Relying on rocks at the bottom as a “drainage layer.”
- trying to solve poor drainage by watering less
Warning box: Poor drainage can mimic other plant problems
A plant in a pot with no drainage may show:
- yellow leaves
- drooping
- fungus gnats
- sour-smelling soil
- slow growth
- root rot symptoms
That can look like underwatering, nutrient issues, or general plant weakness, but the real problem may be trapped water. This is why diagnosis matters before you react.
4. Ignoring seasonal changes
Indoor plants do not need the same care every month of the year. Many houseplants grow more actively in spring and summer, then slow down in fall and winter as daylight shortens.
What actually works:
- checking the soil less often in winter if drying slows down
- Reducing fertilizer when growth pauses
- watching for dry air from heaters and drafts from cold windows
What often fails:
- watering the same amount in January as in July
- fertilizing year-round without checking growth
- Assuming indoor conditions stay stable because the plant is indoors
A common beginner mistake is keeping the same summer routine in winter. The plant may now need less water, less fertilizer, and a slightly better light position, but the owner keeps doing everything the same because “it worked before.”
5. Overfertilizing
Fertilizer helps plants grow, but it is easy to overestimate how much is useful indoors. Houseplants live in a limited amount of soil, so extra nutrients can build up faster than many people realize.
What actually works:
- feeding during active growth
- starting with lighter, more conservative applications
- fixing light and root health before trying to boost growth
What often fails:
- feeding stressed plants first
- Doubling the dose to speed up recovery
- Applying fertilizer in winter when the plant is barely growing
One overlooked point: a plant with poor light will not suddenly become healthy because it was fertilized. A plant with damaged roots may react worse after feeding. Fertilizer supports a good care system. It does not replace one.
Why indoor plants seem to “die easily.”
The reason many indoor plants decline is not because owners do not care enough. It is because several small mistakes stack together:
- A pot is too large
- The room is dimmer than expected
- The soil stays wet too long
- Winter slows drying
- Fertilizer gets added on top of stress
Each issue alone might not destroy the plant quickly. Together, they can create a steady decline that feels confusing. Competitors often treat these as separate tips, but in real life, they interact. That is the information that many beginner guides miss.
Quick checklist: mistakes to catch before they become bigger problems
Before changing your whole routine, check this:
- Am I watering based on soil dryness, not habit?
- Is the plant in the right light for its type?
- Does the pot have drainage holes?
- Has the season changed since this routine last worked?
- Am I fertilizing a healthy, actively growing plant?
- Is the soil staying wet too long?
- Did I change more than one thing at once?
That last question matters. Many people panic after seeing yellow leaves and move the plant, water it, fertilize it, and repot it all within a few days. That makes it harder to tell what actually helped or hurt.
What actually helps beginners succeed
The best way to avoid most indoor plant care mistakes is to slow down and diagnose before reacting. Check light, soil moisture, drainage, season, and growth rate before making changes. When you understand which condition is wrong, your fix becomes much more accurate—and your plant has a much better chance of recovering.
Indoor Plant Problems: Symptoms, Causes, and Fixes
Most indoor plant problems can be traced back to a few root causes: watering issues, incorrect light, environmental stress, or pests. The fastest way to fix a struggling plant is to diagnose the symptom correctly before changing anything. In indoor plant care, the wrong fix often causes more damage than the original problem.
This is where many beginner guides stay too generic. They say things like “yellow leaves mean overwatering” or “brown tips mean low humidity,” but real plants are rarely that simple. The better approach is to look at the pattern, the soil condition, the location of the damage, and whether the problem is spreading.
Quick diagnosis box: start here before treating anything
Use this fast check before you water, fertilize, or move the plant:
- Yellow leaves + wet soil → often overwatering or poor drainage
- Yellow leaves + dry soil → often underwatering or inconsistent care
- Brown crispy tips + dry air → often low humidity, dry air, or salt buildup
- Drooping + dry pot → likely thirst
- Drooping + wet heavy pot → likely root stress, overwatering, or root rot
- Sticky leaves or tiny bugs → likely pests
- Bleached patches facing the window → likely too much direct sun
- Weak stretched growth → likely too little light
That kind of diagnosis matters because two plants can both “look sad” for completely different reasons.
Yellow leaves: causes and fixes
Yellow leaves are one of the most common indoor plant complaints, but they are a symptom, not a diagnosis, which is why understanding the key yellow leaves warning signs on plants is essential before trying to fix the issue.
Cause: soil staying wet too long
This is one of the most likely causes, especially if:
- The soil feels damp for days
- The pot feels heavy
- leaves look soft or limp, not crisp
- older leaves are yellowing first
- The pot has poor drainage, or the room is dim
Fix:
- Stop watering until the soil begins to dry appropriately
- Check that the pot has drainage holes
- review light levels and soil drainage
- Inspect roots if decline continues
Cause: underwatering or inconsistent watering
This is more likely if:
- The soil is very dry and pulling from the pot edges
- leaves turn yellow, then dry or papery
- The plant wilts between waterings
- The pot feels unusually light
Fix:
- Rehydrate thoroughly so the root ball is evenly moistened
- return to checking the soil regularly instead of waiting for dramatic wilt
- Adjust frequency based on season and light
Cause: low light
This is often missed. If the soil stays wet too long and growth is weak, yellow leaves may be partly driven by low light, reducing the plant’s ability to use water.
Fix:
- move the plant closer to a window
- Use a grow light if natural light is limited
- Avoid adding fertilizer until light and watering are corrected
Cause: normal aging
Sometimes a lower, older leaf yellows while the rest of the plant looks healthy. That is not always a care emergency.
Fix:
- remove the old leaf if needed
- Monitor whether the yellowing is isolated or spreading
A key distinction competitors often miss: one yellow leaf is not the same as a yellowing pattern. Isolated aging is different from ongoing stress.
Brown tips: causes and fixes
Brown tips are common, especially on tropical houseplants, but they can come from several different issues, which often overlap with the same causes behind brown spots on plant leaves, and need to be diagnosed carefully before fixing.
Cause: dry air or low humidity
This is more likely if:
- Only the tips or edges are browning
- Damage is crisp, not mushy
- The problem worsens in winter
- The plant sits near a heater, vent, or drafty window
Fix:
- move the plant away from hot or cold airflow
- group humidity-loving plants together
- Use a humidifier if the room is very dry
- keep watering consistently, since dry air and dry soil often combine
Cause: fertilizer salt buildup
This is more likely if:
- You have been feeding regularly
- There is a white crust on the soil or the pot rim
- brown tips appear after feeding
- The plant is otherwise in decent light and moisture conditions
Fix:
- Reduce fertilizer frequency
- Flush the soil if appropriate for the plant and pot setup
- refresh old potting mix if buildup is severe
Cause: inconsistent watering
Brown tips can also happen when the plant repeatedly dries out too much between waterings.
Fix:
- Check the soil more consistently
- Adjust for seasonal drying changes
- Avoid waiting until the plant collapses before watering
A useful clarification: brown tips from dry air are often tip-focused and widespread, while sun scorch tends to create patches or bleached areas where light hits directly. That difference helps separate cause from cause.
Drooping leaves: causes and fixes
Drooping is one of the most misleading plant symptoms because both dry roots and damaged wet roots can cause it.
Cause: thirst
This is more likely if:
- The soil is clearly dry
- The pot feels light
- The leaves perk up after proper watering
- The plant dried quickly due to heat, strong light, or a small pot size
Fix:
- water thoroughly
- let excess drain out
- Recheck the plant after a few hours to a day
Cause: overwatering or root stress
This is more likely if:
- The soil is still wet
- The pot feels heavy
- drooping is paired with yellowing or a sour smell
- The plant has been watered recently and never really dried out
Fix:
- Do not add more water
- Check drainage and soil structure
- Inspect roots if symptoms continue
- improve the light if the room is too dim
Cause: sudden environmental stress
A plant can also droop after:
- repotting
- a temperature swing
- being moved to a very different light level
- sitting near an AC, a heater, or a cold draft
Fix:
- Stabilize conditions
- Avoid changing multiple variables at once.
- Give the plant time to adjust, unless symptoms worsen
At Radiant Plants, we’ve found that drooping causes the most panic because people react fast and often water immediately. The better move is always to check the soil first. A thirsty droop and a wet-soil droop can look surprisingly similar at first glance.
Pests: basic identification and first steps
Pests are easier to manage when you catch them early. The goal is not just to kill bugs, but to identify what you are seeing so you can respond correctly.
Spider mites
Look for:
- tiny speckling on leaves
- fine webbing
- dull, stressed-looking foliage
More likely when:
- Indoor air is dry
- plants are stressed
Aphids
Look for:
- clusters of small soft-bodied insects
- new growth distortion
- sticky residue
Whiteflies
Look for:
- tiny white insects that fly up when the plant is disturbed
- sticky leaves
- weakening growth
Mealybugs
Look for:
- white cottony clusters in leaf joints or on stems
- sticky residue
- slow decline over time
First-step fix for pests:
- Isolate the plant from others
- Inspect the undersides of leaves and stem joints
- remove heavily infested material if needed
- clean leaves and follow a treatment plan suited to the specific pest
What often fails:
- Treating every pest the same way
- ignoring the first few bugs
- focusing only on the top of the leaves
- returning the plant to the collection too quickly
Real-home examples that make diagnosis easier
Scenario 1: Yellow leaves in a dim room
A peace lily in a darker corner is watered on schedule every week. Soil stays damp, older leaves yellow, and the plant droops slightly. The likely issue is not “more water.” It is wet soil plus insufficient light.
Scenario 2: Brown tips in winter
A dracaena near a heating vent develops crisp brown tips, but the soil moisture routine seems reasonable. These points more toward dry air and environmental stress than a watering emergency.
Scenario 3: Drooping after repotting
A monstera droops after being repotted, but the soil is not bone dry. If roots were disturbed and conditions changed suddenly, repot stress is more likely than thirst.
These scenarios matter because symptom-based articles often fail when they do not explain how to tell similar-looking problems apart.
What actually helps plants recover
When a plant looks unhealthy, resist the urge to do everything at once. Do not immediately water, fertilize, repot, or move it on the same day. Instead:
- Check soil moisture
- review light conditions
- Inspect drainage and roots if needed
- Look for pest signs
- consider recent seasonal or environmental changes
That process works better because it isolates the real cause. Once you know whether the issue is wet roots, dry roots, low light, dry air, or pests, the fix becomes much more accurate—and the plant has a much better chance of bouncing back.
Indoor Plant Care by Season (Winter vs Summer)
Yes, you usually need to adjust indoor plant care during the year. In most homes, plants grow more actively in spring and summer, then slow down in winter because of shorter days, weaker light, and drier indoor air. That means watering, light exposure, and fertilizing often need to change with the season.
This is one of the biggest gaps in generic houseplant advice. Many guides explain how to care for plants, but they do not explain that the same plant may need a very different routine in July than in January. In real homes, seasonal care matters because indoor conditions shift even when the plant never leaves the room.
Quick seasonal comparison
Care factor | Winter | Summer |
|---|---|---|
Watering | Usually less frequent | Often more frequent |
Light | Lower natural light, shorter days | Stronger light, longer days |
Humidity | Often lower because of indoor heating | May be higher, depending on the climate |
Growth | Often slower or paused | Usually more active |
Fertilizer | Often reduced or paused | More useful during active growth |
Stress risks | Dry air, drafts, and overwatering in low light | Heat stress, faster drying, sun scorch |
That table looks simple, but the real takeaway is important: season changes the speed at which your plant uses water and nutrients. If growth slows, soil stays wet longer. If growth speeds up, soil dries faster, and feeding becomes more useful.
Winter indoor plant care: what changes most
Winter creates three common challenges indoors:
- less natural light
- slower soil drying
- drier air from heating systems
1. Water less often, but not blindly
Many indoor plants need less frequent watering in winter because growth slows and evaporation drops. The keyword is less often, not “barely ever.” You still need to check the soil instead of following a seasonal guess.
What actually works:
- checking the soil before every watering
- expecting pots to stay moist longer
- Reducing watering frequency if the plant is drying more slowly
What often fails:
- watering on the same summer schedule
- assuming every plant should be almost completely dry all winter
- reacting to minor leaf droop by watering without checking the soil
A common beginner mistake is thinking winter watering means “just water less.” The better question is: Is the plant actually using water more slowly right now? In most cases, yes—but the only reliable way to know is to check the soil.
2. Light becomes more limiting
Shorter days and weaker angles of sunlight often reduce how much light your plants receive indoors. A spot that was fine in summer may suddenly become borderline in winter.
What actually works:
- moving plants closer to a bright window if needed
- rotating plants if one side is leaning toward the light
- supplementing with grow lights in darker homes or low-light seasons
What often fails:
- leaving a light-loving plant in the same spot year-round
- mistaking low-light stress for a watering issue
- Fertilizing to fix slow growth when the real issue is weak winter light
At Radiant Plants, we’ve found that many “winter watering problems” are partly winter light problems. When a plant gets less light, it uses less water. That is why the same watering routine suddenly stops working.
3. Dry air becomes a bigger issue
Indoor heating can dry the air significantly in winter, especially near vents, radiators, or drafty windows. Some tropical plants react with:
- brown tips
- crisp leaf edges
- slower growth
- general stress
What actually works:
- moving plants away from heat vents and radiators
- grouping humidity-loving plants together
- using a humidifier if the room is very dry
What often fails:
- mistaking dry-air damage for underwatering
- leaving foliage plants pressed against the cold window glass
- making sudden placement changes without watching the plant’s response
A real-home example: a dracaena or calathea may have decent soil moisture but still develop brown tips in winter because the air is dry and warm from central heating. More water will not solve that by itself.
Summer indoor plant care: what usually increases
Summer often brings:
- stronger light
- longer days
- warmer rooms
- faster growth
That usually means plants become more active, which changes care in the opposite direction.
1. Plants often need water more often
In summer, many indoor plants dry faster because they are actively growing and temperatures are warmer. But again, the answer is not a rigid schedule. It is more frequent checking.
What actually works:
- checking smaller pots more often
- expecting bright-window plants to dry faster
- Adjusting watering for heat waves or stronger sun exposure
What often fails:
- using the same winter routine into June and July
- Assuming a large plant needs water less often just because it looks sturdy
- forgetting that strong light increases water use
A plant on a bright windowsill in summer can dry out much faster than that same plant in winter. That shift catches a lot of beginners off guard.
2. Growth is usually stronger
Summer is when many houseplants put out new leaves, longer vines, or fuller foliage. That makes it a better time for:
- regular observation of new growth
- gentle shaping or pruning
- repotting if needed
- light feeding, if the plant is healthy and actively growing
3. Fertilizer is usually more useful
When light and growth increase, many plants can actually use nutrients more effectively. This is why summer is often the best time for fertilizing indoor plants—assuming the roots are healthy and the plant is not stressed.
What actually works:
- feeding during active growth
- keeping fertilizer moderate and consistent
- Reducing feed if the plant shows stress or heat damage
What often fails:
- overfeeding because the plant is growing quickly
- fertilizing a wilted or root-stressed plant
- ignoring the fact that brighter light can also increase watering needs
How to tell if the season is affecting your plant
Seasonal impact is not just about the calendar. It shows up in plant behavior.
Signs winter is changing your care needs
- Soil stays wet longer than usual
- growth slows or pauses
- The plant leans more strongly toward the window
- brown tips appear near heaters or in dry rooms
Signs summer is changing your care needs
- Soil dries noticeably faster
- New leaves appear more often
- Plants in direct afternoon sun show scorch risk
- watering needs increase, especially in bright rooms
This diagnostic angle matters because people often respond to symptoms without recognizing the seasonal cause. A plant that dries fast in summer is not necessarily “suddenly needy.” A plant that yellows in winter is not always underwatered. The season changes the whole care equation.
Expert tips for seasonal plant care
- Reassess plant placement twice a year. A spot that works in summer may be too dim in winter.
- Use the soil as your guide. Seasonal advice helps, but the soil tells you what is happening right now.
- Watch your home, not just the weather. Indoor heating, AC, window drafts, and strong afternoon sun all matter.
- Do not force growth in winter. If the plant is resting, let it rest.
- Make gradual changes. Sudden moves from dim light to strong sun can stress plants fast.
One overlooked point competitors often miss: seasonal care is not only about outdoor weather. It is about how your specific home environment changes. A bright apartment with big south-facing windows behaves differently from a darker home with forced-air heat. Once you start watching those patterns, seasonal indoor plant care becomes much easier to manage.
Best Indoor Plants for Beginners (Easy Wins)
The easiest indoor plants for beginners are the ones that tolerate imperfect watering, average indoor light, and small care mistakes without declining fast. For most people, the best beginner plants are snake plant, ZZ plant, pothos, spider plant, and heartleaf philodendron because they are forgiving and adapt well to normal home conditions.
This matters more than many beginner lists admit. The “best” starter plant is not just the prettiest one or the trendiest one. It is the one that fits your real home—your light, your routine, and how often you remember to check the soil. In indoor plant care, success comes faster when the plant is flexible enough to handle beginner errors.
What makes a plant beginner-friendly?
A good beginner plant usually has some combination of these traits:
- Tolerates missed waterings better than average
- adapts to medium or lower indoor light
- does not collapse quickly from small mistakes
- gives visible signs before a serious decline
- grows steadily without needing complex care
What actually works:
- starting with plants that match your room conditions
- choosing forgiving foliage plants before more demanding varieties
- learning your watering rhythm on one or two easy plants first
What often fails:
- starting with a dramatic, high-maintenance plant because it looks beautiful online
- buying a bright-light plant for a dim room
- choosing a plant that needs constant humidity in a dry apartment
At Radiant Plants, we’ve found that beginners do best when they choose plants that forgive inconsistency. A plant that tolerates one missed check or one slightly imperfect watering decision builds confidence much faster than a plant that reacts badly to every small mistake.
Mini list: the easiest indoor plants to start with
1. Snake Plant
Why is it beginner-friendly:
- Tolerates lower light better than many houseplants
- handles missed waterings well
- grows slowly, so care mistakes often show up gradually
Best for:
- busier people
- bedrooms and offices
- homes with moderate to low light
Beginner caution:
- The biggest mistake is overwatering, especially in low light or winter
2. ZZ Plant
Why is it beginner-friendly:
- very tolerant of inconsistent watering
- adapts to lower indoor light
- stays attractive with minimal fuss
Best for:
- low-maintenance plant owners
- people who travel or forget to water
- lower-light rooms with some natural daylight
Beginner caution:
- Like a snake plant, it is much more likely to suffer from too much water than too little
3. Pothos
Why is it beginner-friendly:
- easy to grow in many indoor conditions
- gives clear signals when it needs attention
- trails beautifully, so growth feels rewarding
Best for:
- shelves and hanging planters
- beginners who want visible growth
- homes with medium to bright indirect light
Beginner caution:
- In very low light, pothos may survive but become sparse and slower-growing
4. Spider Plant
Why is it beginner-friendly:
- grows fairly easily in normal indoor conditions
- produces offsets that make the plant feel rewarding
- handles a range of household settings reasonably well
Best for:
- bright rooms with indirect light
- beginner plant shelves
- people who like a classic, fast-to-show-results plant
Beginner caution:
- brown tips can confuse beginners and may come from dry air, mineral buildup, or inconsistent watering, rather than one single issue
Top 5 Reasons to Add a Stunning Curly Spider Plant to Your Home Decor
5. Heartleaf Philodendron
Why is it beginner-friendly:
- forgiving and adaptable
- easy trailing growth
- responds well to basic care without demanding constant attention
Best for:
- medium light rooms
- hanging baskets or shelves
- new plant owners who want something soft and lush
Beginner caution:
- Too little light can make it leggy, while overwatering can cause yellow leaves
6. Dracaena
Why is it beginner-friendly:
- tolerates normal household conditions
- works well in many indoor setups
- available in many forms and sizes
Best for:
- corners with decent natural light
- homes wanting an upright structure
- people who want a plant that looks polished without constant care
Beginner caution:
- Many dracaena problems come from watering too often or poor light placement
7. Jade Plant
Why is it beginner-friendly:
- Good for people who tend to over-attend plants less
- stores water in its leaves
- easy to understand once you learn not to keep it constantly wet
Best for:
- brighter windows
- people who like succulents
- sunny desks or sills
Beginner caution:
- needs more light than many foliage houseplants, so it is not the best pick for dim rooms
Low-maintenance does not always mean low-light
This is one of the biggest beginner misunderstandings. A plant can be easy to care for, but still needs decent light. For example:
- Snake plant and ZZ plant are forgiving and low-maintenance, and they tolerate lower light conditions
- The jade plant is low-maintenance in some ways, but it usually needs brighter light to stay compact
- Pothos is forgiving, but it still grows better in medium to bright indirect light than in a truly dim corner
Competitors often lump “easy,” “low maintenance,” and “low light” into the same category. That creates bad matches. The better way to choose is to separate the questions:
- Is the plant forgiving?
- Does it match my light?
- Does it fit my watering habits?
That small shift helps beginners succeed much faster.
Best beginner plants for real-life situations
If your room gets lower light
Start with:
- snake plant
- ZZ plant
- some dracaena types
These plants are better choices than most succulents for dimmer rooms.
If you want visible growth fast
Start with:
- pothos
- heartleaf philodendron
- spider plant
These are satisfying for beginners because new growth is easier to notice.
If you tend to forget watering
Start with:
- snake plant
- ZZ plant
- Jade plant in bright light
These are usually better than peace lilies or more moisture-loving tropical plants for inconsistent routines.
If you want the safest “first plant.”
Start with:
- Pothos, if you have decent indirect light
- Snake plant if your space is dimmer
- ZZ plant, if you want something especially low-fuss
Real home scenarios that matter more than generic lists
Small apartment with one decent window
A pothos or philodendron near that window is often a better beginner choice than a succulent in the back of the room. The succulent may be “easy” in theory, but only if it gets enough light.
Darker bedroom or office
A snake plant or ZZ plant is usually a smarter pick than a monstera or jade plant. This is where choosing for the room beats choosing for the trend.
Busy schedule and occasional missed care
A forgiving plant with moderate to low needs will help you learn faster than a moisture-sensitive plant that punishes every missed check.
Reassurance: You do not need the “perfect” plant
Many beginners think they need to choose exactly right on the first try. That is not true. You just need to avoid the hardest mismatches:
- bright-light plants in dark rooms
- Thirsty plants for forgetful routines
- sensitive plants for dry, drafty spaces
What actually works is choosing a plant that gives you room to learn. Once you succeed with one forgiving plant, the rest of indoor plant care starts to feel much less intimidating.
A simple rule makes this easier: pick your first plant based on your room and habits, not just appearance. That one decision prevents a lot of beginner frustration and gives you a much better chance of early success.
FAQs About Indoor Plant Care
How often should I water indoor plants?
In indoor plant care, watering should be based on soil dryness, not a fixed schedule. Check if the top 1–2 inches of soil are dry before watering. Most indoor plants need more frequent watering in summer and less in winter when growth slows.
What kind of light is best for indoor plant care?
Indoor plant care works best when plants receive light that matches their needs. Most houseplants prefer bright, indirect light, while some tolerate low light. If growth slows or leaves get smaller, your plant likely needs more light.
Do indoor plants need fertilizer year-round?
Indoor plant care does not require constant fertilizing. Most plants benefit from fertilizer during active growth in spring and summer. In winter, when growth slows, reduce or pause feeding to avoid stressing the plant.
Why are my indoor plants turning yellow?
In indoor plant care, yellow leaves usually signal an imbalance—often watering or light. Check soil moisture first. Wet soil suggests overwatering, while dry soil points to underwatering. Always diagnose before adjusting your routine.
When should I repot indoor plants?
Indoor plant care includes repotting when the roots outgrow the container. Signs include roots circling the pot, fast-drying soil, or slow growth. Move up one pot size and use a fresh, well-draining mix for best results.
What are the easiest plants for indoor plant care beginners?
Indoor plant care is easier with forgiving plants like snake plant, ZZ plant, pothos, and spider plant. These tolerate common beginner mistakes and adapt well to typical home conditions, making them ideal for learning the basics.
Indoor plant care becomes simple when you focus on the basics: check soil before watering, match plants to the right light, use well-draining pots, and adjust your routine with the seasons. Most problems come from small imbalances, not complicated issues. When you slow down, observe, and fix one factor at a time, your plants respond much better. Start with one or two easy plants, apply what you’ve learned, and build confidence as you go.

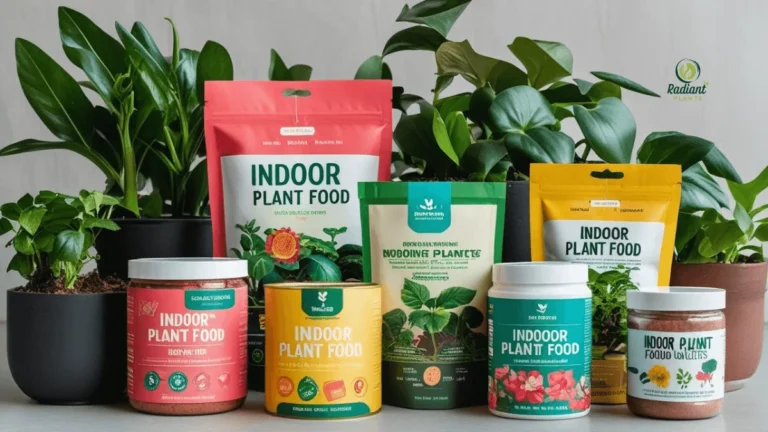
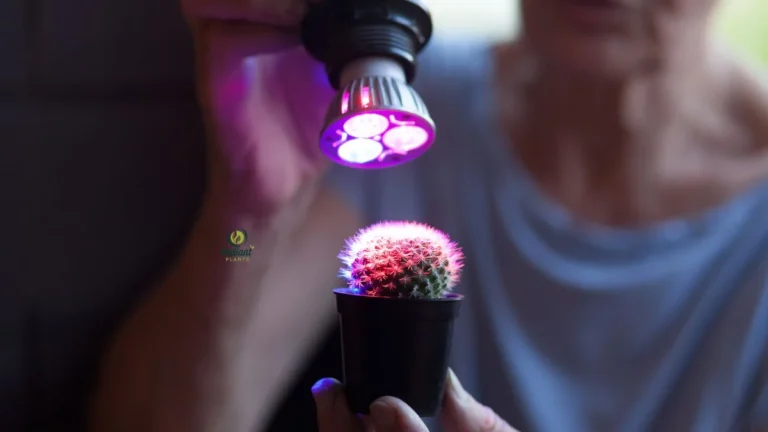
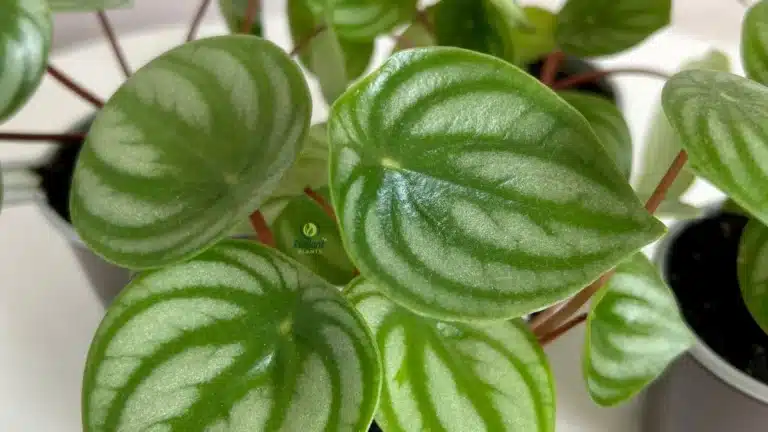
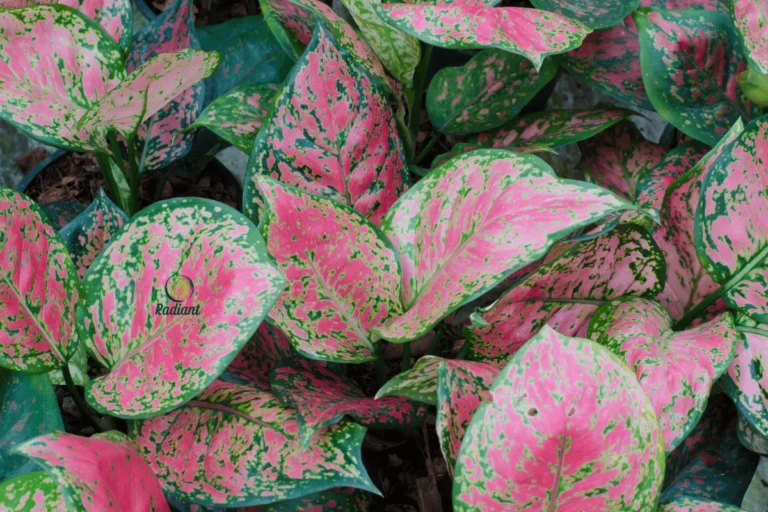
7 Comments