When to propagate vs repot:
- Propagate when stems have healthy nodes
- Propagate to create new plants
- Repot when roots are crowded or circling
- Repot when the soil drains poorly or dries too fast
- Check roots for repotting, stems for propagation
💡 Plant propagation is the process of growing new plants from existing ones, while plant repotting involves transferring a plant to a new pot to support root growth and health.
Most plant problems start with the same confusion: should you propagate or repot? Choosing the wrong action can slow growth, cause root issues, or lead to failed cuttings. This guide breaks down exactly how to tell what your plant needs right now—and how to do it correctly. You’ll learn how to read clear signs, avoid common mistakes, and apply both techniques with confidence so your plants grow stronger and healthier.
In This Article
Propagation vs Repotting — What Should You Do Right Now?

If your goal is to create a new plant, choose plant propagation. If your plant is struggling, root-bound, or outgrowing its container, choose plant repotting. The right choice depends on what you see: healthy stems and nodes → propagate; crowded roots or poor soil → repot.
🌱 Quick Definitions (Keep This Simple)
- Plant propagation = creating a new plant from an existing one (cuttings, division, etc.)
- Plant repotting = moving a plant into a larger pot with fresh soil to support root growth
👉 Think of it like this:
- Propagation = multiplying plants
- Repotting = helping one plant grow better
⚖️ The Key Difference That Matters
Most beginners get this wrong:
- They repot when they should propagate (missing chances to multiply plants)
- Or they propagate a stressed plant (leading to failure)
At Radiant Plants, we’ve found that plant health is the deciding factor:
- Healthy, actively growing plant → safe to propagate
- Stressed, root-bound, or declining plant → fix it first (repot)
📊 Propagation vs Repotting (Quick Comparison)
Factor | Propagation | Repotting |
|---|---|---|
Goal | Create new plants | Improve plant health |
Focus | Stems, nodes, cuttings | Roots and soil |
When to do it | Plant is healthy and growing | Roots outgrow the pot, or the soil degrades |
Risk level | Moderate (cutting can fail) | Low–moderate (shock possible) |
Best season | Spring–summer | Spring (best), early summer |
Common mistake | No node on cutting | Pot too big → overwatering |
🔍 Quick Diagnosis — What Your Plant Is Telling You
Use this to decide in seconds:
👉 Choose PROPAGATION if:
- You see long, healthy stems with nodes
- The plant is growing fast or becoming leggy
- You want more plants from the same one
👉 Choose REPOTTING if:
- Roots are circling the pot or coming out of the drainage holes
- Soil dries out very fast (1–2 days)
- Water sits on top or drains poorly
- Growth has slowed despite good care
🧠 Real-World Example (What Actually Happens at Home)
You buy an Epipremnum aureum and after a few months:
- It has long vines with visible nodes → perfect for propagation
- But the soil dries out every day → also needs repotting
👉 What should you do?
Correct approach:
- Take a few healthy cuttings (propagation)
- Then repot the mother plant
This sequence works because:
- Healthy plant = successful cuttings
- Fresh soil = better long-term growth
⚠️ Common Beginner Mistakes (Avoid These)
- Propagating a weak or yellowing plant → cuttings fail
- Repotting just because the plant “looks big” → unnecessary stress
- Ignoring roots completely (they tell you everything)
- Choosing the wrong timing (winter = slower recovery)
💡 What Most Guides Don’t Tell You
- You can often do both—but timing matters
- Propagation is easier when the plant is actively growing
- Repotting before propagation can reduce success if the plant is stressed
- Root health drives everything—ignore it, and both processes fail
👉 Bottom line:
Look at roots for repotting decisions and stems/nodes for propagation decisions—that one distinction will save you from most mistakes.
Signs Your Plant Needs Propagation or Repotting
If your plant is healthy with strong stems and visible nodes, it’s a good candidate for plant propagation. If you notice crowded roots, fast-drying soil, or poor drainage, your plant likely needs repotting. The key is reading what the plant shows you—stems signal propagation, roots signal repotting.
🌱 Signs You Should Propagate
Propagation works best when the plant is actively growing and strong—not struggling.
- Healthy stems with nodes
Nodes are where roots form. No node = no propagation success.
→ Common mistake: cutting a stem without checking for nodes first - Leggy growth (long, stretched stems)
This usually happens in low light. Instead of letting the plant weaken, you can cut and restart healthier growth. - Overgrown vines
Plants like Epipremnum aureum or Monstera deliciosa naturally grow long stems—perfect for propagation.
💡 At Radiant Plants, we’ve found that cuttings taken during active growth root faster and more reliably—especially in spring and early summer.
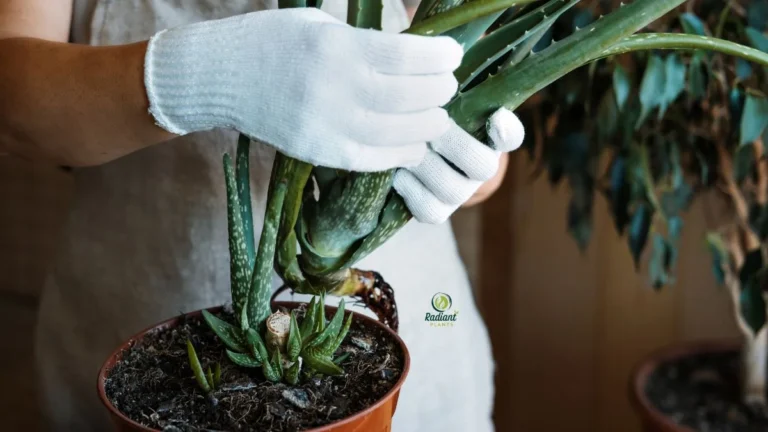
🌿 Signs You Should Repot
Repotting is about root space and soil quality, not plant size alone.
- Roots circling the pot (root-bound)
Gently remove the plant—if roots wrap tightly around the soil, it’s time. - Soil dries out too fast
If you water and the soil is dry again within 1–2 days, the roots are taking over the pot. - Water sitting on top or draining poorly
This usually means compacted or degraded soil, not just a watering issue.
👉 Real scenario:
A plant that suddenly needs watering every day often isn’t “thirsty”—it’s root-bound. Repotting fixes the cause, not just the symptom.
⚠️ Warning Signs (Act Carefully Before Deciding)
These symptoms can be misleading—they don’t automatically mean propagate or repot.
- Yellow leaves
Could be overwatering, nutrient issues, or root stress
→ Don’t repot immediately without checking roots - Wilting after watering
This often signals root damage or rot, not underwatering
→ Common beginner mistake: watering more, making it worse - Root rot smell (musty, sour odor)
This is serious—repotting alone may not fix it
→ You may need to trim damaged roots before repotting
⚠️ Warning:
Repotting a plant with root rot without removing damaged roots can spread the problem.
🔍 Quick Diagnosis Box
👉 Use this simple check:
- Healthy stems + visible nodes → Propagate
- Roots circling + fast-drying soil → Repot
- Yellow leaves + soggy soil → Check for root rot first
- Wilting + wet soil → Root problem, not watering issue
💡 What Most People Miss
- A plant can need both propagation and repotting, but not at the same time
- Many “watering problems” are actually root space problems
- Propagation fails most often because the plant was already stressed
👉 The fastest way to decide:
Check the roots for repotting and the stems for propagation—that one habit will prevent most beginner mistakes.
When Is the Best Time to Propagate or Repot?
The best time for both plant propagation and plant repotting is spring to early summer, when plants are actively growing and can recover quickly. You can do both at other times, but success rates drop—especially in winter. If your plant is stressed or root-bound, timing matters less than fixing the problem quickly.
🌿 Why Growth Phase Matters (This Is What Most People Miss)
Plants follow a natural cycle:
- Active growth (spring/summer) → fastest recovery, strong root development
- Dormancy (late fall/winter) → slow growth, higher risk of failure
👉 During active growth:
- Cuttings root faster
- Repotted plants adjust quickly
- New roots establish with less stress
👉 During dormancy:
- Cuttings may sit in water for weeks without rooting
- Repotted plants may stall or decline
💡 At Radiant Plants, we’ve found that even beginners get great results simply by waiting for the right season—timing alone can double success rates.
🌱 Best Season for Each Action
Propagation:
- Best: Spring → early summer
- Okay: Late summer (slower results)
- Risky: Winter (low success unless conditions are controlled)
Repotting:
- Best: Early spring (before peak growth)
- Good: Spring to early summer
- Avoid: Late fall and winter (unless necessary)
⚠️ Winter Exceptions (When You Should Still Act)
Sometimes you can’t wait:
- Roots are coming out of the drainage holes
- Soil stays soggy for days (risk of root rot)
- The plant is declining fast
👉 In these cases:
- Repotting is safer than doing nothing
- But reduce stress:
- keep roots intact
- avoid overwatering
- place in stable light
💡 Real scenario:
A plant sitting in wet soil in winter will rot faster than it will recover—repotting becomes the safer choice.
🏡 Indoor vs Outdoor Timing Differences
- Indoor plants are more flexible
→ Controlled light and temperature can extend the growing season - Outdoor plants depend strictly on the seasons
→ Propagation and repotting should match local climate cycles
👉 For indoor plants:
- You can propagate year-round if the light is strong enough
- But natural light in winter is often too weak → slower results
📊 Seasonal Note (Quick Guide)
- Spring: ✅ Best time (highest success)
- Summer: ✅ Good (monitor heat and watering)
- Fall: ⚠️ Slowing growth (be cautious)
- Winter: ❌ Avoid unless necessary
⚠️ Warning Box: Avoid Repotting During Dormancy
Repotting during dormancy can:
- Shock the plant
- Slow recovery
- Increase risk of root rot
👉 Exception:
Only repot if there’s a clear problem (root-bound, rot, soil failure)
💡 What Actually Works (From Experience)
- If you’re unsure, wait for new growth—that’s your green light
- Slightly early (early spring) is better than too late (late fall)
- Propagation success depends more on light + timing than tools
👉 Bottom line:
Timing isn’t everything—but choosing the active growth phase makes both propagation and repotting significantly easier and safer.
How to Propagate Plants Step by Step (Beginner Safe)
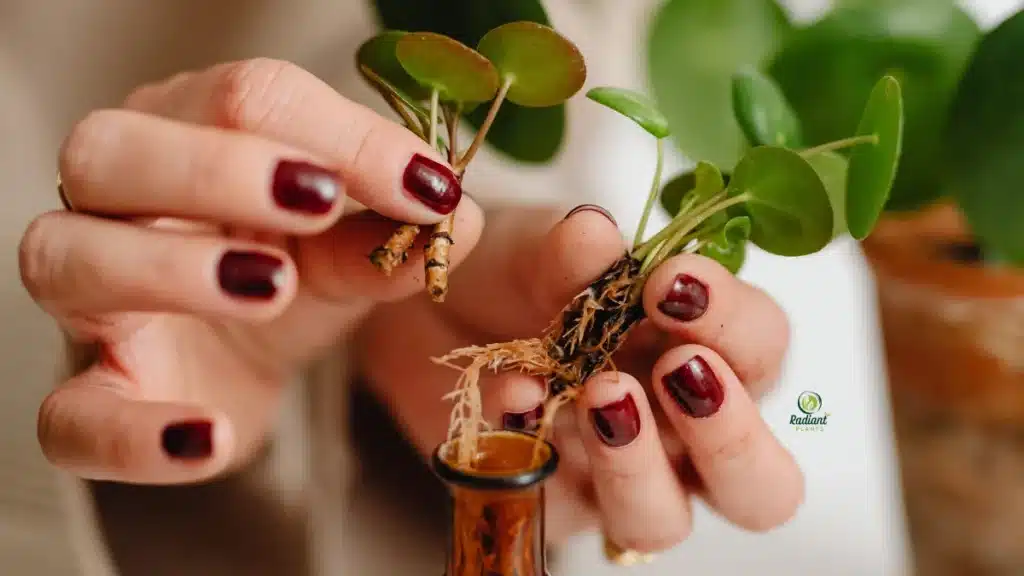
To propagate plants successfully, take a healthy cutting with a node, place it in water or soil, and provide bright indirect light. Most failures happen from missing the node, overwatering, or using weak plant material. If you follow a simple method and choose the right timing, plant propagation becomes very reliable—even for beginners.
🌱 Choose the Right Method
Not all plants propagate the same way. Choosing the correct method is half the success.
- Water propagation
Best for beginners and plants like Epipremnum aureum and Monstera deliciosa
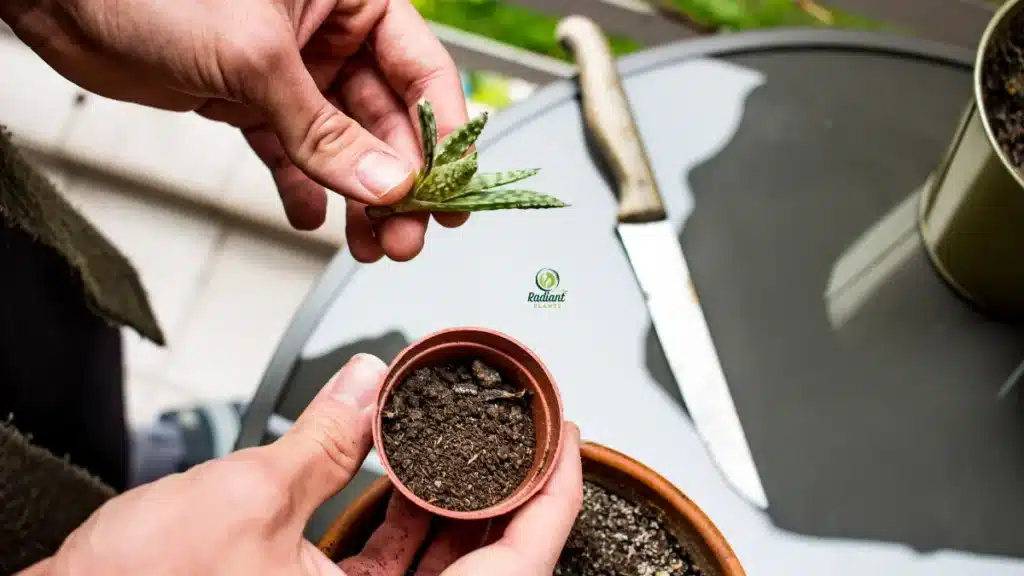
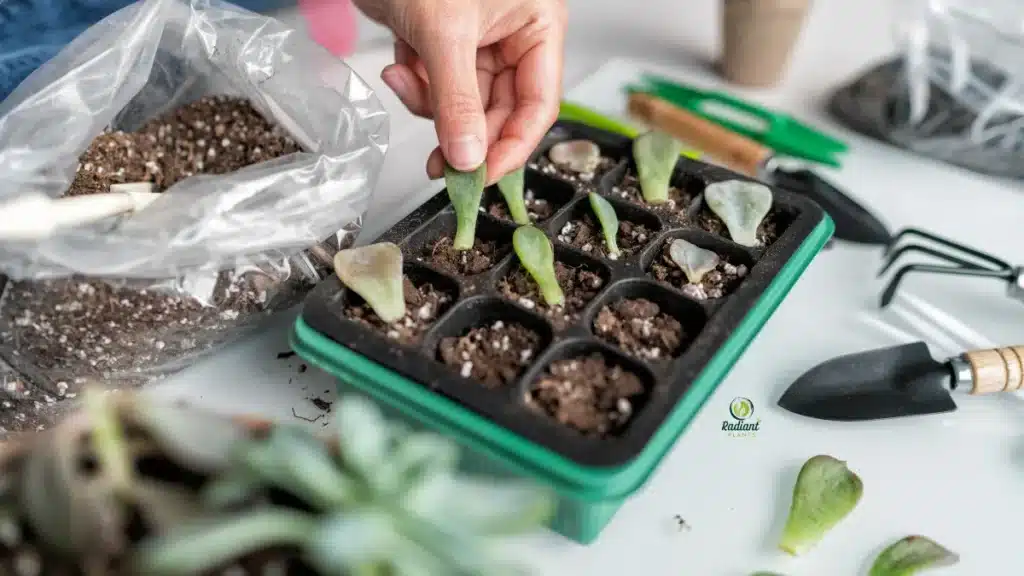
→ Easy to monitor root growth - Soil propagation
Works well for plants sensitive to water rot
→ Roots adapt directly to soil (less transplant shock) - Division
Best for plants with multiple stems, like Sansevieria
→ Split the plant at the root level
💡 At Radiant Plants, we’ve found that beginners succeed fastest with water propagation, because you can actually see root development and catch problems early.
👉 If you want a deeper walkthrough, check how to propagate plants in water.
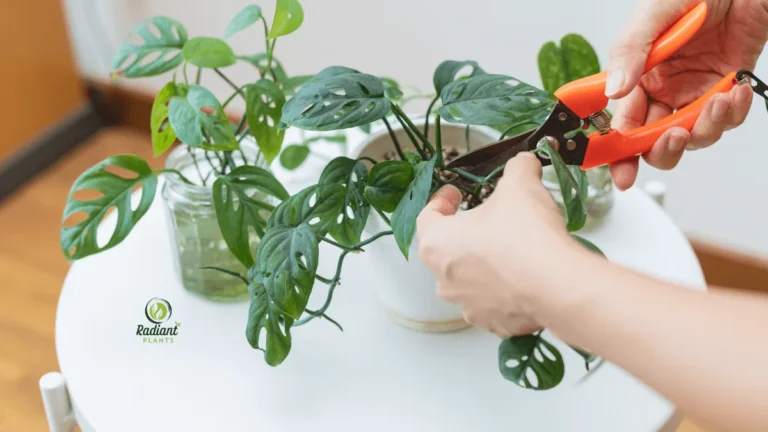
✂️ Step-by-Step Process (What Actually Works)
1. Take the Cutting Correctly
- Cut just below a node (this is where roots grow)
- Use clean, sharp scissors
- Avoid weak or yellowing stems
👉 No node = no roots (this is the #1 beginner mistake)
2. Place in Water or Soil
- Water: submerge the node, keep leaves above water
- Soil: plant the node just below the surface
👉 Keep conditions stable—don’t move the cutting constantly
3. Provide Light and Care
- Bright indirect light is ideal
- Avoid direct sun (can burn or dry cuttings)
- Change water every few days (for water propagation)
🧰 Tools You Need (Simple Setup)
- Clean scissors or pruning shears
- Glass container or small pot
- Fresh water or well-draining soil
- Optional: rooting hormone (speeds up rooting)
💡 You don’t need expensive tools—most successful propagation happens with basic household items.
✅ Quick Checklist (Follow This Every Time)
- Cutting has at least one node
- The stem is healthy and firm
- Leaves stay above water
- Light is bright but indirect
- Water is clean (if using the water method)
🌿 Real Example (Beginner Scenario)
You cut a stem from an Epipremnum aureum:
- First attempt: no node → no roots after 2 weeks ❌
- Second attempt: cut below the node → roots appear in 5–10 days ✅
👉 Same plant, same conditions—only difference was the node
⚠️ Common Mistakes (That Cause Failure)
- Cutting without a node
- Submerging leaves in water → rot
- Using low light (slow or no root growth)
- Taking cuttings from stressed plants
- Letting water sit too long without changing
👉 Most propagation problems are not random—they come from one of these mistakes
💡 Expert Tips (Small Changes, Big Results)
- Slight warmth (not heat) speeds up root growth
- Take multiple cuttings—don’t rely on one
- Transfer to soil once roots reach 2–3 inches
👉 Bottom line:
Successful plant propagation isn’t complicated—it’s about choosing the right cutting, using the node correctly, and keeping conditions stable.
How to Repot Plants Step by Step (Without Stress)

To repot plants safely, move them into a slightly larger pot (1–2 inches wider) with fresh, well-draining soil, and handle the roots gently. Most damage happens from choosing a pot that’s too big or overwatering right after repotting. If you keep the root system stable and avoid excess moisture, plant repotting becomes low-risk.
🪴 Choose the Right Pot Size
- Go 1–2 inches larger in diameter than the current pot
- Always use a pot with drainage holes
👉 Why this matters:
A pot that’s too large holds excess water, which can suffocate roots and lead to rot.
💡 At Radiant Plants, we’ve found that “slightly bigger” is safer than “much bigger”—plants grow into space gradually, not instantly
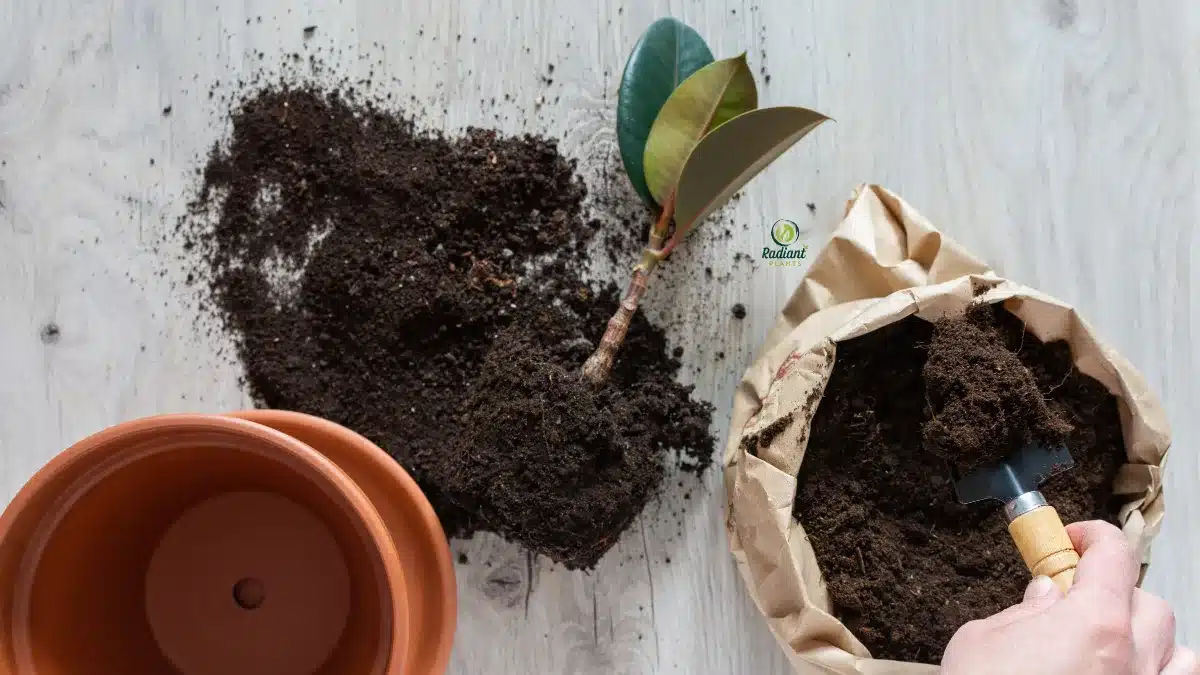
🌱 Best Soil Mix (Drainage + Aeration)
Healthy roots need oxygen as much as water.
- Use a mix that includes:
- potting soil (base)
- perlite or pumice (drainage)
- optional bark (aeration)
👉 Signs your current soil is failing:
- stays wet for days
- smells musty
- feels compact and heavy
💡 Good soil should feel light and slightly airy, not dense or muddy.
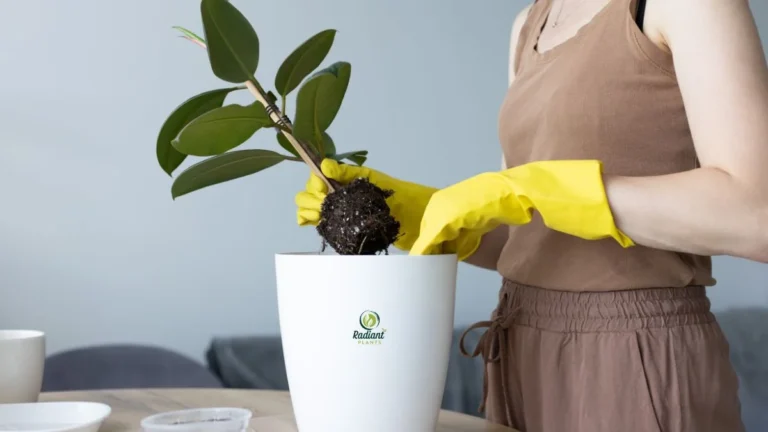
🔄 Repotting Process (Step by Step)
1. Remove the Plant Carefully
- Gently squeeze the pot or tap the sides
- Pull from the base—not the leaves
👉 If stuck, loosen edges with your fingers or a tool
2. Loosen the Roots (But Don’t Overdo It)
- Lightly untangle circling roots
- Trim dead or mushy roots if present
👉 Healthy roots = firm and light-colored
👉 Rotting roots = soft, dark, and smelly
3. Replant in Fresh Soil
- Add soil at the bottom
- Place the plant at the same depth as before
- Fill around roots without compacting too tightly
👉 Leave a small gap at the top for watering
💧 Aftercare (Where Most People Fail)
- Water lightly after repotting (just enough to settle the soil)
- Place in bright indirect light
- Avoid fertilizing for at least 2–4 weeks
👉 Why no fertilizer?
Roots are sensitive after repotting—fertilizer can stress them further
💡 Real scenario:
Many beginners see drooping leaves and assume underwatering → they add more water → roots suffocate.
👉 In most cases, slight drooping is normal repotting stress, not dehydration.
✅ Quick Checklist (Stress-Free Repotting)
- The new pot is only 1–2 inches larger
- Soil is fresh and well-draining
- Roots are gently loosened, not damaged
- Watering is moderate (not heavy)
- The plant is placed in stable light
⚠️ Warning Box: Overwatering Risk
After repotting, roots absorb water more slowly.
👉 Overwatering at this stage can:
- cause root rot
- slow recovery
- lead to yellow leaves and drooping
How to tell the difference:
- Soil wet + drooping → overwatering
- Soil slightly moist + minor droop → normal adjustment
💡 Expert Tips (That Make a Big Difference)
- Repot in spring if possible—plants recover faster
- Don’t break apart the root ball aggressively
- Let the plant adjust before making more changes
At Radiant Plants, we’ve seen that less disturbance = faster recovery—handling roots gently matters more than anything else.
👉 Bottom line:
Successful plant repotting comes down to pot size, soil quality, and controlled watering—get those right, and most plants recover quickly.
Common Mistakes That Kill Plants (And How to Avoid Them)

Most plant failures during propagation and repotting stem from a few preventable mistakes: missing the node, overwatering, and poor timing or setup. If your plant isn’t growing, rotting, or declining after repotting, the cause is almost always one of these—not bad luck.
🌱 Propagation Mistakes
❌ No Node on the Cutting
This is the #1 reason propagation fails.
- Roots only grow from nodes, not random stem sections
- A cutting without a node will stay green… then slowly die
👉 How to tell:
- Look for a small bump or joint where leaves grow—that’s the node
💡 At Radiant Plants, we’ve seen many beginners retry propagation successfully just by cutting 1 inch lower to include the node
❌ Too Much Water (Leading to Rot)
More water ≠ Faster roots.
- Submerged leaves → rot quickly
- Stagnant water → bacteria buildup
- The stem turns black or mushy
👉 How to tell:
- Healthy cutting = firm stem
- Rotting cutting = soft, dark, bad smell
Fix:
- Keep only the node underwater
- Change water every 2–3 days
❌ Low Light (Slow or No Root Growth)
Cuttings need energy to grow roots.
- Low light = weak or delayed rooting
- No light = no growth
👉 Real scenario:
A cutting placed in a dark corner may sit for weeks without change, while the same cutting in bright, indirect light roots in days.
🌿 Repotting Mistakes
❌ Pot Too Big
This is one of the most damaging mistakes.
- Excess soil holds water too long
- Roots can’t absorb it fast enough
- Leads to root rot
👉 How to tell:
- Soil stays wet for several days
- The plant becomes droopy despite watering
Fix:
- Always follow the 1–2 inch larger rule
❌ Wrong Soil (Poor Drainage)
Not all soil is equal.
- Dense soil = poor oxygen flow
- Compacted soil = waterlogging
👉 Healthy roots need:
- airflow
- drainage
- balanced moisture
💡 Many store-bought soils are too dense—mixing in perlite or bark improves results significantly.
❌ Overwatering After Repotting
This mistake kills more plants than repotting itself.
- Fresh soil holds more moisture
- Roots are stressed and absorb less water
- Excess water leads to rot
👉 How to tell the difference:
- Wet soil + drooping → overwatering
- Slight droop + lightly moist soil → normal adjustment
⚠️ Warning Box: The “Too Much Care” Problem
Most plant deaths come from:
👉 Doing too much, not too little
- Watering too often
- Repotting too frequently
- Constantly moving the plant
👉 Plants need stability more than intervention
🌿 Real Example (What Actually Happens)
A beginner repots a healthy Monstera deliciosa into a pot twice its size:
- Soil stays wet → roots suffocate
- Leaves turn yellow → user waters more
- Plant declines quickly
👉 The issue wasn’t watering—it was pot size + soil moisture imbalance
💡 Expert Tips (That Prevent Most Problems)
- Always check roots before repotting decisions
- Never propagate from a stressed or sick plant
- Use light as your guide—more light = faster recovery
- Make one change at a time (don’t repot + fertilize + move the plant together)
At Radiant Plants, we’ve found that simplifying care leads to better results—plants recover faster when you avoid stacking multiple stress factors.
👉 Bottom line:
Most mistakes in plant propagation and plant repotting are predictable—and once you recognize them, they’re easy to avoid.
Troubleshooting — Fix Problems Fast
If plant propagation or plant repotting isn’t working, the issue is usually light, water balance, or root health—not the process itself. The fastest way to fix problems is to diagnose the symptom first, then apply the correct fix instead of guessing.
🌱 Cuttings Not Rooting
🔍 Causes:
- No node on the cutting
- Low light (most common issue)
- Water not changed → oxygen depletion
- Cutting taken from a weak plant
✅ Fixes:
- Recut below a visible node
- Move to bright indirect light
- Refresh water every 2–3 days
- Take a new cutting from a healthier stem
👉 Real scenario:
A cutting sits for 3 weeks with no roots. Same plant, new cutting placed near a window → roots appear in 7–10 days.
💡 At Radiant Plants, we’ve found that light intensity matters more than anything else after the node.
🌿 Stem Rotting (Black, Mushy Cutting)
🔍 Causes:
- Too much water (especially submerging leaves)
- Dirty container or stagnant water
- Warm + low oxygen conditions
✅ Fixes:
- Remove the rotting section immediately
- Recut above the damaged area
- Use clean water and a container
- Keep only the node submerged
👉 How to tell:
- Rot = soft, dark, foul smell
- Healthy stem = firm and green
🌿 Plant Drooping After Repotting
This is where most people panic—and make it worse.
🔍 Two Possible Causes:
1. Normal Repotting Shock
- Leaves slightly droop
- Soil is moist (not wet)
- The plant otherwise looks stable
👉 Fix:
- Do nothing—let the plant adjust
- Keep light consistent
- Avoid fertilizing
2. Overwatering (More Serious)
- Leaves droop heavily
- Soil feels wet for days
- Possible yellowing
👉 Fix:
- Stop watering immediately
- Improve drainage if needed
- Ensure the pot has drainage holes
👉 Key difference:
- Shock = mild + temporary
- Overwatering = worsening over time
🌱 Slow Growth After Repotting
🔍 Causes:
Normal (No Action Needed):
- The plant is adjusting to the new soil
- Roots are expanding before visible growth
Problematic:
- Poor light conditions
- Overwatering slows root function
- Repotting done during dormancy
✅ Fixes:
- Increase light exposure
- Let the soil dry slightly between watering
- Be patient (2–4 weeks adjustment is normal)
💡 At Radiant Plants, we’ve seen that plants often pause growth to rebuild roots first—this is a good sign, not a bad one.
🔍 Quick Diagnosis Box
- No roots after 2–3 weeks → check node + light
- Black/mushy stem → rot → recut immediately
- Drooping + wet soil → overwatering
- Drooping + stable soil → normal shock
- No growth after repotting → likely adjustment phase
⚠️ Warning Box: Don’t Stack Fixes
One of the biggest mistakes:
👉 Changing too many things at once
- Repot + fertilize + move location = overload
- A plant can’t adapt to multiple stress factors
👉 Instead:
- Fix one variable at a time
- Observe for a few days before adjusting again
💡 Expert Tips (That Actually Work)
- Stability is more important than perfection
- Light drives recovery—optimize it first
- Most issues come from overwatering, not underwatering
👉 Bottom line:
Every problem in plant propagation or plant repotting has a clear cause—once you identify it correctly, the fix becomes simple and effective.
Aftercare — What to Do Next for Healthy Growth
After plant propagation or plant repotting, your job is to reduce stress and support root development. Keep light stable, avoid overwatering, and don’t rush fertilizing—most plants fail at this stage from too much care, not too little.
☀️ Light Requirements (This Drives Recovery)
- Place plants in bright, indirect light
- Avoid direct sun for a few days after repotting (can stress leaves)
- For cuttings, light = energy for root growth
👉 How to tell if light is correct:
- New growth or roots forming → good light
- No change after 2–3 weeks → likely too dark
💡 At Radiant Plants, we’ve found that moving a plant just 2–3 feet closer to a window can dramatically speed up recovery.
💧 Watering Rules (Where Most Mistakes Happen)
After Propagation:
- Keep water clean (change every 2–3 days)
- If in soil, keep it slightly moist—not wet
After Repotting:
- Water lightly once after repotting
- Then wait until the top 1–2 inches of soil dry out
👉 How to tell the difference:
- Wet soil + drooping → overwatering
- Slightly dry soil + stable leaves → correct balance
💡 Real scenario:
A freshly repotted plant doesn’t need daily watering—doing so often leads to root rot within days.
🌱 Monitoring Growth (What to Watch For)
Healthy Signs:
- New roots forming (propagation)
- New leaves or steady structure (repotting)
- Firm stems and stable color
Warning Signs:
- Yellowing leaves → possible overwatering
- No root growth after weeks → light or cutting issue
- Drooping worsening over time → root stress
👉 Key insight:
Plants often pause above-ground growth to rebuild roots first—this is normal.
🌿 When to Fertilize (Timing Matters)
- Wait 2–4 weeks after repotting before fertilizing
- Only fertilize propagated plants after roots are established
👉 Why:
- Fresh soil already contains nutrients
- Weak roots can’t handle fertilizer stress
💡 At Radiant Plants, we’ve seen that fertilizing too early is one of the fastest ways to slow recovery instead of boosting growth.
✅ Aftercare Checklist (Follow This Exactly)
- Bright indirect light
- Stable environment (don’t move constantly)
- Moderate watering (not too frequent)
- No fertilizer immediately
- Monitor changes over time
💡 Expert Tips (That Make a Difference)
- Consistency beats perfection—keep conditions stable
- Avoid making multiple changes at once
- Let the plant “settle” before adjusting care
👉 What actually works:
- Set it in the right spot
- Water correctly
- Then leave it alone
👉 Bottom line:
Aftercare is about patience and stability—give your plant the right conditions, and it will do the rest.
Plant Propagation and Repotting FAQs: Common Questions Answered
Can you propagate and repot a plant at the same time?
Yes, but timing matters. If the plant is healthy, take cuttings first, then repot the main plant. Avoid doing both on a stressed plant, as it increases shock. For best results, separate the steps by a few days if the plant shows any signs of stress.
How long does plant propagation take to work?
Most cuttings start forming roots within 1–3 weeks, depending on light, temperature, and plant type. Faster results happen in bright indirect light during spring or summer. If nothing happens after 3 weeks, check for a node and improve lighting conditions.
How big should the new pot be when repotting?
Choose a pot that is about 1–2 inches larger in diameter than the current one. Going too big holds excess moisture and can lead to root rot. The goal is to give roots room to expand gradually, not overwhelm them with too much soil.
Should I water immediately after repotting?
Yes, but only lightly. Water just enough to settle the soil around the roots. After that, wait until the top layer of soil dries before watering again. Overwatering right after repotting is one of the most common causes of plant decline.
Why are my cuttings turning black or mushy?
This usually means stem rot caused by too much water or poor hygiene. Remove the damaged part, recut above the rot, and place the cutting in clean water. Make sure only the node is submerged and change the water regularly to prevent bacteria buildup.
How do I know if my plant is root-bound?
Gently remove the plant from its pot. If roots are tightly circling the soil or growing out of drainage holes, it’s root-bound. You may also notice soil drying very quickly. In this case, repotting will improve water absorption and overall plant health.
Plant propagation and plant repotting become simple once you focus on the right signals. Check stems and nodes when you want new plants, and check roots and soil when growth slows, or space runs out. Use proper timing, avoid overwatering, and keep conditions stable after each step. Most problems come from small mistakes that are easy to fix once you know what to look for. Start with one plant, apply these steps carefully, and you’ll quickly build confidence with both propagation and repotting.