
Repotting is one of the simplest ways to keep indoor plants healthy long-term—but only if you do it at the right time and with the right setup. This guide is for houseplant owners who want a clean, low-stress method that works for common “indoor beauties,” from pothos to monstera to succulents. You’ll learn how to spot the signs your plant is ready (root crowding, fast drying, stalled growth), what tools and soil actually matter, and a step-by-step process that protects roots and avoids transplant shock. We’ll also cover aftercare basics, so your plant rebounds quickly instead of sulking for weeks. If you’ve been wondering how to Repot Plants, start here.
Table of Contents
In This Article
Why Repotting Matters for Your Indoor Plants
Understanding how to repot plants begins with knowing why repotting is essential for long-term health. Repotting isn’t simply changing containers—it’s a full reset that boosts growth, refreshes nutrients, improves drainage, and gives your indoor plants the strong foundation they need to thrive year after year. Once you understand the science behind repotting, learning how to repot plants becomes easier and far more purposeful.
One of the biggest reasons repotting matters is soil nutrient depletion. Research in container horticulture shows that potting soil can lose up to 50% of its nutrients within 12–18 months, even in well-cared-for plants. Roots absorb nutrients quickly, and frequent watering flushes minerals out of the soil. When you know how to repot plants with fresh, rich soil, you’re giving your indoor beauties a second chance at vigorous growth and better overall health.
Repotting also dramatically improves drainage and aeration—two essential factors that prevent root suffocation and disease. Over time, older soil becomes compacted, eliminating the air pockets that roots rely on. Compacted soil holds too much moisture, increasing the risk of root rot. By understanding how to repot plants with a well-draining mix, you’re restoring oxygen flow and creating a healthier underground environment.
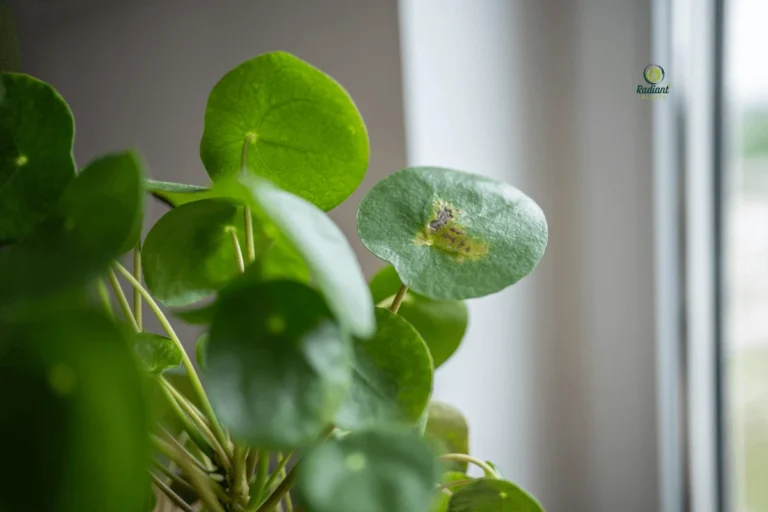
Another key reason repotting matters is space. Many indoor plants quickly become rootbound, especially fast growers like pothos, philodendrons, and monstera. When roots circle the pot, push through drainage holes, or become tightly packed, the plant can no longer take up water or nutrients efficiently. Signs such as slowed growth, frequent wilting, or yellowing leaves often indicate it’s time for a new pot. Knowing how to repot plants correctly ensures that roots have room to expand, support new growth, and store the nutrients they need.
Old soil can also stress plants even when the pot size is adequate. Fertilizer salts, minerals from tap water, and compacted organic matter build up over time. These residues can burn roots, reduce nutrient uptake, and cause brown leaf edges. Repotting removes these harmful buildups and replaces them with fresh, clean soil—one of the most overlooked benefits of repotting indoor plants.
Once you learn how to repot plants confidently, you’ll see repotting as an essential part of plant care rather than an occasional chore. It extends the life of your plants, boosts their growth, and helps prevent common problems from emerging later.
For additional root-health guidance while repotting, check out our internal resource:
Root Rot Treatment: 7 Proven Ways to Stop the Spread on RadiantPlants.com.
How to Know When Your Plant Needs Repotting
Knowing how to repot plants is important, but knowing when to repot is just as essential. Indoor plants often show clear signs when they need a fresh pot, better soil, or more space—even if the symptoms appear subtle at first. By understanding the common signs a plant needs repotting, you can act early, prevent stress, and keep your plant growing strong year-round.
So, how do you know when it’s time to repot? Most indoor plants need repotting every 12–24 months, depending on their growth rate, root system, and pot size. Fast growers like pothos, crotons, and philodendrons may need it yearly, while slower growers can go longer. If you notice slowed growth, constant wilting, or roots pushing through the drainage holes, these are all strong signals that repotting is overdue.
Top Signs Your Plant Is Rootbound
One of the clearest indicators is that your plant is becoming rootbound. When roots no longer have space to expand, the plant begins to show stress in several ways.
Roots circling the drainage holes
If roots are poking out of the bottom of the pot or circling tightly along the sides, your plant has likely outgrown its container. This restricts its ability to absorb water and nutrients effectively.
Water is draining too fast
A rootbound plant often drains water unusually quickly because compact roots leave little room for soil to hold moisture. If your plant dries out within hours, it’s a red flag.
Soil compacted or crumbling
Over time, potting soil breaks down and compacts, leaving your plant with poor aeration and fewer nutrients. Compacted soil often looks dry, pulls away from the container edges, or becomes crumbly.
All these signs indicate it’s time to apply what you’ve learned about how to repot plants and give your plant a healthier environment.
Best Time of Year to Repot Indoor Plants
Why spring is ideal
Most experts recommend repotting in spring, when indoor plants naturally enter an active growth phase. Plants recover more quickly during this period, and fresh soil supports new leaves and root development. Botanical research shows that root growth increases significantly during the warmer months, meaning repotting in spring gives your plant the best chance to thrive.
Exceptions: emergency repotting
While spring is best, there are times when you must repot immediately—no matter the season. Emergency scenarios include severe root rot, pests hiding in the soil, sour-smelling soil, or extreme rootbound conditions. In these cases, delaying repotting can worsen the plant’s health. If you know how to repot plants correctly, even off-season repotting can be safe and successful with proper aftercare.
Understanding these repotting timing cues will help you stay ahead of stress, poor growth, and soil exhaustion. When you respond to the early signs, your plant rewards you with healthier foliage, stronger roots, and more consistent growth.
For further reading on plant health and seasonal care, explore our guides:
Croton Plant Care Tips for a Vibrant, Healthy Plant and Night-Blooming Jasmine Care Guide on RadiantPlants.com.
Tools & Materials You’ll Need Before Repotting
When you’re learning how to repot plants, the right tools and materials make the process smoother, cleaner, and far more successful. Many beginners think they can repot with just soil and a pot—but having a well-prepared setup protects your plant’s roots, reduces stress, and helps it settle quickly into its new home. Here’s exactly what you need.
Potting Mix Types: Choosing the Best Soil for Repotting
The soil you choose plays a major role in how well your plant adapts after repotting. A high-quality potting mix provides fresh nutrients, supports steady growth, and improves aeration. For most indoor plants, a general all-purpose potting mix works well. However, certain plants thrive in specialized blends:
- Aroids (Monstera, Philodendron): a chunky mix with bark, perlite, and peat.
- Succulents & cacti: a fast-draining, sandy mix.
- Tropical houseplants: a light, airy blend that holds moisture without becoming soggy.
Studies from the University of Florida show that soil aeration improves root expansion by nearly 25%, making the best soil mix for repotting a critical investment rather than an optional choice.
Choosing the Correct Pot Size
One of the most common questions people ask is: “What do I need to repot a plant?” And a correctly sized pot is at the top of the list. As a general pot size guide, choose a container that is 2 inches wider than the current pot for small to medium plants. Larger plants may only need a 1-inch upgrade to avoid overpotting, which can lead to soggy soil and root rot.
Terracotta pots offer breathability, plastic pots retain moisture longer, and ceramic pots provide stability. Always ensure your pot has drainage holes, especially when following best practices on how to repot plants the safe, stress-free way.
Essential Tools for Repotting
While you can repot with your hands alone, having the proper tools ensures a cleaner and more efficient process.
- Gloves: Protect your hands from soil, sap, and pests.
- Pruning shears: Ideal for trimming dead roots or damaged leaves.
- Trowel or scoop: Helps you move soil without making a mess.
- Root rake (optional): Loosens compacted roots gently.
- Disinfectant spray: Sterilize your shears to prevent the spread of disease.
Good sanitation is key—research shows that dirty tools are one of the most common ways pests transfer between houseplants. If you’re dealing with insects such as aphids, you may also want to review practical prevention tips in How to Get Rid of Aphids: 5 Mistakes to Avoid on RadiantPlants.com.
Putting It All Together
Before you begin, lay out your tools, select the right soil, and choose the perfect pot. Preparing everything ahead of time makes the entire repotting process easier and ensures your plant’s roots experience minimal disturbance. A little planning goes a long way—and your indoor beauty will reward you with lush, healthy growth.
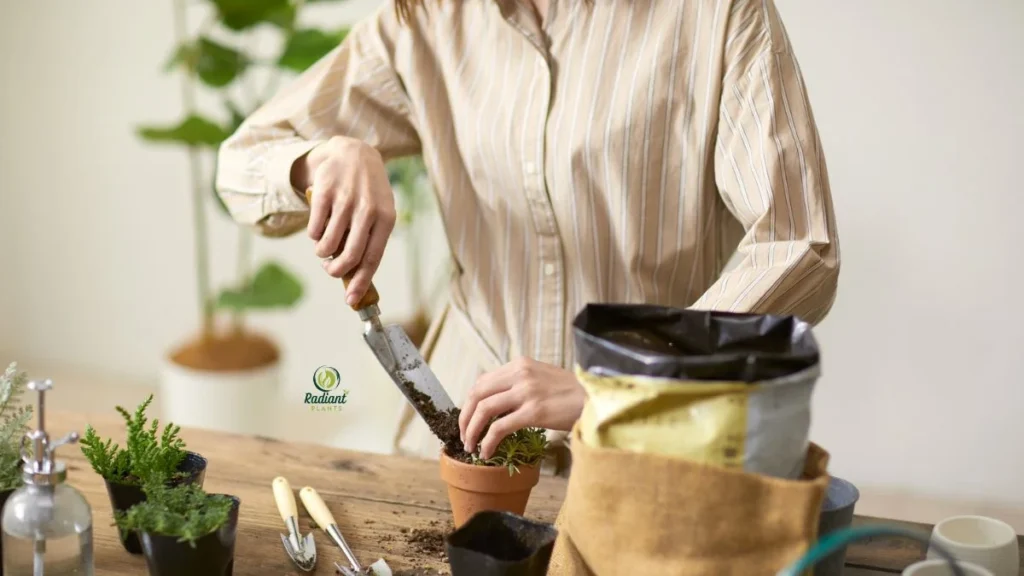
Step-by-Step Guide: How to Repot Plants Safely
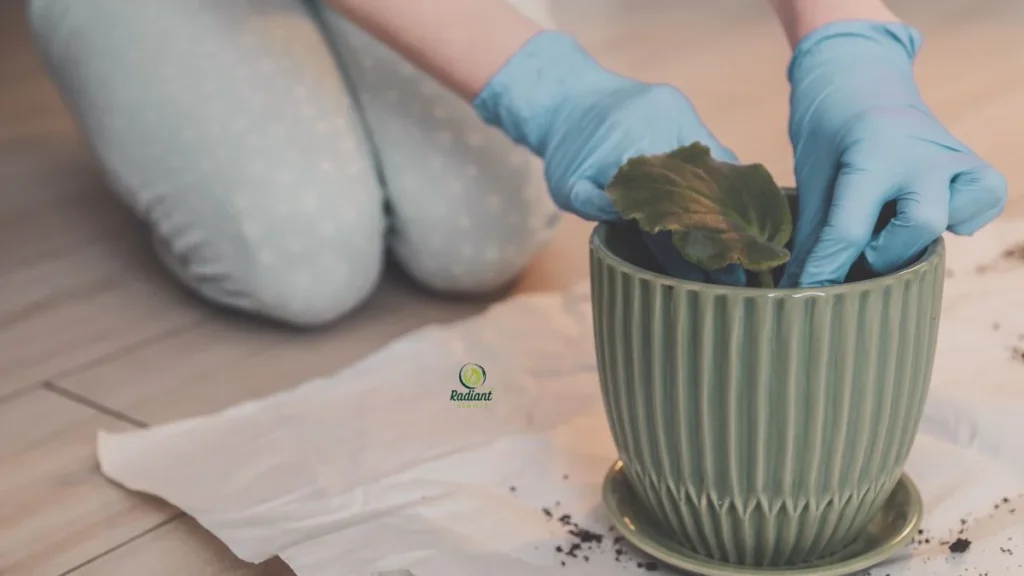
If you’ve ever wondered what the best method to repot a plant is, this step-by-step repotting guide will walk you through the safest and most effective process. When learning how to repot plants, it’s important to move slowly, protect the roots, and create the right foundation with fresh soil and the right pot size. These repotting instructions work for most indoor plants and help reduce transplant shock while encouraging new growth.
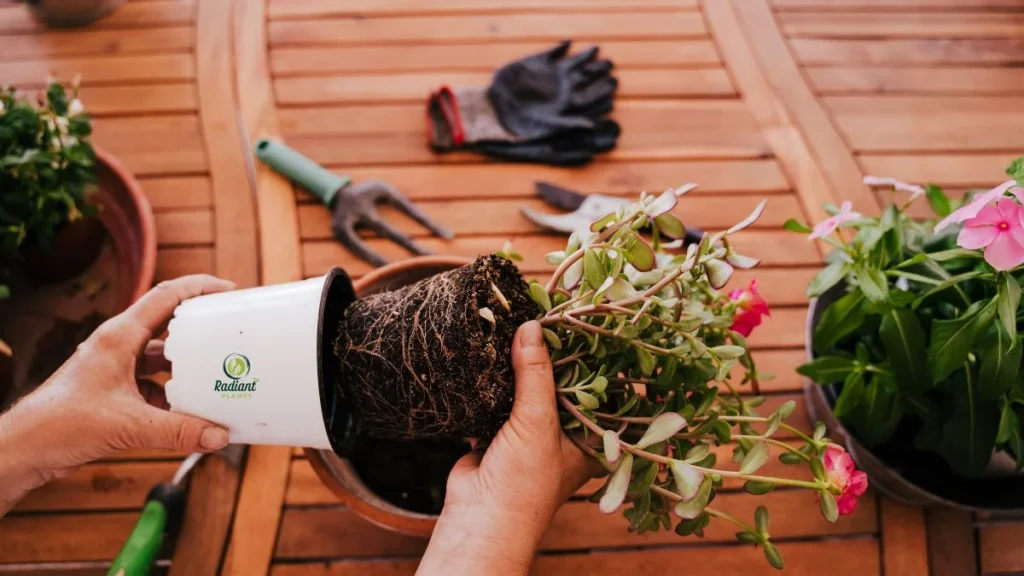
Step 1 — Gently Remove the Plant from Its Pot
Start by watering your plant lightly a few hours earlier. Moist soil makes removal easier and reduces root breakage by up to 30%, according to horticultural studies. Turn the pot sideways, support the base of the plant, and gently slide it out. Tap the pot’s sides if needed, or squeeze soft plastic containers to loosen the soil. If roots are circling tightly, don’t pull—this can tear healthy root fibers. The goal here is a clean, stress-free release.
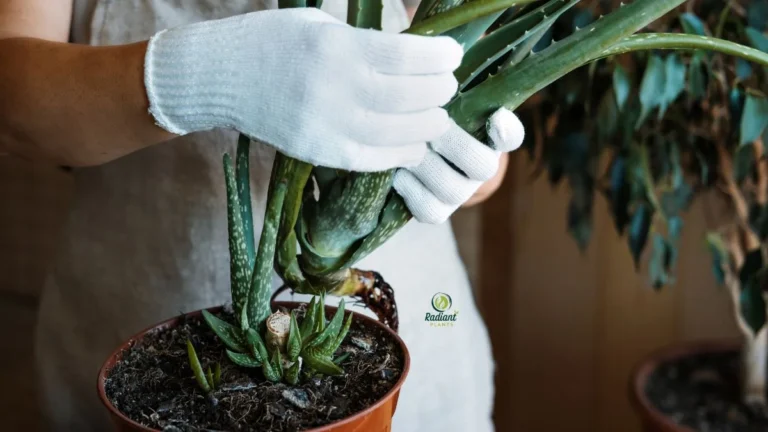
Step 2 — Loosen the Roots the Right Way
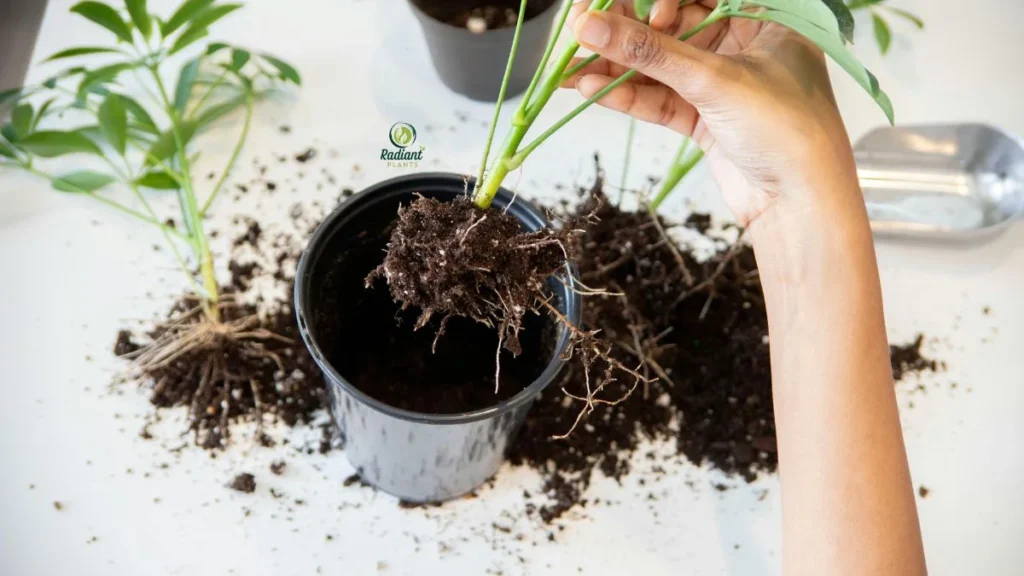
A common question is: “Do you loosen roots before repotting?” Yes—loosening the roots is essential, especially if your plant is rootbound. Use your fingers to gently tease apart the outer roots and free any that were wrapped tightly around themselves. For severely compacted roots, a clean, sharp tool like a root rake can help break up the mass without causing damage. This improves aeration and helps the plant adapt quickly to its new soil environment. Just remember: be gentle. You don’t need to expose the entire root ball—just free enough to encourage outward growth.
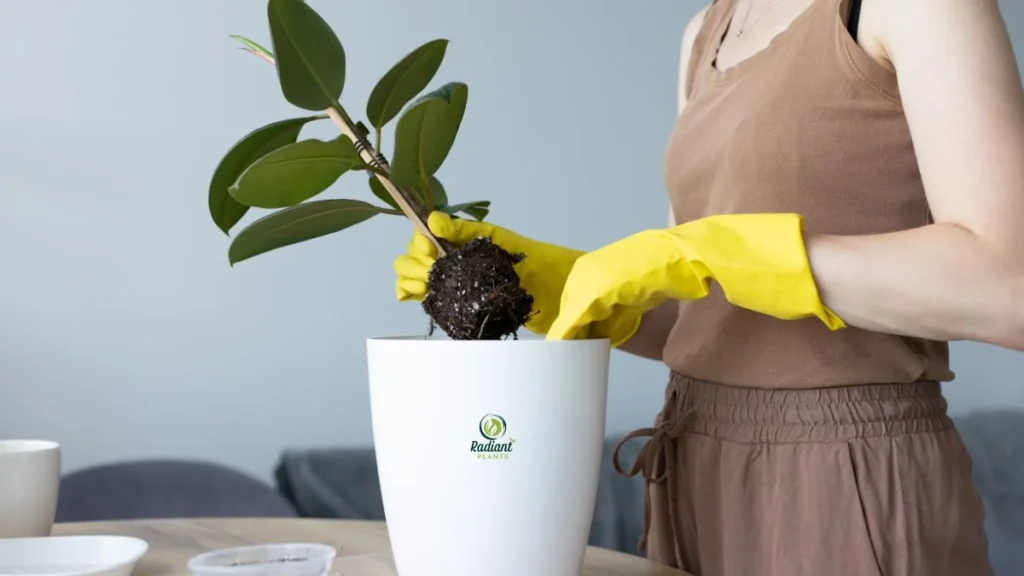
Step 3 — Add Fresh Soil and Place Your Plant
Before setting your plant into its new pot, add a layer of fresh potting mix. This creates a nutrient-rich base and lifts the plant to the correct height. Position your plant in the center, keeping the top of the root ball slightly below the rim of the pot to allow room for watering. This step is key when discussing how to repot indoor plants, because proper placement prevents soil overflow and ensures even moisture absorption.
If your plant has damaged, mushy, or rotten roots, trim them off with sterilized shears. For detailed guidance on preventing root issues, you can explore the article Root Rot Treatment: 7 Proven Ways to Stop the Spread on RadiantPlants.com.
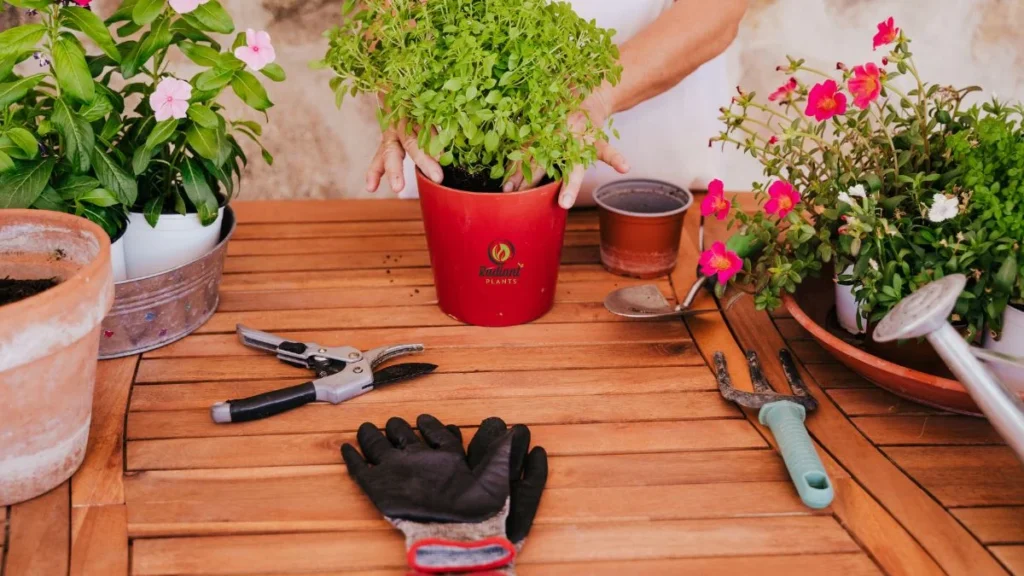
Step 4 — Fill, Press, and Water Correctly
Now it’s time to backfill. Add soil around the sides, pressing lightly to remove air pockets but avoiding over-compaction, which can suffocate roots. Leave about an inch of space at the top for future watering. Give your plant a thorough drink until water runs through the drainage holes. This helps the soil settle and ensures the roots make good contact with their new environment.
Place your freshly repotted plant in bright, indirect light and avoid fertilizing for two to four weeks as the roots adjust. With these step-by-step repotting tips, your plant will settle beautifully into its new pot and continue growing with confidence.
Aftercare: How to Help Your Plant Recover After Repotting
Learning how to repot plants is only half the story—what you do after repotting is just as important. Many plant lovers ask, “How do you take care of plants after repotting?” or “How long do plants stay in shock after repotting?” The truth is, even healthy plants may experience mild repotting shock for 3–7 days, while more sensitive species can take up to two weeks to fully recover. With the right aftercare routine, you can dramatically shorten the adjustment period and ensure your plant settles into its new home with ease.
How to Reduce Repotting Shock
Repotting shock happens because the roots have been disturbed, and the plant needs time to reestablish itself in the new soil. These simple adjustments will help your plant bounce back faster and grow more vigorously.
Adjust Lighting for Smoother Recovery
Avoid placing your freshly repotted plant in direct sunlight, even if it normally thrives there. Bright, indirect light is ideal during the first week, giving your plant enough energy for photosynthesis without overwhelming its delicate, recovering roots. Direct sun at this stage can cause drooping, leaf burn, or stalled growth. Once the plant adjusts, you can gradually return it to its usual lighting conditions. Think of this as a gentle transition that allows your plant to regain strength at its own pace.
Control Watering to Avoid Stress
One of the most important plant recovery tips after repotting is mastering the watering schedule. After the initial deep watering on repotting day, allow the top inch of soil to dry before watering again. Overwatering too soon is a common mistake and can suffocate new root growth. A 2023 horticulture report noted that plants with disrupted root systems are 40% more vulnerable to moisture stress, making controlled watering essential. Use room-temperature water to prevent shocking the roots even further.
Boost Humidity for Faster Root Reestablishment
Higher humidity helps reduce transpiration stress and keeps leaves from drooping. You can increase humidity by misting (once daily), placing a pebble tray beneath the pot, or grouping plants. This is especially helpful for tropical species like philodendrons, calatheas, and crotons. Improved humidity is one of the easiest ways to support recovery, and many indoor plants perk up within 24–48 hours of increased moisture in the air.
Feed Lightly—But Not Too Soon
While fresh potting mix already contains nutrients, some plants benefit from a soft nutritional boost two to four weeks after repotting. Do not fertilize right away—this can overwhelm the roots and prolong shock. Instead, wait until your plant shows signs of new growth, then feed with a diluted, balanced fertilizer to encourage strong root development and leaf production. Slow and steady always wins when caring for a plant post-repotting.
Supporting your plant during the aftercare phase is just as important as understanding the mechanics of how to repot plants. For continued healthy growth, you may also find our guide Monstera deliciosa variegated plant: Everything You Need to Know on RadiantPlants.com helpful—especially if you’re caring for colorful, humidity-loving varieties.
Common Repotting Mistakes to Avoid
Even experienced plant lovers can make errors during repotting that stress or even kill a plant. Many wonder why their indoor plants struggle after repotting. Understanding the most common repotting mistakes helps prevent damage and ensures a smooth transition to a new pot.
Using Oversized Pots
Choosing a pot that’s too large is a frequent mistake. While it may seem logical to give a plant extra room, oversized containers hold excess moisture. This slows oxygen flow to the roots and significantly increases the risk of root rot. Studies show plants in oversized pots are up to 70% more likely to develop fungal problems. For best results, increase the pot size by 1–2 inches for small plants and 2–3 inches for larger specimens.
Overwatering After Repotting
Overwatering is another common error. Freshly repotted roots are vulnerable and can easily suffocate in soggy soil. Water thoroughly just once immediately after repotting, then allow the top inch of soil to dry before watering again. Proper moisture management prevents fungal infections and supports faster plant recovery.
Breaking Too Many Roots
While it’s important to loosen compacted roots, cutting too many can slow recovery. Only trim dead, soft, or rotten roots with sterilized shears. Healthy roots are essential for water and nutrient uptake, so handle the root ball gently. For guidance on root care, see Root Rot Treatment: 7 Proven Ways to Stop the Spread on RadiantPlants.com.
Repotting During Winter
Winter repotting is another frequent misstep. Many indoor plants slow their growth in colder months, making them more susceptible to stress when disturbed. Low light and cooler temperatures can delay recovery. Spring is ideal for repotting, providing warmth, longer daylight, and optimal growth conditions. Emergencies, like severe root rot or rootbound plants, may require off-season repotting, but these are exceptions rather than the rule.
Avoiding these common errors will help your plants adjust quickly and thrive in their new pots. With proper care, timing, and gentle handling, your indoor beauties will flourish, staying healthy and vibrant for years to come.
Repotting by Plant Type (Quick Mini-Guides)
Not all plants require the same approach when learning how to repot plants. Each type has unique needs, from soil composition to root handling. Understanding these differences ensures a smooth transition and healthy growth. Here’s a quick guide for popular indoor plant categories.
Repotting Aroids (Monstera, Philodendron)
Aroids are tropical favorites that thrive in chunky, well-draining soil mixes. When repotting, use a mix of bark, perlite, and peat moss to encourage aeration and prevent waterlogging. Gently loosen the roots, but avoid removing too much of the root mass. Place the plant in a pot only 1–2 inches larger than its previous container to reduce the risk of overwatering. Tropical aroids benefit from slightly higher humidity after repotting, so mist or group plants together for a few days. Proper care at this stage encourages rapid new leaf development and stronger root systems.
Repotting Succulents & Cacti
Succulents and cacti require a very different approach. These plants are highly sensitive to overwatering and root disturbance. Use a fast-draining, sandy potting mix and select a pot with excellent drainage. When removing the plant from its pot, handle it carefully—especially for cacti with spines—and gently shake off old soil. Avoid trimming roots unless they are clearly dead or rotting. After repotting, allow the plant to rest for a few days before watering, which helps reduce the risk of rot and encourages root establishment. Learning how to repot succulents properly can dramatically improve their longevity and overall health.
Repotting Large Indoor Plants
Large indoor plants, like fiddle leaf figs or rubber trees, present additional challenges due to their size and weight. Use sturdy pots with drainage holes and consider having a helper for support. Loosen compacted roots carefully, and add fresh soil incrementally to avoid air pockets. Water thoroughly but moderately, and ensure the plant is placed in bright, indirect light to minimize stress. Repotting large plants may also require staging—moving the plant gradually to prevent damage to leaves or stems. Proper technique ensures strong root growth and reduces the likelihood of transplant shock.
By tailoring your repotting technique to each plant type, you ensure healthier roots, faster recovery, and more vibrant foliage. Whether you’re learning how to repot tropical plants, succulents, or larger indoor species, these mini-guides provide a practical, expert foundation for success.
For more detailed care tips for tropical favorites, check out our Tropical Houseplants: How to Create a Lush Indoor Jungle on RadiantPlants.com.
Propagation Tips When Repotting Plants
Many plant enthusiasts ask, “Can I propagate while repotting?” The answer is yes! Repotting is often the perfect time to propagate, since you already have access to healthy roots and stems. Incorporating propagation during repotting not only maximizes your plant collection but also encourages healthier growth for the parent plant. Understanding the right techniques and timing ensures success for both the repotted plant and its new offshoots.
When to Divide a Plant During Repotting
Dividing plants is a common propagation method that works well for many indoor species, such as peace lilies, spider plants, and calatheas. The best time to divide is when the plant is slightly rootbound or overcrowded. Carefully remove the plant from its pot and gently separate the root ball into smaller sections, ensuring each section has at least 2–3 healthy leaves and a portion of roots. Avoid dividing during winter or dormancy, as plants are less resilient and may struggle to recover. Doing this during repotting minimizes root disturbance and gives each division a fresh start in nutrient-rich soil.
Best Cuttings to Take While Repotting
Stem cuttings are another excellent way to propagate during repotting. When you notice long, healthy stems, select a few with at least 2–3 nodes, then trim just below a node. Remove any lower leaves that would sit in soil or water to prevent rot. Place cuttings in a light, humid environment or a propagation medium such as water, perlite, or moist potting mix. Root development typically begins within 2–4 weeks, depending on the plant species. Popular indoor plants for stem cutting propagation include philodendrons, pothos, monstera, and coleus.
Combining propagation with repotting has the added benefit of refreshing the parent plant’s soil and promoting stronger root growth. While you’re dividing or taking cuttings, you’re also assessing the health of the roots, trimming away any damaged sections, and improving aeration—all factors that contribute to a faster recovery.
Propagation during repotting is not only efficient but also rewarding. By following careful division and cutting techniques, you can expand your indoor plant collection while keeping your existing plants healthy. Remember to water gently, provide bright indirect light, and avoid fertilizing until new growth appears. For additional guidance on healthy tropical plant care and propagation support, see Tropical Plants That Thrive in Any Home on RadiantPlants.com.
With these tips, you can confidently combine repotting and propagation, giving your indoor beauties a fresh start while multiplying your green friends for a vibrant, thriving home jungle.
FAQs for how to repot plants
How often should indoor plants be repotted?
Most indoor plants thrive when repotted every 12–24 months, depending on growth speed and pot size. Fast growers like philodendrons or pothos may need annual repotting, while slower species can go longer. Watch for signs such as roots circling drainage holes, compacted soil, or slowed growth—these indicate it’s time to refresh the soil and upgrade the container.
When is the best time of year to repot plants?
Spring is ideal, as most plants enter active growth, allowing roots to settle quickly in fresh soil. Avoid disturbing roots during winter dormancy unless necessary for emergencies like root rot or overcrowded pots. Proper timing ensures minimal stress and encourages faster recovery for your indoor greenery.
Can I propagate while repotting?
Absolutely! Repotting is a great time to propagate through division or stem cuttings. Ensure each cutting or division has healthy leaves and some roots. Provide a light, humid environment for faster establishment. Combining repotting with propagation helps your plant collection flourish efficiently.
How can I reduce repotting shock?
Repotting shock happens when roots are disturbed, causing drooping, slowed growth, or yellowing leaves. To reduce stress, keep plants in bright indirect light, water moderately, and maintain slightly higher humidity for a few days. Wait a few weeks before fertilizing to allow roots to adjust fully.
What size pot should I choose for repotting
Choose a container slightly larger than the current one—1–2 inches bigger for small plants, 2–3 inches for larger specimens. Oversized pots can retain too much moisture, leading to root issues. Ensure the new pot has drainage holes and use the appropriate soil to promote strong, healthy roots and overall plant growth.
Repotting isn’t complicated—it’s just a reset: fresh soil, better airflow and drainage, and enough space for roots to function again. The main takeaway is to repot when your plant shows clear signals, use the right pot size and mix, handle roots gently, and then give it a calm recovery period with controlled watering and indirect light. Done right, you’ll prevent a lot of “mystery” issues before they start and set your plant up for steady growth. Next step: pick one plant to check this week, and if you’re seeing soggy soil or funky smells, read a related guide on root rot basics.
![Lighting needs for [Indoor Tree Plants] from bright windows to low-light corners](https://www.radiantplants.com/wp-content/uploads/2025/07/How-to-Choose-the-Right-Indoor-Tree-Plant-for-Your-Space-768x512.webp)
thc gummies no prescription required online