If you’re trying to figure out what a Hummingbird Carpet Plant really is—or why yours isn’t thriving—you’re not alone. This groundcover is famous for late-season color and hummingbird-friendly blooms, but it only performs well when sun, drainage, and watering are dialed in. In this guide, you’ll learn how to confirm you have the right plant, choose the best spot in your yard, plant and space it for a true “carpet” effect, and avoid the common mistakes that cause rot or weak flowering.
Hummingbird Carpet Plant Quick Summary
- What the Hummingbird Carpet Plant is (and what it’s often sold as) + quick ID cues
- Best conditions for Hummingbird Carpet Plant: full sun, excellent drainage, light watering once established
- First-year Hummingbird Carpet Plant care: simple watering + soil fixes for clay
- When to prune Hummingbird Carpet Plant for more blooms and tidy spread
- Hummingbird Carpet Plant troubleshooting: not blooming, dieback, yellowing, rot, pests
In This Article
What Is a Hummingbird Carpet Plant?
A Hummingbird Carpet Plant is most often a low, spreading, hummingbird-attracting perennial sold under names like “hummingbird trumpet” or “California fuchsia”—especially in drought-tolerant landscaping. In many US nurseries, it refers to groundcover forms of Epilobium canum (often still labeled Zauschneria in the trade).
Why the name is confusing (and what it usually means)
Hummingbird Carpet Plant isn’t a strict botanical name—it’s a marketing/common name that can point to a few similar-looking, tube-flowering plants that attract hummingbirds.
In practice, when shoppers say “carpet,” they usually mean a mat-forming or trailing variety that stays relatively low and spreads to cover soil (great for slopes, borders, and rock gardens). Many listings and plant tags still use older or alternate naming, so you’ll see multiple names for essentially the same plant group.
The botanical names you’ll see: Epilobium vs Zauschneria
- Epilobium is the modern genus name commonly used in plant references.
- Zauschneria is an older genus name that’s still widely used on nursery tags and in gardening circles (you’ll often see “creeping zauschneria”).
If you’re trying to confirm what you’re buying, the plant tag may show:
- Epilobium canum (or a subspecies/cultivar)
- or Zauschneria (sometimes with “californica” or cultivar names)
What “carpet” means (habit + best uses)
“Carpet” forms are chosen for spread and coverage, not height. They typically:
- spread by low stems and/or underground growth
- form a dense, weed-suppressing mat over time
- bloom with tubular flowers that are especially attractive to hummingbirds
Best landscape uses (where “carpet” really shines):
- Slopes (erosion control + low maintenance)
- Hot, sunny borders along sidewalks/driveways
- Rock gardens and gravel-mulched beds
- Cascading edges over walls or raised beds
- Pollinator strips paired with other drought-tough perennials
Quick comparison: common names vs botanical names
What it’s called on tags/online | The botanical name you may see | Key traits to expect |
|---|---|---|
Hummingbird Carpet Plant | Epilobium canum (often) | Low/spreading groundcover, tubular blooms, drought-tolerant once established |
Creeping Hummingbird Trumpet | Epilobium canum cultivars / subspp. | More “carpet” behavior; good for slopes, edging |
California Fuchsia | Epilobium canum | Longer bloom season, hummingbird magnet, can die back in winter |
Creeping Zauschneria | Zauschneria (older label for Epilobium) | Same plant group; name often used by nurseries |
Hummingbird Trumpet Plant | Epilobium/Zauschneria OR sometimes other genera | Sometimes used loosely—verify habit (upright vs creeping) before buying |
Tip: If the tag doesn’t show a botanical name, search the seller’s listing for “Epilobium” or “Zauschneria” and compare photos to confirm the growth habit.
Common mistakes (and how to avoid them)
- Mistake: Buying the wrong plant because of the name.
Fix: Look for the botanical name (Epilobium/Zauschneria) and confirm it’s a spreading groundcover, not an upright shrub-like plant. - Mistake: Assuming “carpet” means it’s a lawn replacement.
Fix: It’s a groundcover, but it won’t behave like turf. It’s best as a bed plant in the sun with good drainage. - Mistake: Planting it in a wet spot because it’s “easy.”
Fix: Treat it like a drought-tough plant: fast drainage first, then watering only as needed once established. - Mistake: Mixing it on the same irrigation line as thirsty plants.
Fix: Group it with xeriscape companions so it doesn’t get accidentally overwatered.
How to Identify a Hummingbird Carpet Plant

If your Hummingbird Carpet Plant has narrow leaves, a low spreading habit, and tubular orange-to-red flowers that show up in late summer into fall, you’re probably looking at a groundcover form of California fuchsia/hummingbird trumpet (often labeled Epilobium or Zauschneria). The fastest way to confirm is to check growth habit + flower shape—those two traits separate it from most look-alikes.
What to look for (by feature)
Leaves (shape, texture, color)
- Shape: typically narrow/lance-shaped leaves rather than big oval leaves.
- Texture: can feel slightly soft or fine-textured depending on variety.
- Color changes in heat/drought: foliage often looks smaller, tighter, or slightly duller in extreme heat; in mild climates, it can stay fuller.
Growth habit (runners/rhizomes; height vs spread)
- True “carpet” forms tend to:
- spread outward and fill space horizontally
- Send up shorter flowering stems above the mat
- form a loose-to-dense patch over time rather than a single upright clump
- Many selections spread via underground growth (rhizomes) or creeping stems.
Flowers (color, tube shape, bloom timing)
- Shape: Flowers are typically tubular (a key hummingbird trait), not flat and open like many bedding flowers.
- Color range: commonly orange, coral, red, sometimes pinkish tones depending on cultivar.
- Bloom timing: often mid/late summer through fall, especially strong when days are hot and sunny.
Stems (winter expectations)
- In colder regions, it often dies back after frost and regrows from the base in spring.
- In mild coastal or warm-winter areas, it may stay partly evergreen or keep some top growth.
60-second ID checklist (5–7 cues)
Use this as a quick “yes/no” scan:
- ✅ Tubular flowers (not daisy-like) in orange/coral/red
- ✅ Blooms show up late summer into fall more than spring
- ✅ Plant forms a spreading patch (groundcover) rather than a tall shrub
- ✅ Narrow leaves (more lance-like than broad)
- ✅ Thrives in full sun and looks happiest in lean, well-drained soil
- ✅ Handles heat well once established; doesn’t like “wet feet.”
- ✅ Often sold under names like California fuchsia, hummingbird trumpet, or creeping zauschneria
Quick “looks like” examples (and how to tell)
Example 1: Looks like Hummingbird Carpet Plant
- Low mat/patch along a sunny edge + thin leaves + tubular orange blooms in late season.
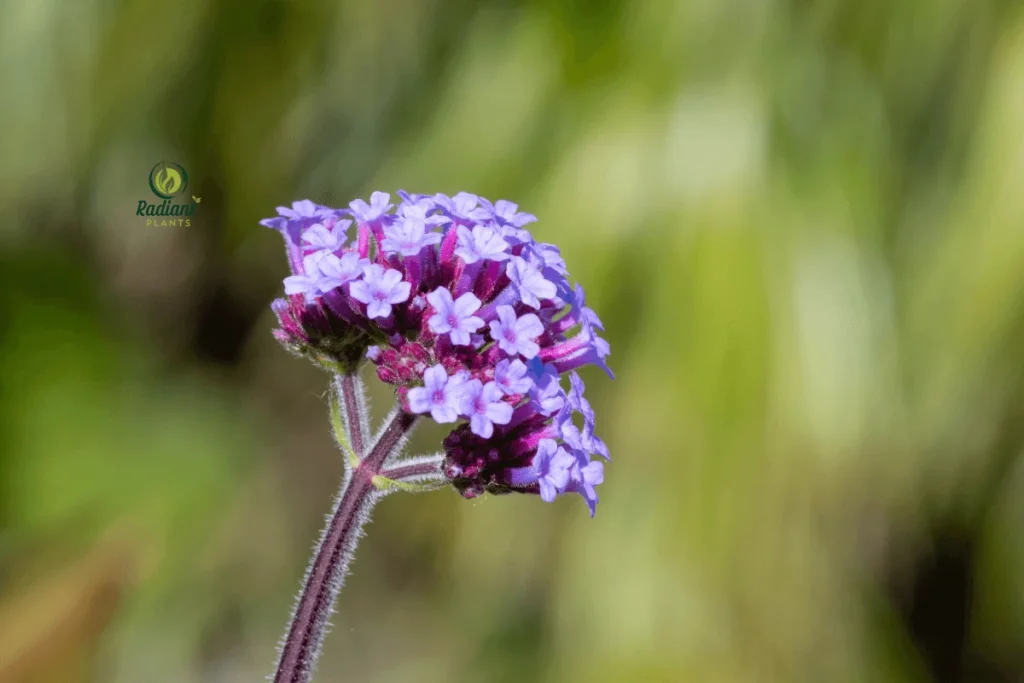
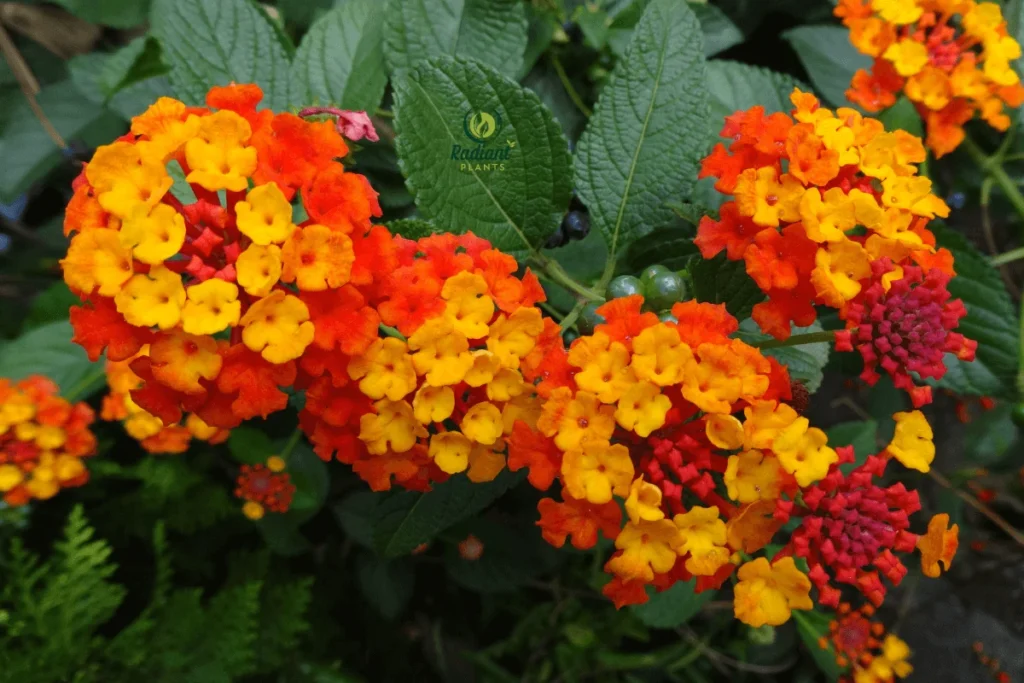
Not this: a plant with big flat flower clusters (often lantana/verbena).
Example 2: Looks like Hummingbird Carpet Plant
- Spreads over gravel/rock garden + sends up flowering stems above the mat.
Not this: a woody shrub habit with thick stems and very upright form.
Example 3: Looks like Hummingbird Carpet Plant
- Dies back after frost, then reappears from the base in spring.
Not this: evergreen groundcovers that stay green year-round in cold zones.
Common mistakes (the “look-alike” traps)
- Confusing it with salvia (sage):
Salvias can attract hummingbirds, too, but many have spike-shaped flower clusters and a more upright clumping habit. - Confusing it with lantana:
Lantana usually has round flower clusters (not tubes) and rougher, broader leaves—plus it often behaves differently by region. - Confusing it with verbena:
Verbena tends to have flat-topped clusters and a different bloom structure; it’s not the same tubular “trumpet” form. - Buying a “hummingbird plant” without checking its habit:
Sellers use hummingbird-friendly names loosely—always confirm tubular flowers + spreading groundcover form.
Hummingbird Carpet Plant Key Specs (Zones, Size, Bloom Time)
Most “Hummingbird Carpet Plant” selections are sun-loving, drought-tough groundcovers that bloom mid/late summer into fall and spread to form a mat. They’re generally hardy in a moderate-to-warm USDA zone range, but real-world success depends less on cold and more on drainage + humidity (wet soil in humid climates is the fastest way to lose them).
Specs table (quick reference)
Use this as your “does this fit my yard?” filter before you buy.
Spec | What to expect (typical) | What changes it |
|---|---|---|
USDA hardiness zones | Often listed for mid-range zones through warm zones | Cold winters = more dieback; mild winters = more evergreen behavior |
Sun exposure | Full sun for best blooms | Too much shade = fewer flowers + leggier growth |
Water needs | Low once established; moderate during establishment | Humid regions + heavy soil = higher rot risk |
Soil | Fast-draining (gravelly/sandy ideal) | Clay/low spots = decline unless raised/bermed |
Mature height | Usually low with short flowering stems | More water/fertility can push taller, softer growth |
Mature spread | Often spreading to form a patch/mat | Space, sun, and drainage speed up “carpet” fill-in |
Spread rate | Typically moderate fill-in (not instant turf) | Heat + sun + lean soil = faster; shade/wet = slower |
Bloom window | Commonly mid-summer into fall | Deadheading + sun + not overfeeding can extend bloom |
Drought tolerance | Strong after establishment | Overwatering reduces bloom and raises disease risk |
USDA zones: what “hardy” really means (regionally)
Plant tags often show a zone range, but “hardy” can mean different things depending on where you live:
- Cold-winter areas: the top may die back after frost, but the plant can return from the base if the root zone is healthy.
- Humid-summer areas: even if the zone number looks fine, humidity + wet soil can cause rot and poor performance.
- Dry-summer areas: these plants tend to excel because their biggest enemy—staying wet—is less common.
Size + spread: what “carpet” looks like in practice
Expect a plant that stays relatively low and spreads outward to form a patch over time—perfect for edges, slopes, and rock gardens.
- If you want a fast “filled-in” look, spacing and sun matter more than fertilizer.
- Overly rich soil can create lush growth that’s more prone to flopping and issues.
Bloom season + rebloom factors
Most gardeners grow Hummingbird Carpet Plant for its late-season color when many beds slow down.
Rebloom and bloom length depend on:
- Sun exposure (more sun = more flower power)
- Watering (too much water = more leaves, fewer blooms)
- Nitrogen (heavy feeding can reduce flowering)
- Pruning timing (cutback at the wrong time can delay blooms)
Drought tolerance (and why drainage matters more than fertilizer)
Once established, these plants are often described as drought-tolerant, but that doesn’t mean “no water ever”—it means they prefer deep, infrequent watering and hate staying soggy.
If you only fix one thing, fix drainage:
- Good drainage = healthier roots, better blooms, fewer losses
- Extra fertilizer = often unnecessary and can backfire
Expert tips: how to read nursery tag claims (without getting burned)
- “Drought-tolerant” ≠ “never water.” It usually means: water to establish, then reduce.
- Check the fine print: if the tag says “well-drained soil,” treat that as a requirement, not a suggestion.
- Look for the botanical name: tags may say Epilobium or Zauschneria—both can refer to the same trade group.
- Match irrigation zones: if your bed is on a sprinkler schedule for thirsty plants, this one may struggle long-term.
Where Hummingbird Carpet Plant Grows Best in the US
Hummingbird Carpet Plant performs best in sunny, dry-summer conditions with lean, fast-draining soil—think places where water moves through the root zone quickly, and humidity stays moderate. It can still grow in other regions, but in humid summers or heavy clay, success depends on smart siting (raised, sloped, airy spots) more than anything else.
The “ideal” US conditions (what this plant is built for)
Look for the combo that matches its natural preferences:
- Hot sun / high light most of the day
- Lean soil (not heavily composted) that drains fast
- Low-to-moderate summer humidity with good air movement
- Infrequent deep watering once established (not constant moisture)
Where it can struggle (and why)
These are the “risk factors” that show up again and again:
- Heavy clay → holds water around roots, especially after rain or irrigation
- Low spots → water collects; roots stay wet longer
- Humid summers → slower evaporation + higher disease/rot pressure
- Poor airflow (crowded beds, tight corners) → foliage stays damp longer
If you live in a humid region, don’t treat this like a generic groundcover—treat it like a drainage-first plant.
Microclimate wins (how to “cheat” your region)
Even in tougher climates, you can stack the deck in your favor:
- Slopes and berms: gravity is your friend—water exits the root zone faster
- Rock gardens/gravel mulch: helps keep crowns drier and improves drainage
- South-facing beds: warmer soil + faster drying (great for bloom and survival)
- Near hardscape heat: along a driveway/sidewalk, can boost growth and flowering
- Raised beds or mounded planting: best workaround for clay-heavy yards
Quick site check (30 seconds):
- After rain, does that spot stay wet for hours? If yes, it’s not ideal.
- Is there at least a light breeze most days? If no, prioritize spacing and pruning later.
3 quick US scenarios (what to do in each)
1) Southwest slope (ideal scenario)
- What works: full sun, gritty soil, slope drainage
- How to plant: space for coverage, water to establish, then reduce
- Biggest risk: overwatering on drip with thirsty neighbors
- What to do: keep it in a lower-water irrigation zone
2) Pacific coast garden (often workable with good drainage)
- What works: mild temps, long growing season, good light
- Watch for: cooler summers + foggy mornings can keep foliage damp
- What to do: choose a sunnier bed, avoid dense organic mulch, keep airflow
3) Humid Southeast bed (possible—but only with the right setup)
- Main challenge: humidity + summer rains + slower drying soil
- What to do: plant on a berm/raised bed, use gravel mulch, avoid low spots, don’t overwater
- If you can’t improve drainage, consider a different drought-tolerant groundcover better suited to humidity
Common mistakes (the ones that cause “it died for no reason”)
- Planting in a “wet corner” because it’s open and sunny
- Sunny + wet is still wet; roots don’t care about sun if they’re sitting in water.
- Over-mulching with thick wood mulch that holds moisture at the crown
- If you mulch, keep it light and away from the plant’s base.
- Mixing it with high-water perennials on the same irrigation line
- It may look fine early on, then decline as roots stay too wet.
- Crowding plants too tightly in humid climates
- Tight spacing reduces airflow and increases moisture retention.
Case study / real example: “Same plant, two yards—why one thrives and one rots”
Yard A (thrives): planted on a slight slope beside a sunny walkway; gravelly soil; watered weekly for the first month, then only during heat waves.
Result: dense spreading patch and strong late-season blooms.
Yard B (rots): planted in a flat bed at the bottom of a downspout area; clay soil; wood mulch piled near the crown; sprinkler hits it every morning.
Result: yellowing, collapse, and dieback—especially after rainy weeks.
The takeaway: this plant is forgiving about heat, but not forgiving about staying wet. Fix the site + drainage, and care gets dramatically easier.
Light Requirements (Full Sun vs Part Shade)
For the best blooms, Hummingbird Carpet Plant typically needs full sun—think 6–8+ hours of direct light most days. In extremely hot inland areas, part shade in the late afternoon can prevent stress, but too much shade usually means fewer flowers and leggy growth.
Best sunlight range for maximum blooms
- Sweet spot: Full sun (especially morning through early afternoon) for strong flowering and tighter, denser growth.
- Acceptable: Light afternoon shade if your summers are brutal (scorching heat reflecting off walls/pavement).
- Usually not ideal: Mostly shade—the plant may survive, but it often trades blooms for leafy, stretched stems.
When partial shade actually helps
Part shade can be a win when:
- Your bed faces west/southwest and gets intense late-day heat
- The plant sits next to hardscape (driveway, wall) that radiates heat
- You see repeated leaf scorch/wilting even with correct watering
In those cases, a bit of shade after ~3–4 pm can reduce stress while still keeping enough light for flowering.
How to tell if light is the problem
Use these quick “symptom → likely cause” signals:
- Leggy, stretched stems + larger gaps between leaves → usually not enough sun
- Weak bloom or very few flowers → often shade (or too much nitrogen/water—see Watering/Fertilizer sections)
- Plant flops over instead of staying tidy → can be shade or overly rich/moist soil
Sunlight audit checklist (hours + direction + seasonal changes)
Do this once before you blame watering:
- Count direct sun hours: track the spot at 9 am, noon, 3 pm, 5 pm (even a quick phone note works).
- Check direction:
- South-facing = strongest sun
- West-facing = hottest late-day sun
- East-facing = gentler morning sun
- Watch seasonal shifts: a bed that’s sunny in spring can become shaded in summer when trees leaf out.
- Spot reflectors: walls, fences, and pavement can add extra heat and light.
Rule of thumb: if you’re under 6 hours of true direct sun in summer, expect reduced bloom.
Expert tips: improve light without moving the plant
If you can’t relocate it, you can still boost effective sun:
- Prune overhead shade lightly: trim nearby shrubs/branches that block mid-day light (avoid major tree work—hire a pro if needed).
- Thin crowded neighbors: give the plant breathing room so it gets more light and airflow.
- Use reflective surfaces strategically: a light-colored wall/fence can increase brightness, but watch for heat stress in very hot regions.
- Pick the right side of hardscape: in hot climates, place it where it gets morning sun + some afternoon relief rather than full west blast.
- Adjust irrigation instead of shading more: if it wilts in the afternoon sun, the fix may be deep, infrequent watering while establishing, not adding shade.
Hummingbird Carpet Plant Soil and Drainage Requirements
If there’s one thing that makes or breaks a Hummingbird Carpet Plant, it’s fast drainage—this plant hates sitting in wet soil (“wet feet”). When roots stay soggy (especially in clay or low spots), decline can look sudden: yellowing, collapse, and rot.
Why “wet feet” causes decline
Hummingbird Carpet Plant is commonly grown as a drought-tolerant groundcover, which usually means it’s adapted to soils where water moves through quickly rather than lingering. In constantly damp conditions, roots get stressed and are more vulnerable to rot organisms.
5-minute drainage test (no tools needed)
You can do a simple “hole test” to see if your planting spot drains well:
- Dig a hole about 12 inches wide and 12 inches deep.
- Fill it with water once and let it drain completely (pre-wets the soil).
- Fill it again and time how long it takes to drain.
How to interpret it (simple):
- Drains within ~1–2 hours: usually workable for drought-tough plants
- Still holding water after 3–4+ hours: high risk unless you change the setup
- Water is still present the next day: don’t plant there without raising the root zone
Example: If your hole looks like a mini-pond after dinner and it’s still wet at bedtime, that spot needs a berm/raised bed or a different plant.
Fixes for clay (choose the right solution)
Clay isn’t automatically a dealbreaker—but you need a strategy that keeps the crown and roots above saturated soil.
Option A: Light amending (best for “not-too-bad” clay)
- Mix in grit/mineral drainage helpers (coarse sand, small gravel, pumice—depending on what’s available locally).
- Avoid turning the whole bed into a compost sponge; the goal is drainage, not richness.
Works best when: the area drains “okay-ish,” and you’re improving a larger bed.
Option B: Berm or mound (best bang-for-buck in most yards)
- Build a 6–12 inch mound of fast-draining soil so the root zone sits above the surrounding grade.
- Plant on the top/shoulder of the mound, not the base.
Works best when: you can’t rework the whole bed and want a quick win.
Option C: Raised bed (best for truly heavy clay or wet sites)
- A raised bed gives you consistent drainage and keeps the plant out of trouble.
- Use a lean, well-draining mix (not heavy compost).
Works best when: the yard holds water, or you’re in a humid region with frequent summer rain.
Option D: Container planting (best for patios or very wet yards)
- Use a pot with excellent drainage holes and a gritty mix.
- This is the easiest way to “guarantee drainage” if your ground stays wet.
Works best when: you want full control, or your soil fails the drainage test.
Mulch choices: gravel vs wood mulch
Mulch can help—or hurt—depending on climate and soil.
Gravel/rock mulch (often best for this plant)
- Keeps the crown area drier
- Improves surface drainage and reduces splash
- Matches xeriscape-style planting
Wood mulch (use carefully)
- Can conserve moisture, which is helpful in very hot/dry sites
- But in humid climates or heavy soils, it can keep the crown too damp and raise rot risk if piled thickly.
Rule: Whatever you use, keep mulch pulled back from the base so the crown can breathe.
Drainage checklist (test + fix options)
- ☐ Do the 12″x12″ drainage hole test
- ☐ If it drains slowly, choose one: berm, raised bed, or container
- ☐ Keep the plant’s crown slightly above the surrounding soil level
- ☐ Use a lean, fast-draining soil approach (not compost-heavy)
- ☐ Mulch smart: gravel for wet/humid sites; light wood mulch only if truly dry
- ☐ Keep mulch off the crown (no mulch “volcano”)
Common mistakes (that lead to rot and disappointment)
- Over-amending with compost
Compost improves soil structure, but too much can increase water-holding capacity, which is bad for a plant that wants to dry between waterings. - Planting too deep
A buried crown stays wetter longer and is more prone to rot. Aim for the crown at or slightly above grade. - Heavy mulching right up to the stems
Traps moisture and reduces airflow at the crown—especially risky in humid climates. - Choosing the lowest spot in the yard
Low spots collect water; even “drought-tolerant” plants fail there.
Expert Quote: “With the hummingbird carpet plant, drainage is everything. If the soil stays wet, it won’t matter how much sun you give it—raise the planting area or use gravelly soil so the roots can dry out.” — [Local native-plant nursery manager / Master Gardener]
Watering Guide (First 30 Days vs Established Plants)
Watering a Hummingbird Carpet Plant is all about two phases: water enough to establish roots in the first month, then shift to deep, infrequent watering once it’s settled. The most common way people lose this plant is by keeping the soil constantly damp—especially in clay or humid climates.
The two rules that prevent most problems
- During establishment, moisture should be consistent, not soggy.
- After establishment, let the soil dry between waterings; prioritize drainage over “more water.”
Watering schedule by phase + climate (quick table)
Use this as a starting point, then adjust based on your soil and weather.
Phase | Arid / hot-summer (low humidity) | Temperate (moderate summer) | Humid / rainy-summer |
|---|---|---|---|
Week 1–2 | Water 2–3x/week | Water 2x/week | Water only if top soil dries |
Week 3–4 | Water 1–2x/week | Water 1x/week | Water sparingly (avoid soggy soil) |
Month 2–3 | Water weekly or every 10–14 days | Water every 10–14 days | Often weather-only, unless drought |
Established | Water deeply every 2–4 weeks | Water during dry spells | Usually rare; only in drought |
Important: This assumes well-drained soil. If you have clay or a low spot, use a berm/raised bed or reduce frequency sharply.
Establishment phase: what “keep it alive” watering looks like
The goal is to encourage roots to grow outward without creating rot conditions.
What to do:
- Water the root zone is moist after watering, then allow the top inch or two to dry before the next watering.
- If you planted during a heat wave, check moisture more often—but don’t switch to daily watering unless the soil drains fast.
Simple check: push your finger 2 inches into the soil.
- Dry at 2 inches → water
- Moist at 2 inches → wait
- Wet/squishy → stop watering and improve drainage
After establishment: deep, infrequent watering (and what to avoid)
Once the plant is rooted in, it typically performs best when you:
- Water deeply (so moisture reaches deeper roots)
- Water less often (so the surface dries and oxygen returns to the soil)
Avoid:
- Light daily watering (keeps the crown damp, encourages shallow roots)
- “Just in case” watering in humid/rainy weeks
- Sprinklers that soak it on a schedule meant for thirsty plants
Signs of overwatering vs underwatering (fast diagnosis)
Overwatering signs
- Yellowing leaves + soft stems
- The plant looks “tired” even when the soil is wet
- Sudden collapse after rainy days or frequent irrigation
- Musty smell / consistently wet soil around the crown
Underwatering signs
- Wilting during peak afternoon heat that improves in the evening
- New growth slows, and leaves look smaller
- Soil is dry several inches down for many days in a row
Key nuance: a brief afternoon wilt in extreme heat can be normal. If it perks up at night and the soil isn’t bone-dry, don’t panic-water.
Irrigation setups: drip vs sprinkler (and why overhead can backfire)
Drip irrigation (usually best)
- Delivers water to the root zone with less leaf wetness
- Easier to control frequency and avoid crown saturation
Sprinklers/overhead watering (use cautiously)
- Can keep foliage wet longer, especially in humid climates or shaded beds
- May increase disease pressure when leaves stay damp, and airflow is poor
Best practice: If you must use sprinklers, water early in the morning and ensure good spacing/airflow.
Examples: simple schedules you can follow
These are “set-it-and-check-it” baselines (adjust for rain):
Week 1–2 (after planting)
- Hot/arid: Mon/Wed/Fri
- Temperate: Tue/Sat
- Humid: only when the top 2″ dries
Week 3–4
- Hot/arid: 1–2 times weekly
- Temperate: once weekly
- Humid: often none if rainfall is regular
Month 2–3
- Hot/arid: weekly to every 10–14 days
- Temperate: every 10–14 days
- Humid: drought-only
Mature
- Water only during extended dry spells (or every 2–4 weeks in very hot/arid regions)
Common mistakes (what to stop doing)
- Daily watering (even “a little”) → keeps soil constantly damp
- Planting in low spots and trying to “water your way out” of decline
- Same irrigation line as thirsty plants (the bed’s schedule drowns it over time)
- Ignoring rain (automatic timers still run after storms)
- Watering late in the day so foliage stays wet overnight
Planting & Spacing for a True “Carpet” Effect
To get a real “carpet” from Hummingbird Carpet Plant, focus on planting time + spacing + drainage—that combination determines whether it fills in cleanly or struggles with weeds and rot. In most of the US, planting in spring or early fall works best, as long as you avoid extreme heat and soggy winter soil.
Best planting time (spring vs fall)
- Spring: best for colder-winter regions—plants get a full growing season to establish before frost.
- Early fall: great for mild-winter and dry-summer areas—soil is warm, stress is lower, and roots can establish before winter.
- Avoid: planting right before a heat wave or during long rainy stretches (both increase stress and rot risk).
Spacing guidelines (edge vs carpet vs slope)
Spacing depends on whether you want a neat border, a dense mat, or erosion control. Since cultivars vary in spread, think in ranges:
Goal | Spacing idea (center-to-center) | What you’ll get |
|---|---|---|
Edging / tidy border | 18–24 inches | Defined plants that knit together over time |
Full “carpet” in a bed | 12–18 inches | Faster fill-in, fewer weeds once established |
Slope stabilization grid | 18 inches in a staggered pattern | Better soil hold + even coverage |
Rule: In humid climates, lean toward wider spacing for airflow (less disease/rot risk).
How to plant (depth, root flare, watering-in)
This plant is picky about staying too wet at the crown—planting technique matters.
Step-by-step planting
- Prep the spot for drainage first. If the soil is heavy, plant on a berm/mound or raised area.
- Dig a hole slightly wider than the root ball, not deeper.
- Set the plant so the root flare/crown sits at or slightly above the surrounding soil line. Planting too deeply increases rot risk.
- Backfill with a lean, well-draining mix (avoid stuffing the hole with compost-heavy soil).
- Water in thoroughly once to settle the soil, then follow the establishment watering schedule.
Quick test: when you’re done, water should soak in—not pool around the base.
Border control (how to keep it from wandering)
If you’re planting along a path or driveway, plan containment from day one:
- Use a hard edge: metal/plastic edging, pavers, or a narrow gravel strip
- Create a maintenance strip: 6–12 inches of gravel between the plant and the path
- Do a quick seasonal trim of runners/edges to keep lines crisp
Planting day checklist
- ☐ Choose a spot with 6+ hours sun (more = more bloom)
- ☐ Confirm drainage (no puddling; mound/raise if needed)
- ☐ Plant crown at or slightly above grade
- ☐ Space for your goal: border vs carpet vs slope grid
- ☐ Water in once, then follow the Week 1–4 watering plan
- ☐ Keep mulch off the crown (especially in humid climates)
- ☐ Add edging/gravel strip now if it’s near a path
Examples: 3 layouts with spacing
1) Border along a walkway (clean look)
- Spacing: 18–24 inches
- Add a 6-inch gravel strip between plants and hardscape for dryness + neat edges
- Best for: hot strips, sunny borders
2) Mass planting for a full carpet (fast coverage)
- Spacing: 12–18 inches
- Plant in a staggered pattern (not a straight line) for quicker knit-in
- Best for: beds where you want weed suppression
3) Slope grid for erosion control
- Spacing: ~18 inches, staggered like a checkerboard
- Plant on the slope’s “shoulders,” not in water-collecting pockets
- Add gravel mulch to reduce splash and help drainage
Common mistakes (and how to avoid them)
- Too close in humid climates → poor airflow, higher fungal/rot pressure
- Fix: wider spacing + avoid overhead watering.
- Too far apart → weeds take over before the plants knit together
- Fix: mulch appropriately, or plant closer in dry climates where airflow isn’t an issue.
- Planting in a low spot and expecting it to “carpet.”
- Fix: mound the planting area or choose a different location.
- Planting too deep
- Fix: crown slightly above grade; keep mulch off the base.
Case study / real example: slope planting that reduced erosion + increased blooms
A homeowner planted a staggered grid on a sunny slope with gravel mulch and no overhead irrigation:
- Before: bare soil washed during storms; sparse blooms from stressed plants
- After (season 1–2): the slope held soil better, plants filled in, and blooms increased once roots were established and drainage stayed fast
Why it worked: slope drainage + correct spacing + gravel mulch kept crowns dry and improved airflow—exactly what this plant wants. [
How to Prune Hummingbird Carpet Plant (Cutback and Seasonal Care)
For most gardens, the best way to prune Hummingbird Carpet Plant is a spring cutback after the worst freezes are over—this keeps the crown protected in winter and helps push fresh growth and stronger blooms. How hard you cut back depends on your climate and how much green tissue survived, but the goal is always the same: remove dead material, open airflow, and shape the patch.
When to prune (timing by region)
Why spring is the default: In many regions, last season’s stems help protect the crown from cold and wet. Cutting too early can expose tender growth to frost or keep the plant too open during winter rains.
- Cold-winter regions: wait until early to mid-spring, when hard freezes are less likely.
- Mild-winter/coastal regions: You can tidy earlier, but spring is still the safest time for a stronger regrowth flush.
- Humid/rainy-winter areas: delaying until spring can reduce rot risk because you’re not leaving a freshly cut crown exposed during prolonged wet spells.
How hard to cut back (and what not to remove)
A practical approach:
- Start with dead stuff first. Remove brown, brittle stems and any mushy sections.
- Don’t scalp healthy green growth if your plant stayed partly evergreen—leave some green tissue to keep energy flowing.
- For most patches, cut back to a few inches above the crown or to where you see healthy nodes, then let new shoots fill in.
- If the patch is dense and humid-prone, thin it slightly to improve airflow.
Example: If your plant is 8–12 inches tall with a mix of brown and green stems, remove the brown stems entirely and shorten the green ones lightly, focusing on shape and airflow.
Winter behavior: what to expect after frost
Hummingbird Carpet Plant often behaves like this:
- After frost, top growth may die back and look messy.
- In spring, new shoots emerge from the base or near the crown as temperatures warm.
- In mild climates, it can stay partially green; just clean up damaged tips.
What to do right after frost:
- Resist the urge to “clean it to the ground” immediately.
- Remove only broken/mushy parts and let the rest protect the crown until spring.
Rejuvenation: thinning for airflow and better flowering
If blooms are getting weaker or the center looks tired, a rejuvenation prune helps:
- Thin, congested growth so air can move through the patch (especially in humid climates).
- Remove older woody stems at the base and leave younger, flexible growth to re-fill.
- If it’s spreading where you don’t want it, edge-trim the perimeter and remove wandering stems.
This is also the moment to evaluate drainage: a patch that keeps thinning out may be telling you the soil stays too wet.
Seasonal calendar checklist (spring/summer/fall/winter)
Spring
- ☐ Main cleanup/cutback after freeze risk drops
- ☐ Remove dead material + thin for airflow
- ☐ Refresh gravel mulch lightly (keep off the crown)
Summer
- ☐ Light shaping only if needed
- ☐ Avoid heavy pruning during peak heat
- ☐ Watch watering—overwatering reduces bloom
Fall
- ☐ Minimal pruning; let structure protect the crown
- ☐ Stop fertilizing with heavy nitrogen (if you fertilize at all)
Winter
- ☐ Leave most stems in place
- ☐ Remove only mushy/rotting debris
- ☐ Don’t keep the bed wet; prioritize drainage
Expert tips: prune for blooms vs prune for shape
- For more blooms: prioritize sun + correct watering, then do your main prune in spring so the plant can push vigorous flowering growth in-season.
- For a tidier shape: edge-trim lightly during the growing season, but keep it conservative—over-trimming can reduce flowering stems.
- For humid climates: thinning beats shearing. Shearing can create a dense outer shell that traps moisture inside.
Common mistakes (what to avoid)
- Cutting too early (late fall/early winter): exposes the crown and can reduce cold protection.
- Over-pruning: removing too much green tissue can slow rebound and reduce bloom.
- Leaving soggy debris piled in the crown: traps moisture and can encourage rot—clean it out and keep mulch off the base.
- Shearing into a tight mound in humid climates reduces airflow and keeps foliage damp longer.
Expert Quote: “Wait until spring to cut back—old growth protects the crown through winter. Then remove dead stems and thin lightly for airflow so the plant rebounds and blooms better.”
Fertilizing Hummingbird Carpet Plant and Choosing the Right Mulch
Most Hummingbird Carpet Plant patches don’t need regular fertilizer—if anything, too much nitrogen can push leafy growth at the expense of flowers. You’ll usually get better blooms by dialing in sun + drainage + watering than by feeding.
Why too much nitrogen can reduce blooms
Nitrogen is great for leaves and stems, but many flowering perennials respond to high nitrogen by:
- producing softer, greener growth
- putting less energy into flowering
- becoming more floppy and sometimes more disease-prone in humid conditions
When a light feed might actually help
There are a few situations where light feeding can be useful:
- Containers: nutrients wash out faster, so a small dose can support steady growth.
- Extremely poor, sandy soils: if growth is weak and pale even with good sun and correct watering, a small feed may help.
- After a hard cutback/rejuvenation, a gentle, balanced feed can support regrowth—only if drainage is excellent.
Best approach: start low and observe. If the plant is blooming well, don’t fix what isn’t broken.
Compost: when it helps vs when it hurts
Compost is often recommended broadly, but for this plant, it’s a “use with judgment” amendment.
Compost can help when:
- Your soil is so poor it won’t hold any moisture at all (very fast-draining sand)
- You’re top-dressing lightly to improve soil structure over time
Compost can hurt when:
- You have clay or a site that already holds water
- You use a heavy compost mix that turns the planting zone into a moisture sponge
- You pile it near the crown, where it stays damp
Rule: If drainage is even slightly questionable, prioritize mineral drainage improvements (berms, gravelly mixes) over compost-heavy amendments.
Mulch strategy (weeds + temperature) — gravel vs organic
Mulch is useful for weed suppression and temperature buffering, but it has to match your climate.
Gravel/rock mulch (often best for this plant)
- improves surface drainage and keeps crowns drier
- works especially well in xeriscape-style beds and humid-risk sites
Organic mulch (wood chips/shredded bark)
- can reduce evaporation in very hot, dry areas
- but can trap moisture at the crown if applied thickly or piled up against stems—higher rot risk in humid climates
Best practice: keep any mulch pulled back 2–3 inches from the base so the crown can breathe.
Fertilizer options (quick comparison table)
Option | When it makes sense | What to watch out for |
|---|---|---|
None (recommended for most) | The plant is growing and blooming normally | Overcorrecting and creating problems |
Slow-release, low-dose | Containers or very poor soil | Too much nitrogen = fewer blooms, floppy growth |
Light compost top-dress | Only if drainage is excellent and the soil is very lean | Water retention around the crown; rot risk in clay/humidity |
Common mistakes (what to avoid)
- Overfeeding with high-nitrogen fertilizer
Leads to lush leaves and fewer flowers; it can also make plants softer and more prone to issues. - “Fixing” bloom issues with fertilizer instead of sun/water
If blooms are weak, the cause is usually light, watering frequency, or drainage, not lack of nutrients. - Heavy compost or manure in the planting hole
Can hold water around roots, especially in clay—exactly what this plant doesn’t want. - Mulch piled against the crown
Creates a damp collar around stems and increases rot risk—especially in humid climates.
Propagation (Cuttings, Division, and Transplanting)
The easiest way for most home gardeners to propagate Hummingbird Carpet Plant is either softwood/semi-hardwood cuttings or division of an established patch. Cuttings are great when you want more plants without disturbing the original, while division is faster when you already have a spreading clump you can split.
Cuttings vs division: which is best at home?
Choose cuttings if:
- You want multiple “clones” without digging up the parent plant
- Your plant isn’t big enough to split yet
- You’re okay waiting a few weeks for roots
Choose division if:
- You have a mature patch that’s crowding or thinning in the center
- You want an instant head start (bigger pieces establish faster)
- You’re already doing a spring cleanup/edge control
Step-by-step: propagating from cuttings
Best timing: typically late spring through summer when stems are actively growing (avoid extreme heat waves).
What you do (simple overview):
- Snip 3–6-inch healthy stems (non-flowering stems root easiest).
- Remove the lower leaves, leaving a small tuft at the top.
- Plant in a fast-draining medium (e.g., perlite + potting mix) so it stays lightly moist but never soggy.
- Keep in bright shade/indirect light (not blasting sun) until roots form.
- Water to keep the medium slightly moist, not wet (this plant rots easily).
Moisture rule: damp like a wrung-out sponge—never waterlogged.
Step-by-step: propagating by division
Best timing: usually spring (after cold snaps) or early fall in mild climates.
- Water the plant the day before (makes digging easier).
- Dig a section from the edge of the patch where new growth is vigorous.
- Split into pieces with roots attached (by hand or with a clean knife).
- Replant immediately at the same depth (crown at or slightly above grade).
- Water in once, then follow establishment watering (don’t keep it soggy).
Transplant shock: how to reduce it (biggest wins)
Hummingbird Carpet Plant can sulk if it’s moved at the wrong time or planted too wet. To cut shock:
- Move it in mild weather (spring/fall, not peak summer)
- Keep the root ball intact as much as possible
- Match the new site to the plant: full sun + fast drainage
- Water correctly: consistent moisture for a short time, then taper
- Don’t fertilize heavily right away—it can push weak top growth before roots are ready
If you only do one thing: plant into a raised/bermed, well-draining spot. That prevents the “transplant + rot” combo.
Propagation checklist (materials + steps)
Materials
- ☐ Clean snips/pruners
- ☐ Small pots or cell trays
- ☐ Fast-draining mix (perlite/pumice + potting mix)
- ☐ Labels (date + cultivar)
- ☐ Optional: rooting hormone (helpful, not mandatory)
Cuttings steps
- ☐ Take 3–6″ non-flowering stems
- ☐ Strip lower leaves
- ☐ Stick into a damp (not wet) medium
- ☐ Bright shade until rooted
- ☐ Pot up after roots form
Division steps
- ☐ Dig edge sections with roots
- ☐ Split into rooted pieces
- ☐ Replant at correct depth
- ☐ Water in and taper watering as it establishes
Examples: week-by-week rooting expectations (typical)
Rooting speed varies by temperature and humidity, but here’s a realistic baseline:
- Week 1: cuttings stay green; you’re preventing rot more than “feeding” growth
- Week 2–3: first resistance when you tug gently (early rooting)
- Week 4–6: stronger root system; ready to pot up and slowly increase sun exposure
Hardening-off tip: once rooted, increase morning sun gradually over 7–10 days before planting out.
Case study / real example (placeholder): “I propagated 6 starts—here’s what worked”
- Took 6 cuttings from non-flowering stems in late spring
- Used a very gritty mix (perlite-heavy) to avoid rot
- Kept them in bright shade and watered only when the top started to dry
- Result: most rooted by week 4; the only failure was that the pot was kept too wet
Takeaway: for this plant, propagation success is mostly about avoiding soggy media while roots form.
Problems & Troubleshooting (By Symptom)
Most Hummingbird Carpet Plant problems trace back to just a few root causes: too little sun, too much water, poor drainage, or excess fertilizer. Use the symptom checklist below to diagnose fast—then fix the underlying condition (especially drainage) instead of chasing the visible issue.
Quick troubleshooting checklist (Symptom → likely cause → fix)
Use this like a decision tree.
Symptom | Most likely cause | What to do first |
|---|---|---|
Not blooming / very few flowers | Too much shade, overwatering, excess nitrogen, pruning at wrong time | Increase sun exposure, reduce watering, stop high-N fertilizer, adjust pruning timing |
Yellowing leaves | Overwatering, soggy soil, root stress, and sometimes nutrient imbalance | Check soil moisture + drainage; reduce watering; improve drainage |
Rot / sudden collapse | Drainage failure, constant moisture, low spot, mulch against the crown | Stop watering, remove soggy mulch/debris, move/raise the plant to a berm |
Leggy, floppy growth | Low light, overcrowding, too rich/wet soil | Increase sun/airflow, thin neighbors, avoid heavy feeding |
Sticky leaves / distorted tips | Aphids | Rinse with water, use insecticidal soap if needed |
Fine webbing / stippled leaves | Spider mites (often in hot/dry stress) | Increase plant vigor, rinse undersides, miticide/soap if severe |
- Bloom issues → Light Requirements, Watering Guide, Fertilizer & Mulch, Pruning
- Rot/yellowing → Soil + Drainage, Where It Grows Best
Not blooming (light, water, nitrogen, pruning timing)
Most common reasons:
- Not enough sun: fewer than ~6 hours of direct light often reduces bloom.
- Too much water: promotes leafy growth over flowers.
- Too much nitrogen: same effect—more leaves, fewer blooms.
- Pruned at the wrong time: cutting too hard at the wrong time can remove flowering stems.
Fix in order (fastest wins first):
- Confirm sun hours (do the sunlight audit)
- Reduce watering frequency (especially if soil stays moist)
- Stop high-nitrogen feeding
- Do a correct spring cleanup next season, rather than repeated mid-season cutting
Example: A plant in part shade + on a lawn irrigation line often stays green but barely flowers. Move it to a sunnier, drier zone, and blooms typically improve.
Yellowing leaves (overwatering, nutrient imbalance, root stress)
Yellowing is most often a moisture/drainage signal, not a “feed me” signal.
Likely causes:
- Soil staying wet (clay, low spot, too-frequent irrigation)
- Mulch piled against the crown, trapping moisture
- Root stress after transplanting or during long rainy weeks
What to do:
- Check moisture 2–3 inches down before watering again
- Pull mulch back from the base
- Improve drainage (berm/raised planting) if it stays wet for hours after rain
- Only consider fertilizer if drainage + light are confirmed good and growth is still weak.
Rot/collapse (drainage failure, irrigation issues)
This is the “emergency mode” symptom—act fast.
Red flags:
- The plant collapses while the soil is still wet
- The crown feels mushy or smells sour
- Decline accelerates after rain or frequent watering
Immediate steps:
- Stop watering and pause irrigation timers
- Remove soggy debris and pull mulch away from the crown
- If the site stays wet, lift and replant on a berm/raised bed or move to a drier spot
- Switch to drip (or spot watering) instead of overhead schedules
Leggy growth (low light, overcrowding)
If it looks stretched or floppy:
- Increase sun exposure (or thin overhead shade)
- Thin nearby plants to improve airflow
- Avoid rich soil and heavy feeding that makes growth soft
Quick test: if stems are reaching toward light and blooms are sparse, treat it like a sun problem first.
Pests (aphids/spider mites) + deer resistance expectations
Aphids
- Often show up on tender new growth
- First-line control: a strong water rinse; then insecticidal soap if needed
Spider mites
- More common in hot, dry stress
- Look for fine webbing and stippled leaves; rinse undersides and reduce stress
Deer resistance
- Many drought-tolerant, aromatic, or tough-leaved plants are less preferred, but “deer resistant” is never deer-proof.
- If deer pressure is high, use deterrents or physical barriers during establishment.
Common mistakes (why problems keep repeating)
- Treating yellow leaves with fertilizer without checking drainage
- Watering on a schedule instead of checking soil moisture
- Planting in shade and expecting blooms
- Fixing pests while ignoring plant stress (healthy plants handle pests better)
- Over-mulching and keeping the crown damp
Best Companion Plants + Landscape Uses
The best companions for Hummingbird Carpet Plant are sun-loving, low-water perennials that won’t force it onto a high-irrigation schedule. Design-wise, it works like a “finisher” groundcover—spreading along edges, spilling over walls, and lighting up late season with tubular blooms that fit perfectly in pollinator and xeriscape beds.
Companion plant pairings (same water needs)
Pick plants that thrive on similar “deep, infrequent” watering once established. Good categories include:
- Drought-tolerant shrubs (structure + contrast): compact sages, drought-friendly cistus-type shrubs, low-water rosemary forms (region-dependent)
- Xeriscape perennials (color + bloom sequence): salvia varieties, yarrow, blanket flower, penstemon, coreopsis, lavender (where hardy)
- Grasses and grass-like plants (texture + movement): blue fescue-type grasses, deer grass in warmer zones, sedge varieties suited to dry sun
- Succulents/rock garden plants (hot-strip winners): sedums/stonecrops, ice plant in suitable climates, other gritty-soil favorites
Color + texture combos for long-season interest
Hummingbird Carpet Plant is strongest as a late-season accent, so build a bed that looks good from spring through fall:
- Spring–early summer color: pair with early bloomers (yarrow/penstemon types) so the bed isn’t “quiet” before it flowers.
- Mid-season texture: add fine-textured grasses or silvery foliage plants for contrast.
- Late-season punch: let the hummingbird carpet take over visually when its flowers peak.
Texture tip: it reads best next to upright, spiky, or airy plants—its low, spreading habit balances taller shapes.
Best landscape uses (where it really shines)
- Slopes: groundcover spread + low-water habit makes it ideal for erosion-prone spots
- Edging: along paths/driveways where heat reflects (as long as drainage is good)
- Rock gardens/gravel beds: excellent fit for fast-draining soils
- Hot strips: narrow beds that bake in summer (choose the sunniest, driest spots)
- Wildlife/pollinator gardens: tubular blooms are a strong hummingbird draw
3 design “recipes” (easy combos you can copy)
1) Sunny slope “erosion + color” mix (low-water)
- Hummingbird Carpet Plant (as the spreader)
- Upright salvia/penstemon-type perennial (mid-height blooms)
- A drought-tough grass (texture + root hold)
Why it works: mixed root structures stabilize soil and keep interest all season.
2) Rock garden/gravel bed “hot and dry” mix
- Hummingbird Carpet Plant
- Sedum/stonecrop-type plants (filler + drought tolerance)
- Yarrow or blanket flower for long-blooming mid-season color
Why it works: all prefer drainage and don’t need rich soil.
3) Hummingbird strip “late-season nectar line.”
- Hummingbird Carpet Plant
- A second hummingbird-friendly bloomer that peaks earlier (salvia-type)
- A compact lavender/rosemary-style plant where hardy (scent + structure)
Why it works: staggered bloom times keep hummingbirds visiting longer.
Expert tips (avoid irrigation conflicts)
- Match irrigation zones. Treat this as a low-water plant once established; don’t put it on the same sprinkler schedule as thirsty perennials.
- Think “dry border,” not “lawn edge.” If sprinklers hit the bed daily, you’re setting it up for rot and weak bloom.
- Use gravel strategically. A gravel or decomposed granite strip can keep the crowns drier and clean up the visual edge.
Common mistakes (that shorten the plant’s life)
- Pairing with high-water lawns/beds (constant moisture = decline)
- Mixing it with thirsty shade plants because the bed is “mixed” (light + water needs clash)
- Overcrowding for immediate impact in humid climates (reduces airflow)
- Using heavy organic mulch everywhere in wet-prone areas (keeps crowns too damp)
Hummingbird Carpet Plant FAQs
Is the hummingbird carpet plant the same as California fuchsia?
Often, yes. “Hummingbird carpet plant” is commonly used for groundcover forms sold as California fuchsia or hummingbird trumpet (often labeled Epilobium or Zauschneria). To confirm, look for narrow leaves, a spreading habit, and tubular orange-red flowers that peak late summer into fall.
How often should I water a hummingbird carpet plant?
Water more during the first month to establish roots, then switch to deep, infrequent watering. In most yards, that means watering only when the top few inches dry out. The biggest mistake is frequent light watering, which keeps roots damp and can cause rot.
Why isn’t my hummingbird carpet plant blooming?
The top causes are insufficient sunlight, excessive water, and excessive nitrogen fertilizer. Aim for 6–8+ hours of direct sun, let soil dry between waterings, and skip high-nitrogen feeds. Also, avoid heavy pruning at the wrong time—spring cleanup is usually best.
Is the hummingbird carpet plant deer-resistant?
It’s often considered deer-resistant, but no plant is deer-proof. Deer pressure varies by region and season. If deer browse is common in your area, protect new plants with temporary fencing or repellents during establishment, and avoid planting them along heavily traveled deer paths.
Hummingbird Carpet Plant is at its best when you treat it like a sun-and-drainage specialist: give it plenty of light, fast-draining soil, and just enough water to establish—then back off. With smart spacing, a simple spring cutback, and low-fuss feeding, it rewards you with a tidy groundcover and reliable late-season color. If you’re ready to plant, start with the ID checklist and drainage test, then match it with other low-water companions for an easy, hummingbird-friendly bed.