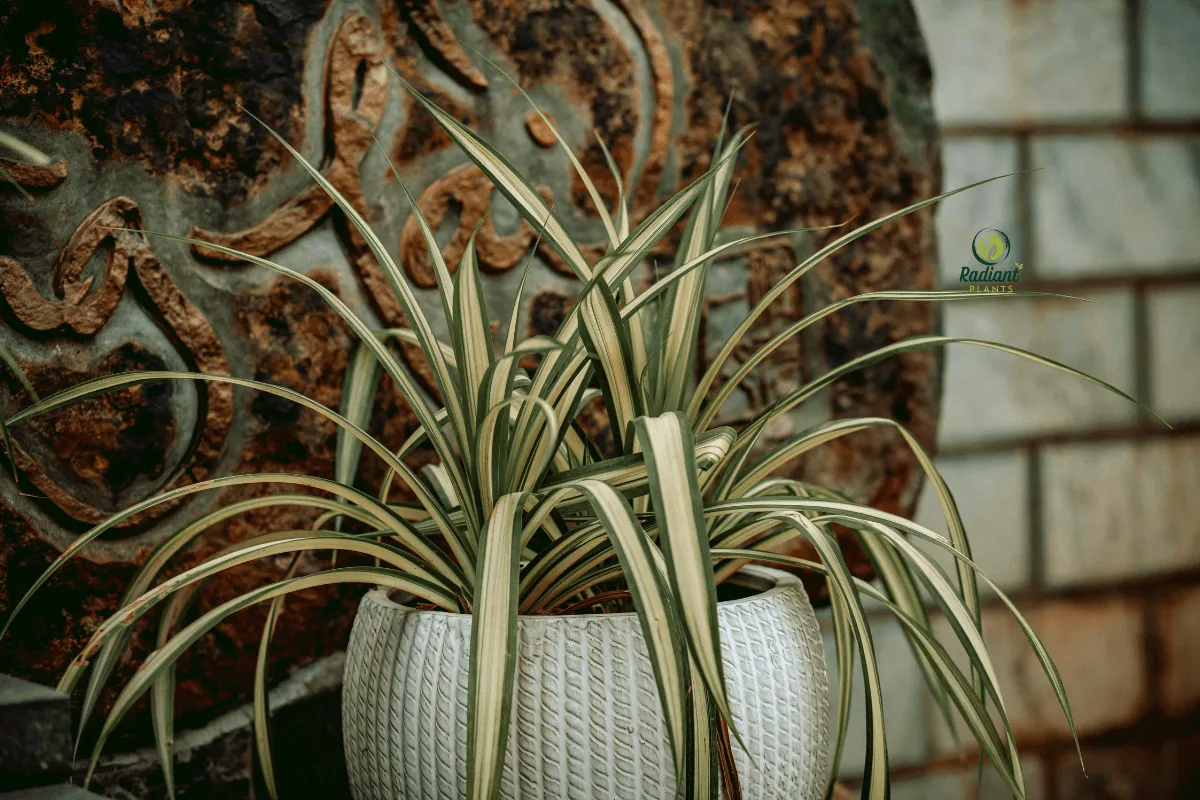
Have you ever noticed your once-vibrant spider plant looking rather dejected? Those crispy brown edges silently judging your plant parenthood abilities? Rest assured, you’re hardly alone in this predicament. Having rehabilitated numerous struggling Chlorophytum comosum specimens over the years, I’ve discovered that even these famously forgiving plants eventually reach their limits when care basics go awry.
The encouraging news? Nearly every spider plant predicament has a straightforward remedy. Let’s explore the most prevalent spider plant care missteps and transform those languishing greenery into the cascading, baby-producing showstoppers they’re naturally meant to become.
Table of Contents
In This Article
Common Spider Plant Care Mistakes


Watering Woes: The #1 Spider Plant Killer
Spider plants possess remarkable resilience, yet improper watering remains their primary downfall. Learning to navigate hydration challenges represents your greatest opportunity for nurturing thriving specimens.
Overwatering: Drowning with Kindness
That yellowing, droopy spider plant? You’re likely loving it to death with excessive moisture. Spider plants prefer drying out between waterings, and soggy soil rapidly leads to problems.
Signs your plant suffers from excessive moisture include:
- Yellowing leaves throughout the plant (not just at the tips)
- Soft, mushy stems near the soil line
- Wilting despite wet soil
- Fungus gnats are hovering around the pot
- Unpleasant, sour soil odor
Overwatering creates the perfect environment for root rot—a fungal condition that destroys the plant’s ability to absorb nutrients. Once root rot advances, salvation becomes challenging.
Your watering frequency should adjust with seasons. During active growth periods (spring/summer), spider plants typically need hydration every 7-10 days. In dormant periods (fall/winter), this extends to every 2-3 weeks.
The finger test remains foolproof: insert your index finger into the soil up to the second knuckle. Only water when the soil feels dry at this depth. This simple habit prevents countless plant casualties.
Underwatering: When Neglect Goes Too Far
While spider plants tolerate occasional neglect, persistent underwatering causes problems. A severely dehydrated spider plant displays:
- Curling, crisping leaf edges
- Browning extends beyond just the tips
- Slow or halted growth
- Soil pulling away from the pot edges
Inconsistent watering—swinging between drought and deluge—creates unnecessary stress. Establish a consistent checking routine rather than adhering to a rigid calendar schedule.
Reviving severely dehydrated specimens requires patience. Begin by thoroughly soaking the pot in room-temperature water for 30 minutes. Thereafter, establish a consistent watering pattern, allowing the top inch to dry between sessions.
Water Quality Issues
Spider plants demonstrate remarkable sensitivity to fluoride, chlorine, and other chemicals commonly found in municipal water supplies. These substances accumulate in soil over time, eventually resulting in those signature brown leaf tips that frustrate many plant enthusiasts.
Mitigate water quality issues through:
- Using rainwater (the premium choice)
- Employing distilled or filtered water
- Letting tap water sit uncovered for 24 hours before use (reduces chlorine)
- Avoiding softened water (which contains salts harmful to plants)
Many successful spider plant caretakers maintain separate watering containers for their houseplants, allowing chemical dissipation between waterings.
Light Location Mistakes: Finding the Sweet Spot
Spider plant care often goes wrong with lighting. These adaptable plants handle various light conditions, yet this adaptability often misleads caretakers into suboptimal placement decisions.
Too Much Direct Sunlight
Despite their accommodating nature, spider plants suffer in direct, intense sunlight. Signs of excessive light exposure include:
- Bleached, pale foliage
- Crispy, brown patches (different from tip browning)
- Stunted, compact growth
- Increased water requirements
Seasonal adjustments prove necessary as sun angles and intensities change throughout the year. A perfect winter location might become a scorching death trap by summer.
Optimal window orientations for spider plants typically include:
- East-facing: Morning sun, gentle and well-tolerated
- North-facing: Bright indirect light, excellent year-round
- West-facing: Requires placement 5+ feet from windows
- South-facing: Needs sheer curtain protection or significant distance from glass
Too Little Light: The Leggy Plant Problem
Insufficient light creates equally problematic outcomes. Spider plants stretching toward light sources develop elongated, weak stems with widely spaced, small leaves—a condition called etiolation.
Indicators your spider plant craves more brightness:
- Unusually long spaces between leaves
- Smaller than normal leaf development
- Fading variegation (particularly in variegated varieties)
- Leaning or stretching toward light sources
- Few or no baby plants are developing
For homes with limited natural light, consider supplemental grow lights. Modern LED options provide appropriate spectrum illumination without significant energy consumption or heat output. Position grow lights 12-18 inches above plants and operate them 8-12 hours daily for optimal results.
Soil and Potting Problems
Effective spider plant care begins below the surface with appropriate growing medium with appropriate growing medium and container selection.
Using the Wrong Potting Mix
Standard potting soil often proves too dense and moisture-retentive for spider plants, creating root aeration problems. These plants evolved in conditions with excellent drainage, and their care should reflect these natural preferences.
The ideal spider plant growing medium provides:
- Excellent aeration
- Appropriate moisture retention (without sogginess)
- Mild acidity (pH 6.0-6.5)
- Sufficient organic matter for nutrient supply
Create your own perfect spider plant soil blend by combining:
- 2 parts quality potting soil
- 1 part perlite or pumice
- 1 part orchid bark or coco coir
- Optional: 1/4 part worm castings for slow-release nutrition
This mixture creates abundant air pockets while maintaining sufficient moisture, mimicking the plant’s natural environment.
Pot Size and Material Matters
Spider plants perform better when slightly root-bound, producing more offshoots and displaying more compact growth when their roots encounter resistance.
Signs your spider plant requires repotting include:
- Roots visibly circling above the soil surface
- Roots emerging from drainage holes
- Water runs straight through without absorption
- Extremely rapid soil drying (1-2 days after thorough watering)
- Stunted growth despite proper care
- The plant is becoming top-heavy and unstable
When selecting containers, choose pots only 1-2 inches larger in diameter than the current pot. Oversized containers lead to excess soil moisture and potential root issues.
Regarding materials, terra cotta proves particularly beneficial for spider plants because:
- Its porosity provides additional soil aeration
- It draws excess moisture away from roots
- It helps prevent overwatering tendencies
- It provides weight/stability for top-heavy plants
Essential: Never select containers without drainage holes. No spider plant thrives in standing water, regardless of care excellence in other aspects.
Temperature and Environment Issues
Complete spider plant care includes managing environmental factors. These adaptable plants have temperature preferences that, when violated, lead to various problems.
Temperature Extremes
Spider plants thrive within the range of 65-75°F (18-24°C), tolerating occasional brief excursions beyond these boundaries. However, sustained temperature extremes stress these plants considerably.
Protect your spider plants from:
- Cold drafts from exterior doors, windows, or AC vents
- Hot, dry air from heating vents, radiators, or fireplaces
- Sudden temperature fluctuations
- Placement on windowsills that become extremely cold overnight
During winter months, move plants several inches away from windows, as glass surfaces transmit cold effectively. Similarly, maintain a distance from heating sources that create localized hot spots.
Humidity Challenges
While spider plants tolerate average home humidity better than many tropical houseplants, extremely dry air affects their appearance and health. Signs of humidity deficiency include:
- Brown leaf edges (often confused with watering or fertilizer issues)
- Leaf tips are turning brown and crispy despite proper watering
- Curling leaf edges
- Slowed growth during the heating season
Create microclimate humidity improvements through:
- Grouping plants (they release moisture through transpiration)
- Using pebble trays filled with water beneath pots (ensure pots rest on pebbles above the water level)
- Running humidifiers during particularly dry periods
- Keeping plants away from dehumidifiers and heating vents
Between humidification methods, pebble trays offer the best balance of effectiveness and convenience for most households.
Shocking Causes of Brown Spots on Plant Leaves & Quick Fixes!
Solutions for Healthier Spider Plants
Reviving Your Struggling Spider Plant
When faced with a declining spider plant, systematic rehabilitation yields impressive results.
The Complete Spider Plant Recovery Plan
- Assessment (Day 1):
- Examine roots by gently removing them from the pot
- Trim any soft, dark, or foul-smelling roots with clean scissors
- Note leaf damage patterns and overall condition
- Check for pests with a magnifying glass
- Reset (Day 1-2):
- Repot in fresh, appropriate soil mix
- Select a clean pot with proper drainage
- Water thoroughly with room-temperature filtered water
- Place in bright indirect light away from stress factors
- Stabilization (Weeks 1-2):
- Maintain consistent moisture (not wet, not bone dry)
- Provide stable temperature and humidity
- Avoid fertilizer during this recovery period
- Remove severely damaged leaves at the base with clean cuts
- Monitoring (Weeks 2-4):
- Watch for new growth (indicates successful recovery)
- Observe leaf color stabilization
- Note cessation of decline symptoms
- Gradually resume the normal care routine
- Reintroduction (Weeks 4-8):
- Begin very dilute fertilization (1/4 strength)
- Return the plant to its permanent location
- Resume regular care schedule
- Expect visible improvement milestones
With proper rehabilitation, most spider plants show significant improvement within 2-3 weeks and complete recovery within 2-3 months.
Pruning and Maintenance Techniques
Regular maintenance forms an essential part of proper spider plant care and prevents many common problems. Establish these practices:
Pruning Guidelines:
- Remove completely brown or yellow leaves at the base using clean, sharp scissors
- Trim partial leaf damage by following the natural leaf shape
- Remove spent flower stalks once they brown
- Thin overcrowded plants by removing some outer leaves
Maintenance Schedule:
- Weekly: Dust leaves with a microfiber cloth (improves photosynthesis)
- Monthly: Remove any damaged foliage
- Quarterly: Check for repotting needs
- Seasonally: Adjust watering/feeding schedule
These simple practices significantly improve appearance and prevent many common issues before they develop.
Spider Plant Propagation: Creating New Life
One of the most rewarding aspects of spider plant cultivation involves their prolific baby production, when conditions prove suitable.
Why Your Spider Plant Isn’t Producing Babies
Spider plant propagation issues frequently frustrate indoor gardeners. Several factors influence spiderette (baby plant) production:
Age and Maturity: Spider plants must reach sufficient maturity before producing offshoots. Typically, plants need 1-2 years of growth before reaching reproductive age. Newly purchased small specimens rarely produce babies immediately.
Environmental Triggers: Several conditions encourage spider plant reproduction:
- Mild root constriction (slightly pot-bound conditions)
- Bright, indirect light (critical factor)
- Proper fertilization during the growing season
- Day/night temperature differential of at least 10°F
- Seasonal light changes (mimicking natural cycles)
Seasonal Timing: Spider plants naturally produce most babies during spring and summer when day length increases. Production typically slows or stops during fall and winter, regardless of indoor conditions.
Successful Propagation Methods
Once your plant produces babies, several propagation approaches yield new plants:
Water Propagation:
- Select babies with visible root nodes
- Cut from the parent plant, leaving 1-2 inches of stem attached
- Place in clean water, changing water weekly
- Transplant to soil when roots reach 1-2 inches
- Keep the soil consistently moist for 2 weeks after transplanting
Soil Propagation:
- Select babies with small roots already forming
- Either cut from the parent plant or leave attached
- Pin the baby into contact with the soil surface in the nearby pot
- Keep the soil consistently moist
- Sever connection to parent after 3-4 weeks of establishment
Success Expectations:
- Water method: 90 %+ success rate, but requires transition shock management
- Soil method: 75-85% success rate, but less transition shock
- Attached method: Nearly 100% success rate, but requires proximity
New spider plants typically establish within 4-6 weeks and begin significant growth within 2-3 months.
Pest Prevention and Treatment
Comprehensive spider plant care includes pest management. While generally resistant, these plants occasionally suffer from insect infestations, particularly when stressed by other care factors.
Common Spider Plant Pests
Spider Mites: These nearly microscopic pests cause stippled, discolored leaves and fine webbing in severe cases. Early detection requires close inspection of leaf undersides.
Treatment options include:
- Thoroughly washing leaves with room-temperature water
- Applying insecticidal soap weekly for 3 applications
- Increasing humidity (spider mites prefer dry conditions)
- Applying neem oil for persistent infestations
Mealybugs: These white, cottony pests cluster in leaf axils and undersides. Their honeydew secretions often lead to sooty mold development.
Effective treatments include:
- Removing visible bugs with alcohol-dipped cotton swabs
- Spraying with insecticidal soap
- Systemic treatments for severe infestations
- Isolating affected plants immediately
Aphids: Less common but occasionally problematic, these small pear-shaped insects cluster on new growth and tender areas.
Control methods include:
- Strong water spray to dislodge colonies
- Insecticidal soap applications
- Neem oil treatments
- Beneficial insect introduction for larger collections
Preventative Pest Measures
Preventing infestations proves far easier than treating established problems:
Creating Hostile Environments:
- Maintain appropriate humidity levels
- Ensure good air circulation
- Avoid plant stress through proper care
- Clean leaves regularly to remove dust and potential pests
- Follow consistent spider plant care practices to maintain overall plant health
Regular Inspection Routine:
- Weekly examinations of leaf undersides
- Immediate isolation of suspicious plants
- Preventative treatments during high-risk seasons
- Special attention after new plant acquisitions
Quarantine Protocols:
- Keep new plants separated for 3-4 weeks
- Inspect thoroughly before introducing to the collection
- Preventative treatments before integration
- Separate tools and watering cans for quarantined specimens
With vigilant prevention, most spider plants remain pest-free throughout their lives.
Spider Plant Care Reference Tables
Spider Plant Care Quick Reference Guide
Care Aspect | Ideal Conditions | Common Mistakes | Quick Solutions |
|---|---|---|---|
Light | Bright indirect light | Direct sun or deep shade | Allow the top 1″ to dry out |
Water | Group plants or use a pebble tray | Overwatering or using tap water | Use filtered water, and check the soil before watering |
Soil | Well-draining, slightly acidic | Heavy, dense potting soil | Mix in perlite and peat moss |
Temperature | 65-75°F (18-24°C) | Exposure to drafts or heaters | Keep away from doors, windows, and heat sources |
Humidity | 40-60% | Dry air below 30% | Dilute balanced fertilizer monthly in the the growing season |
Fertilizer | Half-strength fertilizer only for spring-summer | Over-fertilizing | Dilute balanced fertilizer monthly in the growing season |
Troubleshooting Spider Plant Problems
Symptom | Probable Cause | Solution |
|---|---|---|
Brown leaf tips | Fluoride in water or dry air | Use distilled water, increase humidity |
Yellow leaves | Overwatering | Reduce watering, check for root rot |
Pale, bleached leaves | Too much direct sunlight | Insufficient light or an immature plant |
No baby plants | Move to a brighter location | Increase light, be patient with young plants |
Leggy, stretched growth | Insufficient light | Root-bound or poor soil |
Curling leaves | Temperature stress or pests | Check for drafts and inspect for pests |
Stunted growth | Repot with fresh soil in the larger container | Repot with fresh soil in larger container |
Becoming a Spider Plant Whisperer
Your journey toward mastering spider plant care unfolds gradually, but avoiding these widespread mistakes accelerates your progress considerably. Remember that these resilient plants genuinely want to flourish—they simply require you to understand their fundamental requirements.
With appropriate watering practices, lighting conditions, and environmental considerations, your spider plants will reward your attentiveness with luxuriant growth, improved indoor air quality, and abundant baby plants to share with friends and family members. What once languished as a struggling specimen can transform into the centerpiece of your indoor garden with just a few thoughtful adjustments to your care approach.
The most successful plant enthusiasts develop relationships with their greenery—observing subtle changes, responding to emerging needs, and celebrating growth milestones. Your spider plants communicate constantly through their appearance and growth patterns. Learning to interpret these signals transforms plant care from guesswork into meaningful interaction.
Why not implement one improvement today? Select the most relevant issue from this guide and make that single adjustment. Then watch as your spider plant responds with renewed vigor and growth. Small, consistent improvements yield remarkable long-term results in the rewarding world of houseplant cultivation.
With these spider plant care techniques mastered, you’ll soon be sharing your expertise—and baby plants—with impressed friends and family.
FAQs About Spider Plant Care
How often should I water my spider plant?
Spider plant care requires allowing the top inch of soil to dry out between waterings. Typically, this means watering once every 7-10 days in summer and every 14-21 days in winter, but always check soil moisture first.
Why does my spider plant have brown tips?
Brown tips on spider plants usually indicate fluoride or chlorine in tap water, low humidity, or salt buildup from fertilizer. Proper spider plant care includes using filtered water and maintaining adequate humidity.
When should I repot my spider plant?
Repot your spider plant when it becomes root-bound, typically every 1-2 years. Spider plant care best practices suggest repotting in spring using well-draining soil and a pot 1-2 inches larger than the current one.
Why isn’t my spider plant producing babies (spiderettes)?
Spider plants need to reach maturity (typically 1-2 years old) and receive adequate light to produce babies. Proper spider plant care with bright indirect light and slight pot-binding often triggers spiderette production.
Can spider plants survive in low light?
While spider plants can tolerate low light conditions, optimal spider plant care includes bright indirect light. In low light, growth will slow, variegation may fade, and the plant will produce fewer or no babies.
Are spider plants safe for pets?
Yes, spider plants are non-toxic to cats and dogs according to the ASPCA, making them excellent choices for pet owners concerned about plant safety. This is an important consideration in comprehensive spider plant care.
How do I propagate spider plant babies?
Spider plant care includes easy propagation by planting the baby spiderettes while still attached to the mother plant, or by cutting them off and rooting in water or directly in soil.
Can I put my spider plant outside?
Spider plants can be placed outdoors in warm months in dappled shade, but proper spider plant care means bringing them inside when temperatures drop below 55°F (13°C).
COMPLETE Spider Plant Care – Watering, Lighting, Repotting, Propagation & More -Houseplant Care
Can you be more specific about the content of your article? After reading it, I still have some doubts. Hope you can help me.
Thanks for your comment! 😊 I’d be happy to help. Could you let me know which part of the article you’re unsure about? Tell me your specific question, and I’ll explain it in more detail so everything is clear for you. 🌿💚