How Do You Repot Aloe Plants for Healthy New Growth?
Repotting an aloe plant is simpler than it looks—and when you do it right, the payoff is a burst of fresh, healthy new growth. If you’ve been wondering how do you repot aloe plants without stressing them out, you’re in the perfect place. Aloe is a resilient, sculptural beauty, but it thrives when given the right soil, pot size, and a little extra attention during its transition to a new home.
In this guide, you’ll learn exactly when to repot your aloe, the pot size it prefers, how to avoid common mistakes, and the step-by-step method experts use to keep roots healthy and strong. You’ll also discover how to separate aloe pups, what to do after repotting, and how much sun your plant needs while it settles in.
Whether your aloe is rootbound, top-heavy, or simply overdue for fresh soil, this guide will give you the confidence to repot it with ease—and help it bounce back better than ever. Let’s get your aloe thriving in its new space.
Table of Contents
In This Article
🌱 Why Repotting Matters for Aloe Plants
Repotting is one of the simplest ways to keep your aloe healthy, vibrant, and growing steadily—and it’s a key part of understanding how do you repot aloe plants correctly. While aloe is known for being low-maintenance, it still relies on the right soil structure, drainage, and root space to thrive. Over time, the soil breaks down, compacts, and loses the airflow that succulents depend on. This makes repotting not just optional, but essential for long-term aloe root health.
One of the biggest repotting benefits is improved drainage. Aloe plants are highly sensitive to excess moisture, and old or dense soil can trap water around the roots, increasing the risk of root rot. Studies from university horticulture programs consistently show that succulents potted in fast-draining mixes experience fewer fungal issues and grow up to 30% faster compared to plants kept in standard potting soil. Repotting with a well-aerated mix—such as cactus soil blended with perlite or pumice—creates the ideal environment for healthy growth.
Repotting also prevents overcrowding. As aloe matures, it produces offsets (or “pups”) that compete for space and nutrients. Too many plants in one pot can lead to stunted growth, nutrient depletion, and uneven moisture distribution. Refreshing the pot not only allows you to separate pups but also restores access to fresh, nutrient-rich soil.
The process itself is simple: choose a slightly larger pot, refresh the soil, check the roots, and give the plant space to regain energy. This foundational step supports successful propagation, healthier leaf development, and better water absorption.
For more guidance on root care, explore our Root Rot Treatment guide, and browse the Plant Care Tips category for additional succulent care essentials on RadiantPlants.com.
🌱 When Should I Repot My Aloe Vera Plant?
Knowing when to repot aloe is just as important as understanding how do you repot aloe plants. Aloe plants don’t need frequent repotting, but there are clear, easy-to-spot signals that tell you it’s time for a fresh start. One of the most common signs aloe needs repotting is when roots begin poking out of the drainage holes or circling tightly around the base of the soil. This indicates a rootbound aloe, which struggles to absorb water and nutrients efficiently.
Another sign is soil that dries out unusually fast. When the potting mix becomes compacted or depleted, it loses its ability to retain moisture long enough for the roots to absorb it. You might also notice your aloe becoming top-heavy or leaning to one side—often a clue that the plant has outgrown its current pot and needs more stability.
The best time to repot is during spring or early summer, when aloe enters its active growth phase. According to horticultural extension services like the University of Florida IFAS, succulents recover more quickly from root disturbance when daytime temperatures rise and light levels are strong. Repotting during dormancy or winter months can slow recovery and increase the risk of root stress.
Timing matters because a healthy recovery window ensures your aloe can rebuild its root system, adjust to new soil conditions, and resume steady growth with minimal shock. If you uncover mushy or discolored roots during repotting, this could signal early root rot—an issue you can learn to identify and treat in our Root Rot Treatment guide on RadiantPlants.com.
For seasonal planting tips and propagation guidance, explore our Plant Care Tips category to support your aloe through every stage of growth.
🌱 What Pot Size Do Aloe Plants Need?
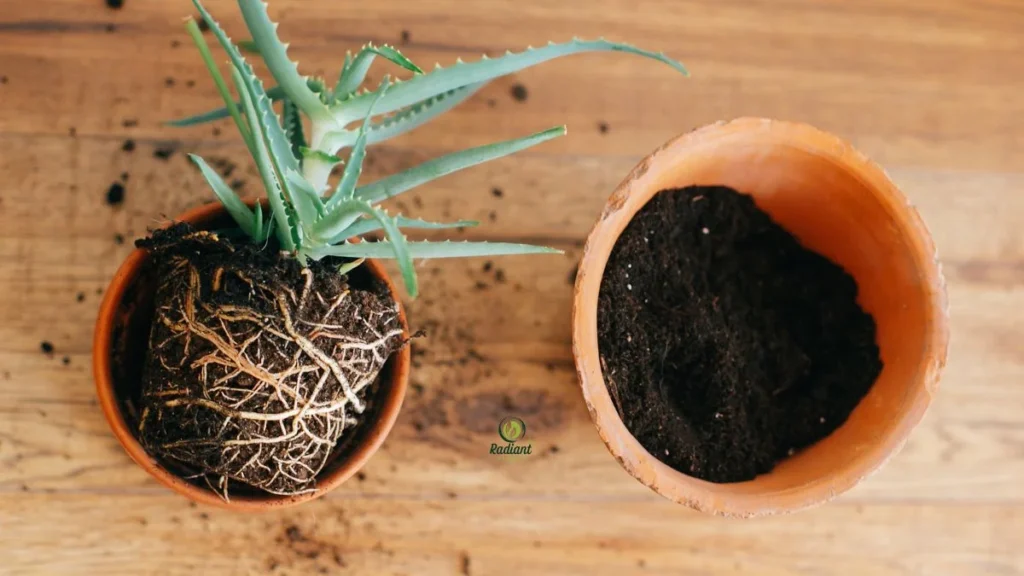
Choosing the right pot is one of the most important steps in understanding how do you repot aloe plants successfully. Many beginners assume a bigger pot means more room to grow, but aloe plants don’t work that way. In fact, the best pot size for aloe is one that’s only 1–2 inches wider than the root ball. This slight increase in space keeps the soil volume manageable and encourages steady, healthy root development.
So, do aloe plants like small or big pots? The answer is clear: aloe prefers smaller, snug pots rather than oversized containers. When the pot is too large, the soil holds excess moisture that the roots can’t use quickly enough. This slow-drying environment significantly increases the risk of fungal issues and root rot—one of the most common problems cited by horticulture extension services like UC Davis. Smaller pots help maintain the fast drainage succulents need while supporting structural stability as the plant grows.
Material also matters. A classic terracotta pot for aloe is ideal because it’s porous, allowing moisture to evaporate more quickly and helping the soil stay airy. Ceramic pots with drainage holes are another great option, especially if you want a more decorative look for indoor styling. Plastic pots can work, but they retain moisture longer, so watering needs closer attention.
When choosing an aloe potting container, consider your aesthetic goals as well. If you love designing green corners at home, explore our Interior Greenery & Styling category for pot ideas that complement your space. And for guidance on keeping moisture levels balanced after repotting, the Plant Care Tips category offers helpful watering basics and succulent care insights on RadiantPlants.com.
Selecting the right pot gives your aloe the perfect foundation to settle, grow, and thrive.
🌱 Do Aloe Plants Like to Be Root Bound?

Aloe plants can tolerate being mildly rootbound, but they don’t prefer it—especially if your goal is healthy, consistent growth. Many rootbound succulents continue to survive in tight spaces, but aloe is different from tougher desert species like haworthia. Once the roots begin circling the pot or pressing against the walls, the plant starts experiencing subtle aloe root stress that affects water absorption and nutrient uptake.
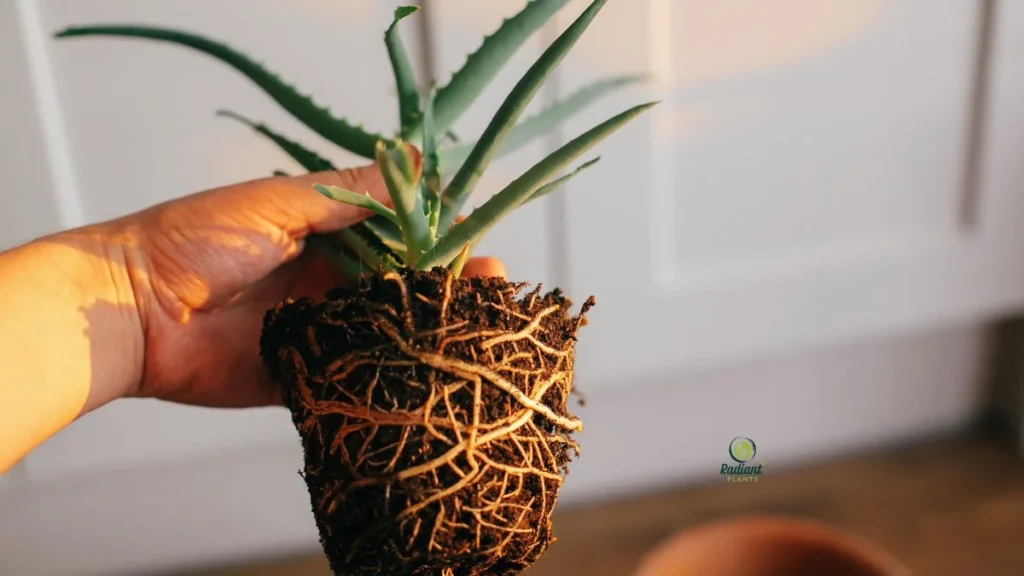
A slightly rootbound aloe is usually fine for a short period, but severely rootbound plants face real risks. The most common is dehydration, as tightly packed roots can’t access moisture evenly. You might notice the leaves curling inward, becoming thin, or developing pale tips. In more extreme cases, overcrowded roots lead to stunted growth, top-heavy leaning, and soil that dries out within hours. According to horticultural guidance from institutions like Iowa State University Extension, restricted roots limit long-term plant vigor and make succulents more susceptible to disease.
Inspecting the roots safely is an essential step when learning how do you repot aloe plants. Start by gently loosening the soil around the edges with your fingers, then tilt the plant sideways and ease it out while supporting the base. If the roots form a tight spiral or mat, it’s time to repot. Healthy aloe roots are firm and tan; black, mushy, or stringy roots may indicate early rot—something you can troubleshoot using our Root Rot Treatment guide on RadiantPlants.com.
For more general succulent care techniques, including watering habits and recovery tips, explore our succulent articles in the Plant Care Tips category. Proper root space makes all the difference in helping your aloe grow stronger, fuller, and more resilient.
🌱 Should I Put Rocks in the Bottom of My Aloe Vera Plant Pot?

It’s a common belief that adding rocks to the bottom of a pot will improve drainage—but this long-standing drainage myth has been debunked by horticulture experts. Research from institutions like Washington State University shows that a rock layer actually slows drainage instead of improving it. Water collects above the rocks, creating a perched water table that keeps the soil wetter, not drier. And for a succulent like aloe, that trapped moisture is one of the fastest ways to trigger root rot.
So when you’re learning how do you repot aloe plants, skip the rocks entirely. True drainage comes from two things:
- A well-draining soil mix, and
- A pot with proper drainage holes.
Aloe vera naturally grows in sandy, gritty soil where water drains quickly. To mimic those desert conditions, the best soil mix for aloe combines:
- Cactus or succulent mix (your base),
- Perlite or pumice (to increase airflow), and
- Optional: a small amount of coarse sand for structure.
This combination prevents compaction, keeps roots oxygenated, and allows moisture to move freely through the pot. When repotting, gently loosen the old soil around the roots, fill the new container with your mix, and water lightly after planting. With the right medium, your aloe adapts quickly and resumes healthy growth.
If you want to go deeper into optimizing soil and drainage for all your houseplants, explore our Plant Care Tips section on Radiant Plants. You may also find our in-depth guide on indoor plant drainage essentials helpful if you have it published. These resources make the repotting process smoother and help you avoid common watering mistakes.
🌱 Does Aloe Vera Need Full Sun or Shade?

When learning how do you repot aloe plants, understanding aloe’s sunlight needs is just as important as choosing the right soil and pot. Aloe thrives in bright, indirect light or partial sun, mimicking the semi-arid environments where it naturally grows. Too little light can slow growth and cause pale, stretched leaves, while too much direct sunlight—especially in harsh afternoon hours—can lead to leaf burn or sun-stress spots.
Sun-stress signs include brown or reddish leaf tips, crispy edges, and shriveled leaves. Conversely, lack-of-light signs are soft, elongated leaves that lean toward the nearest light source. Indoor growers often notice aloe leaves turning lighter green or stretching when the plant isn’t getting enough bright light. Observing these cues helps you adjust placement before your aloe experiences long-term stress.
After repotting, it’s essential to give aloe a gentle light transition. Freshly disturbed roots are more vulnerable to stress, so placing your aloe in softer, indirect light for the first few days allows it to acclimate. Gradually move it back to its preferred bright spot once it shows signs of recovery, like firmer, upright leaves.
For indoor styling and positioning tips, check out our Interior Greenery & Styling category for ideas on integrating aloe into your living spaces. You may also find our other succulent light guides useful for balancing natural and artificial lighting conditions. Providing the right light ensures your aloe remains vibrant, healthy, and ready to flourish in its new pot.
🌵 How Do You Repot Aloe Plants? Step-by-Step Guide

Repotting aloe may seem intimidating, but with the right approach, it’s straightforward. This repotting aloe step-by-step guide will help your succulent thrive in its new home while minimizing stress.
What You’ll Need (Tools & Supplies)
- Pot size: Slightly larger than the root ball with drainage holes.
- Soil mix: Cactus or succulent mix blended with perlite or pumice.
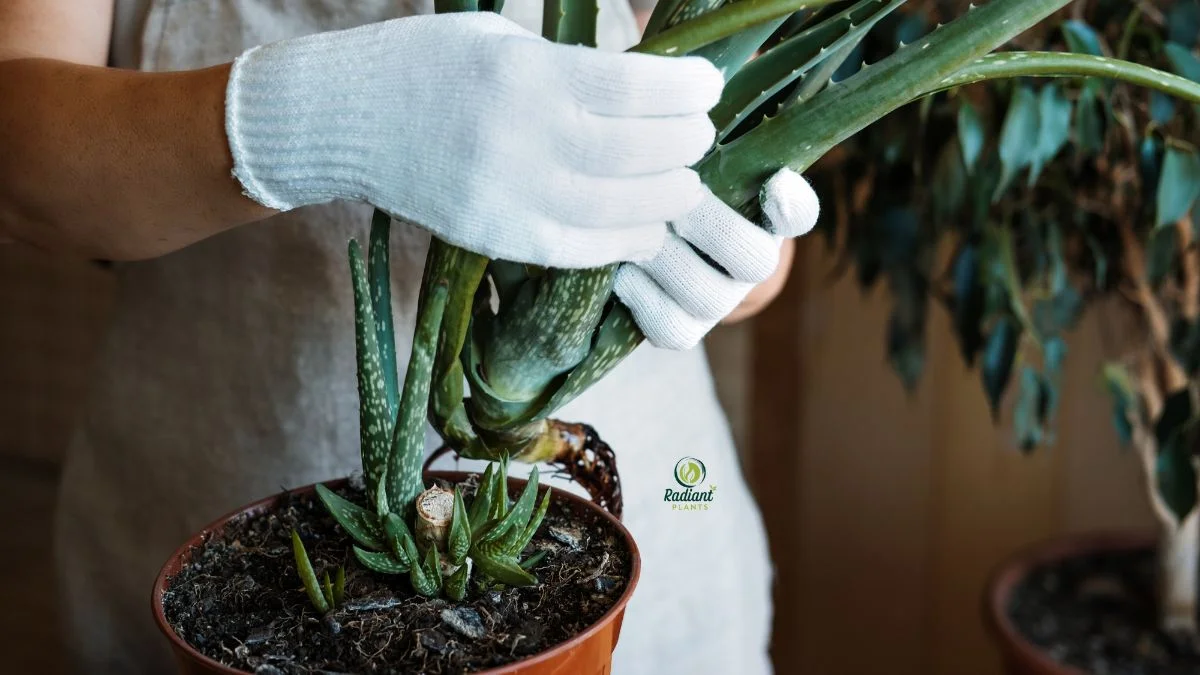
- Gloves: Protect your hands from sharp leaf edges.
- Optional: Cinnamon to dust any minor root cuts, helping prevent infection.
Step 1 — Prepare the New Pot & Soil
Fill the pot about one-third with your soil mix. Ensure it’s light and well-aerated to promote aloe root health.
Step 2 — Remove Aloe Safely from Its Old Pot
Gently loosen the soil around the edges and tilt the plant sideways. Support the base as you ease it out to avoid damage.
Step 3 — Inspect and Trim the Roots
Check for mushy, black, or broken roots. Trim damaged sections carefully. Dust cuts with cinnamon if desired. (See our Root Rot Treatment guide for detailed advice.)
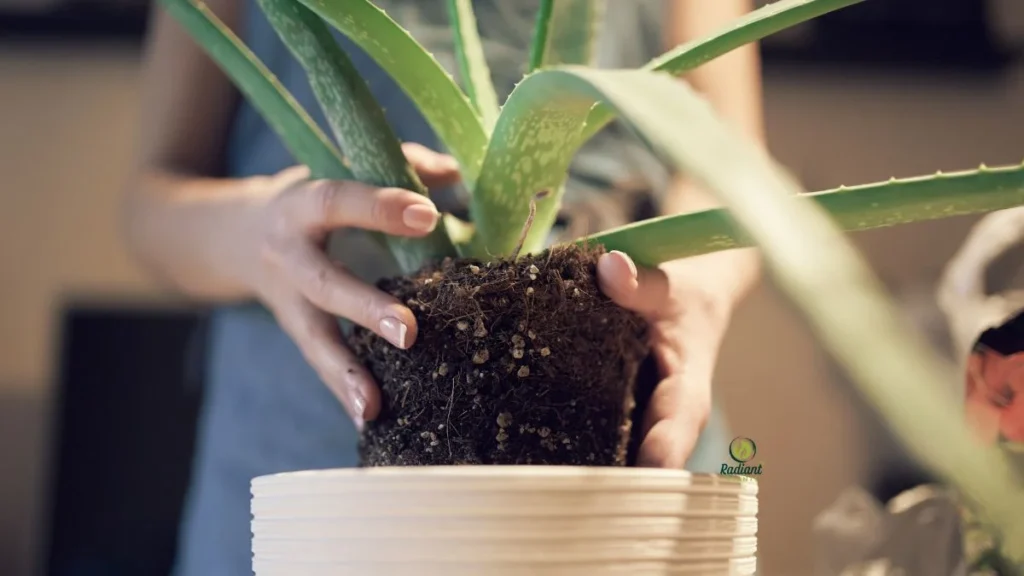
Step 4 — Set the Aloe in Its New Pot Correctly
Place the plant so the base sits slightly below the rim. Keep it upright and stable.
Step 5 — Fill, Settle, and Secure the Plant
Add soil around the roots, pressing lightly to eliminate air pockets. Avoid compacting too hard.
Step 6 — First Watering After Repotting
Wait 3–5 days before watering to allow minor root wounds to callus. Then water lightly and let excess drain.
Step 7 — Light, Care, & Recovery Tips
Place aloe in bright, indirect light initially. Gradually reintroduce to partial sun. Monitor for stress signs, such as drooping leaves or discoloration, and adjust care as needed.
Following this aloe repotting tutorial ensures your plant establishes quickly, promoting healthy leaves and robust roots. For more tips on watering and ongoing care, check out our Plant Care Tips category on RadiantPlants.com.
🌿 How to Repot Aloe Pups (Offsets)
Aloe plants naturally produce small offshoots, known as pups or offsets, which can grow into independent plants. Learning how do you repot aloe plants includes understanding aloe pups propagation, a simple way to expand your succulent collection or share plants with friends.
What pups are: Aloe pups are miniature clones that emerge from the base of the parent plant. They share the same characteristics and growth patterns but are not strong enough to survive independently until they develop a small root system. Observing healthy pups is essential before separating them; they should be at least 2–3 inches tall and have a few leaves to ensure survival.
When to separate them: Timing is crucial. The best moment to separate pups is during repotting of the parent aloe, ideally in spring or early summer. This period aligns with the plant’s active growth, allowing both parent and pups to recover quickly. Avoid removing tiny or weak offsets, as they may fail to thrive.
How to pot pups for successful rooting: Carefully lift the pup from the parent plant using a clean, sharp knife if needed, making sure it has some roots attached. Let any cut surfaces callus for a day or two to prevent rot. Prepare a small pot with a well-draining soil mix, such as cactus soil with perlite or pumice, and plant the pup just deep enough to support its leaves. Water sparingly until the roots establish, then gradually increase moisture as the plant grows.
Propagating aloe pups not only ensures the long-term health of your parent plant but also allows you to style your indoor spaces with multiple small succulents. For more inspiration, explore our Interior Greenery & Styling section, or check out our propagation guides for additional succulent tips.
🌱 Common Mistakes When Repotting Aloe Plants
Even experienced plant lovers can make aloe repotting mistakes that slow growth or damage roots. Understanding these pitfalls ensures your aloe thrives after its move to a new pot.
One common error is choosing pots that are too large. Oversized containers hold excess soil, which retains water longer than aloe roots can absorb. This creates a high risk of root rot. Experts recommend a pot only 1–2 inches wider than the root ball to maintain proper drainage and encourage healthy root expansion.
Another frequent mistake is using moisture-retentive soil. Regular potting soil often holds too much water for succulents. Aloe prefers a well-draining mix like cactus soil combined with perlite or pumice. Using dense soil can suffocate roots and lead to fungal issues.
Repotting too often is also harmful. Aloe is a slow-growing plant, and frequent disturbances stress the roots unnecessarily. Only repot when signs like root-bound growth, top-heavy leaves, or deteriorating soil indicate it’s needed.
Many beginners water immediately after repotting, which can shock the plant. Aloe roots need a short recovery period—typically 3–5 days—before the first light watering. Watering too soon increases the risk of rot, especially in cooler temperatures.
Finally, exposing freshly repotted aloe to harsh, direct sunlight can scorch sensitive leaves. Start with bright, indirect light and gradually reintroduce partial sun to allow the plant to acclimate.
Avoiding these mistakes helps ensure your aloe grows strong and resilient. For tips on preventing overwatering and other root-related issues, check out our Root Rot Treatment guide and explore our Plant Care Tips category for more detailed succulent care advice on RadiantPlants.com.
🌿 Aftercare: How to Help Your Aloe Thrive Post-Repotting
Proper aloe care after repotting is essential for helping your plant recover quickly and establish strong roots. One of the first rules is patience—avoid watering immediately. Wait 3–5 days before giving your aloe its first light watering. This allows minor root injuries to callus and reduces the risk of root rot. Once you resume watering, do so sparingly and ensure the soil drains well.
Light is another critical factor. After repotting, aloe prefers bright, indirect light rather than harsh direct sun. Sudden exposure to full sunlight can cause leaf burn, especially if the plant is adjusting to new soil and a different pot. Gradually reintroduce it to partial sun over a week or two to prevent stress. Observing leaf firmness and color is a simple way to monitor how well your aloe is acclimating.
Fertilizing should also be delayed. Aloe is slow-growing and doesn’t need much nutrition immediately after repotting. Wait 4–6 weeks before adding a light, balanced succulent fertilizer. Over-fertilizing too soon can harm sensitive roots and stunt growth.
Finally, keep an eye out for signs of shock, including drooping, yellowing, or curling leaves. Minor adjustments in light, water, or temperature often help the plant recover. Remember, aloe is resilient, and gentle care during this period ensures it bounces back stronger and healthier.
For additional guidance on watering, lighting, and overall succulent care, visit our Plant Care Tips category. You can also explore Interior Greenery & Styling for ideas on the best placement to showcase your newly repotted aloe while keeping it safe and thriving.
FAQs: How Do You Repot Aloe Plants
When is the best time to repot an aloe plant?
The ideal time to repot aloe is in spring or early summer, during its active growth phase. If you’re wondering how do you repot aloe plants, look for signs like a rootbound aloe, roots emerging from drainage holes, or top-heavy growth. Repotting at this time ensures faster recovery and healthier new growth. Check our Plant Care Tips category for more.
Should I water my aloe immediately after repotting?
No—wait 3–5 days before watering. Knowing how do you repot aloe plants includes understanding post-repotting care to avoid overwatering aloe. Once the roots settle, water lightly and allow the soil to dry between sessions.
What type of pot is best for aloe?
When figuring out how do you repot aloe plants, choose a pot slightly larger than the root ball with drainage holes. Terracotta or ceramic pots allow airflow and prevent waterlogging. Avoid oversized pots or plastic containers that retain excess moisture.
How do I repot aloe pups (offsets)?
How do you repot aloe plants with pups? Separate offsets that are 2–3 inches tall with a few leaves. Gently remove with roots intact, let cuts callus, and plant in a well-draining soil mix. Water sparingly and provide bright, indirect light until established.
Can aloe survive if it’s slightly rootbound?
Yes, aloe tolerates being mildly rootbound. When learning how do you repot aloe plants, inspect the roots carefully. Severely rootbound roots can cause dehydration and stunted growth, so trim damaged sections to encourage healthy aloe root health. For guidance, see our Root Rot Treatment guide.
Repotting aloe plants is a simple yet powerful way to ensure healthy growth, vibrant leaves, and strong roots. By understanding how do you repot aloe plants, you can avoid common mistakes like oversized pots, moisture-retentive soil, and overwatering, while giving your succulent the ideal environment to thrive. Proper pot selection, well-draining soil, careful root inspection, and gentle post-repotting care all contribute to a resilient, long-lasting aloe plant.
Whether you’re separating pups, refreshing old soil, or giving a rootbound aloe a new home, each step helps your plant flourish and even encourages propagation for future growth. Observing signs like top-heavy leaves, visible roots, or rapid soil drying ensures you repot at just the right moment.
Ready to take your aloe care to the next level? Start repotting confidently today and watch your aloe bounce back stronger than ever. For ongoing tips on watering, light, and indoor styling, explore our Plant Care Tips category, and discover creative ways to showcase your aloe in your home with Interior Greenery & Styling.
Your point of view caught my eye and was very interesting. Thanks. I have a question for you.
Thanks for sharing. I read many of your blog posts, cool, your blog is very good.