
Picture this: a lush, glossy-leaved rubber plant standing majestically in your living room, its deep green foliage catching the light just right. There’s something deeply satisfying about nurturing this tropical beauty in your own home—watching new leaves unfurl, seeing it grow taller month by month.
I still remember bringing home my first Ficus elastica, a tiny 6-inch cutting that has now transformed into a stunning 5-foot indoor tree that draws compliments from everyone who visits. That journey wasn’t without challenges, though. There were the yellow leaves that had me worried I’d killed it, the mysterious brown spots that appeared one summer, and that time it dropped three leaves after I moved it across the room.
But that’s the beauty of rubber plants—they’re surprisingly resilient while being remarkably communicative about their needs. Each challenge taught me something valuable about these magnificent houseplants.
Whether you’re considering your first rubber plant purchase, already have one that’s struggling, or simply want to elevate your plant from surviving to thriving, this guide reveals the essential secrets that professional growers and passionate plant enthusiasts have mastered.
These aren’t complicated botanical techniques requiring special equipment—just straightforward, practical approaches that address what rubber plants truly need to flourish indoors. From watering wisdom to light requirements, soil secrets to humidity hacks, these ten insights will transform your rubber plant experience.
Your journey to rubber plant success starts here. Let’s dive into the secrets that will help you grow a spectacular, healthy specimen that becomes the centerpiece of your indoor garden.
Table of Contents
In This Article
Understanding Your Rubber Plant: Meet Ficus Elastica


The Fascinating Origins of the Rubber Plant
The rubber plant may now be a beloved houseplant, but its story begins thousands of miles away in the tropical rainforests of Southeast Asia. Native to regions spanning from India through Malaysia and Indonesia, these magnificent plants grow as towering trees in the wild, often reaching heights of over 100 feet. They thrive in the warm, humid conditions of the forest understory, where they receive dappled sunlight filtering through the canopy above.
In their natural habitat, rubber plants develop an interesting growth pattern. They begin life as epiphytes, growing on other trees, sending their aerial roots down to the forest floor until they establish themselves as independent plants. This adaptable nature is partly why they’ve become such successful houseplants—they’re naturally inclined to make the most of their environment.
The plant earned its common name from its milky white sap called latex, which was historically harvested for making rubber products before synthetic alternatives became widespread. European botanists first documented these plants in the late 1700s, and by the Victorian era, they had become fashionable houseplants across Europe and America.
Today’s indoor rubber plants bear little resemblance to their wild ancestors in size, but they retain the same striking foliage and adaptability that have made them household favorites for generations.
Popular Rubber Plant Varieties for Indoor Growing
While shopping for your rubber plant, you’ll encounter several distinct varieties, each with unique characteristics that might better suit your home and aesthetic preferences:
Ficus elastica ‘Robusta’ stands as the classic variety most people envision when thinking of rubber plants. These specimens feature large, oval-shaped leaves in deep, glossy green that can reach 8-12 inches long. The substantial leaves make a bold statement in any room, and this variety tends to grow quite vigorously under proper care.
Ficus elastica ‘Burgundy’ brings dramatic flair with its intense color. The leaves emerge as a deep reddish-purple, eventually maturing to a captivating burgundy-green. The undersides remain an eye-catching maroon color that adds visual interest, especially when light shines through them. Many plant enthusiasts cherish this variety for the rich color it brings to plant collections.
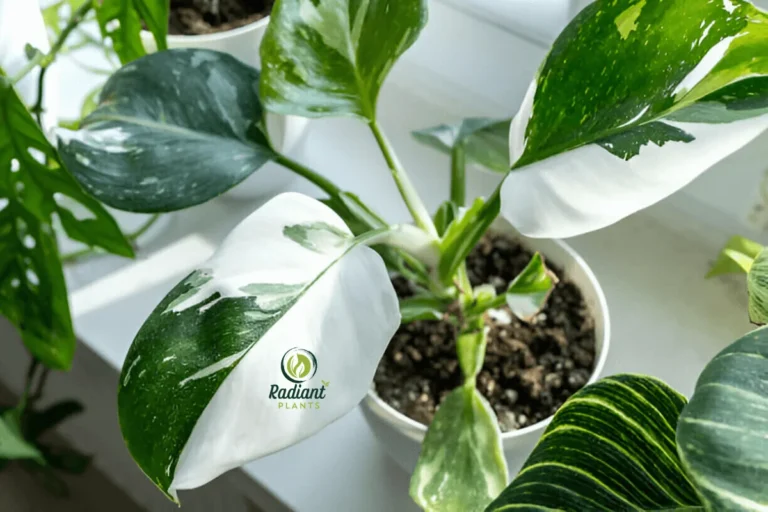
Ficus elastica ‘Tineke’ offers striking variegation with splashes of cream, green, and occasionally pink tones painted across each leaf. New growth often displays beautiful pink hues that gradually fade as leaves mature. These plants require slightly brighter light than their solid-colored cousins to maintain their distinctive patterning.
Ficus elastica ‘Ruby’ presents perhaps the most colorful option, with leaves streaked in various shades of pink, cream, and green. New leaves emerge with a dramatic pinkish-red tint that gradually shifts as they age. Like other variegated varieties, ‘Ruby’ needs more light to maintain its vibrant coloration.
Variety | Leaf Color | Light Needs | Care Difficulty | Special Considerations |
|---|---|---|---|---|
Robusta | Deep green | Medium | Easy | Most forgiving variety |
Burgundy | Dark burgundy-green | Medium | Easy-Medium | Colors fade in low light |
Tineke | Green with cream variegation | Medium-High | Medium | Loses variegation in low light |
Ruby | Pink, cream and green | High | Medium-Hard | Requires bright indirect light for colors |
Secret #1: Mastering the Art of Rubber Plant Watering
The Perfect Watering Schedule
Perhaps no aspect of rubber plant care causes more confusion than watering. These plants walk a fine line—they dislike both soggy soil and bone-dry conditions. Finding that sweet spot means understanding their natural drought tolerance while respecting their need for consistent moisture.
Rubber plants prefer a cycle of drying slightly between waterings. During the growing season (spring and summer), this typically translates to watering once every 7-10 days, but this frequency varies dramatically based on your home’s conditions. Winter typically requires cutting back to watering every 2-3 weeks as the plant’s growth slows and it requires less moisture.
Rather than adhering to a rigid schedule, learn to check your plant’s soil moisture level. The finger test provides a reliable method—simply insert your finger about 2 inches into the soil. If you feel moisture, hold off on watering. If the soil feels dry at this depth, it’s time to water thoroughly.
When you do water, do so deeply until water runs from the drainage holes, then allow all excess water to drain away completely. Never let your rubber plant sit in standing water, as this almost guarantees root rot—a common killer of otherwise healthy specimens.
Watch for warning signs that might indicate improper watering. Yellowing leaves often signal overwatering, while brown, crispy leaf edges typically suggest underwatering. Leaves that droop but recover quickly after watering indicate you’ve waited slightly too long between waterings.
Water Quality Matters
The kind of water you provide matters nearly as much as your watering frequency. Rubber plants can be sensitive to certain chemicals commonly found in tap water, particularly chlorine and fluoride, which may accumulate in the soil and eventually damage roots or cause brown leaf tips.
If possible, use filtered water, rainwater, or tap water that has been left to sit uncovered for 24 hours (allowing chlorine to dissipate). Distilled water works too, though it lacks minerals that can benefit plant growth.
Always water your rubber plant with room temperature water. Cold water shocks the root system and can lead to stress responses like leaf drop. This small adjustment—simply allowing water to reach room temperature before applying—often makes a surprising difference in plant health over time.
If you notice white mineral buildup on your soil surface, your water may contain high levels of salts or minerals. Occasional “leaching”—running a large volume of water through the pot to flush accumulated minerals—can help prevent this buildup from harming your plant.
Secret #2: Lighting Requirements for Optimal Growth
Finding the Sweet Spot: Ideal Light Conditions
Contrary to some misconceptions, rubber plants are not low-light plants. In their natural habitat, they receive dappled sunlight through the forest canopy—bright, but indirect light. Replicating these conditions indoors leads to the healthiest growth and most vibrant foliage.
Bright indirect light represents the gold standard for rubber plants. This means placing them near, but not directly in front of, windows. Eastern exposures work wonderfully as they provide gentle morning sunlight without the intense afternoon rays that can scorch leaves. Northern windows provide consistent light but may be slightly too dim in winter months. Western and southern windows can work well if the plant sits several feet back from the window or if sheer curtains diffuse the intense direct sunlight.
But what exactly does “indirect light” mean in practical terms? Think of it as bright enough to cast a shadow, but not so intense that the shadow has crisp, defined edges. Another test: if you can comfortably read a book without additional lighting for most of the day, that spot likely offers suitable light for your rubber plant.
Light meters have become affordable tools for indoor gardeners and can remove the guesswork entirely. Rubber plants thrive in light levels between 400-800 foot-candles. Below 300 foot-candles, they survive but rarely thrive; above 1000 foot-candles (direct sunlight), leaf burn becomes likely.
Remember to adjust your plant’s position seasonally. Windows that provide perfect light in summer may be too dim in winter when the sun’s angle changes. Similarly, a spot that works perfectly in winter might expose your plant to scorching direct light in summer.
Troubleshooting Light-Related Issues
Recognizing light-related problems early allows for easy adjustments before your rubber plant suffers lasting damage. Insufficient light typically manifests as leggy growth, long stretches between leaves as the plant reaches toward light sources. The new leaves may also appear smaller than older foliage, and the rich, vibrant color of the leaves often dulls.
Too much direct light presents differently. Watch for bleached spots or scorched patches on leaves, particularly those closest to the light source. The leaves might also curl inward as a protective response. These symptoms typically appear first on newer leaves, which haven’t yet developed the waxy coating that helps protect mature foliage.
For homes with challenging light conditions, grow lights offer an excellent solution. LED grow lights have become increasingly affordable and energy-efficient. Position them 12-18 inches above your rubber plant and provide 12-14 hours of supplemental light daily for optimal growth.
When moving your rubber plant to brighter conditions, always acclimate it gradually. Sudden exposure to significantly brighter light can shock the plant, causing stress responses like leaf drop. Increase exposure incrementally over 1-2 weeks, moving the plant closer to the light source in stages or increasing the time spent in brighter conditions each day.
Secret #3: Soil and Potting Secrets for a Thriving Rubber Plant
Creating the Perfect Soil Mix
Rubber plants demand a soil environment that balances moisture retention with excellent drainage—a combination that most commercial potting soils don’t quite achieve. The ideal mix mimics their natural growing conditions while accommodating indoor care limitations.
The perfect rubber plant soil provides several key elements: adequate aeration for root health, enough water retention to prevent constant drying, and sufficient drainage to avoid soggy conditions. The soil should also maintain a slightly acidic to neutral pH (around 6.0-7.0) where nutrients remain accessible to the plant.
While pre-packaged potting mixes labeled for indoor foliage plants can work adequately, creating a custom blend often yields better results. Commercial mixes frequently retain too much moisture for rubber plants’ liking, potentially leading to root issues over time.
Peat moss (or coco coir as a more sustainable alternative) forms an excellent base for your mix, providing water retention while remaining relatively airy. Perlite or pumice adds crucial drainage and prevents compaction. Pine bark not only improves drainage but also creates air pockets and slowly breaks down to feed beneficial microorganisms in the soil.
DIY Rubber Plant Potting Mix Recipe
- 2 parts quality potting soil (provides a base of nutrients and structure)
- 1 part perlite or pumice (enhances drainage and prevents compaction)
- 1 part pine bark fines (improves aeration and drainage)
- Optional: a handful of activated charcoal (keeps soil fresh and helps prevent root rot)
Thoroughly mix these components before potting. This blend strikes the perfect balance between moisture retention and drainage while providing the slightly acidic environment rubber plants prefer.
Choosing the Right Pot
Your choice of container significantly impacts your rubber plant’s health, sometimes more than you might realize. The material, size, and design all affect moisture levels and root development.
Terra cotta pots offer excellent breathability, allowing excess moisture to evaporate through their porous walls. This reduces the risk of overwatering but means you’ll need to water more frequently. These classic containers also provide stability for potentially top-heavy mature plants.
Plastic and glazed ceramic pots retain moisture much longer, beneficial in dry environments but potentially problematic in humid conditions or for heavy-handed waterers. If you choose these materials, pay extra attention to your watering habits and ensure excellent drainage.
Whatever material you choose, drainage holes remain non-negotiable for rubber plants. Without proper drainage, even the most careful watering eventually leads to root rot. If you’ve fallen in love with a decorative pot lacking drainage holes, use it as a cachepot—place your rubber plant in a plastic nursery pot with drainage holes, then set that inside the decorative container. Remove the inner pot for watering, allowing it to drain completely before returning it to the decorative outer pot.
When sizing up, practice restraint. Choose a pot only 1-2 inches larger in diameter than the current container. Excessive pot size leads to prolonged soil moisture as the plant can’t absorb water quickly enough, potentially causing root issues. Most rubber plants need repotting only every 2-3 years, when roots begin circling the pot’s edges or growing through drainage holes.
Secret #4: Humidity and Temperature: Creating the Perfect Microclimate
Humidity Requirements
As native inhabitants of tropical Southeast Asian forests, rubber plants evolved in environments with consistently high humidity levels. While they’ve adapted reasonably well to average household conditions, understanding and occasionally supplementing humidity can dramatically improve your plant’s appearance and health.
Ideally, rubber plants enjoy humidity levels between 40% and 60%. Most homes hover around 30-40% humidity, acceptable but not optimal. In particularly dry environments or during winter when heating systems reduce indoor humidity, your rubber plant may show stress signals like brown leaf edges, leaf curling, or slowed growth.
These symptoms often appear first on newer leaves, which haven’t yet developed the waxy coating that helps mature foliage retain moisture. If you notice these signs, measuring your home’s humidity with an inexpensive hygrometer makes identifying the problem more straightforward.
Humidity-Boosting Methods
Several approaches can increase humidity around your rubber plant, each with different effectiveness levels and maintenance requirements:
Pebble trays offer a simple, affordable solution. Fill a tray with pebbles, add water to just below the stones’ top surface, then place your plant’s pot on the pebbles, ensuring the pot doesn’t sit directly in water. As the water evaporates, it creates a more humid microclimate around your plant.
Humidifiers provide the most effective humidity boost. Modern ultrasonic models operate quietly and allow precise control over humidity levels. Placing a humidifier near your rubber plant can transform its growing environment, particularly beneficial during winter months or in naturally arid climates.
Grouping plants creates a naturally humid microenvironment as plants release moisture through transpiration. This collaborative humidity-sharing costs nothing and often enhances your home’s appearance through clustered plantings.
Misting remains somewhat controversial among plant enthusiasts. While a quick spray increases humidity momentarily, the effect dissipates quickly, often within an hour. If you enjoy the ritual of misting, it won’t harm your rubber plant when done occasionally, but don’t rely on it as your primary humidity solution.
Method | Effectiveness | Cost | Maintenance Required |
|---|---|---|---|
Pebble Tray | Moderate | Low | Low (weekly water top-off) |
Humidifier | High | Medium-High | Medium (regular cleaning, refilling) |
Plant Grouping | Low-Moderate | None | None |
Misting | Low | Low | High (must be done frequently) |
Temperature Requirements
Rubber plants prefer consistent temperatures between 65-85°F (18-29°C), aligning with comfortable human living conditions. They tolerate brief dips to around 55°F (13°C) but suffer damage below 50°F (10°C). Expose them to freezing temperatures, and you’ll likely lose your plant entirely.
Consistency matters nearly as much as the actual temperature. Sudden fluctuations stress rubber plants, potentially triggering leaf drop as a stress response. Pay particular attention to drafty windows in winter, air conditioning vents blowing directly on plants, or outdoor temperature drops if you move your plant outside during summer months.
Seasonal temperature changes also affect your plant’s watering needs. Higher temperatures increase water consumption, while cooler temperatures slow growth and reduce water requirements. This relationship between temperature and watering explains why many rubber plants struggle in winter—the combination of lower temperatures and continued frequent watering often leads to root rot.
Secret #5: Fertilization Strategy for Healthy Rubber Plants
Nutrients Your Rubber Plant Craves
Think of fertilizer not as plant food but as a vitamin supplement. Your rubber plant primarily “eats” through photosynthesis, but supplemental nutrients support optimal growth, especially in the confined environment of a pot where nutrients deplete over time.
For sustained, healthy growth, rubber plants require three primary macronutrients—nitrogen (N), phosphorus (P), and potassium (K)—represented by the three numbers on fertilizer packages. Balanced fertilizers with ratios like 10-10-10 work well, though slightly higher nitrogen formulations (like 20-10-10) can promote lusher foliage growth.
Nitrogen drives leaf development and overall growth, making it particularly important for foliage plants like rubber trees. Phosphorus supports root development and energy transfer within the plant. Potassium enhances overall plant health, disease resistance, and efficient water use.
Beyond these macronutrients, rubber plants benefit from micronutrients like magnesium, calcium, and iron. Quality fertilizers typically include these trace elements, but specialized foliage plant fertilizers often provide an ideal nutrient balance specifically formulated for plants like your rubber tree.
Fertilization Schedule
Like most tropical houseplants, rubber plants benefit from regular feeding during their active growth period (spring and summer) and require little to no fertilization during dormancy periods (fall and winter).
During the growing season, fertilize your rubber plant every 4-6 weeks with a balanced, water-soluble fertilizer diluted to half the manufacturer’s recommended strength. This “weakly, weekly” approach—applying diluted fertilizer more frequently rather than full-strength doses less often—provides steady nutrition without risking fertilizer burn.
As daylight hours shorten in late fall, suspend fertilization entirely. Feeding a dormant plant pushes it to grow when it naturally wants to rest, creating stress and potentially making it susceptible to pests and diseases. Resume fertilization in early spring when you notice new growth beginning.
Watch for signs of fertilizer problems. Over-fertilization typically manifests as white crust on soil surfaces, brown leaf tips and margins, or excessively leggy growth. Under-fertilization shows up more subtly as slowed growth, smaller new leaves, or pale foliage lacking vibrant color.
The choice between organic and synthetic fertilizers comes down to personal preference. Organic options like fish emulsion, worm castings, or compost tea release nutrients slowly and support beneficial soil microorganisms. Synthetic fertilizers deliver precise nutrient ratios and immediate availability but don’t improve soil structure. Either approach works well for rubber plants when applied correctly.
Secret #6: Pruning and Shaping Your Rubber Plant
Strategic Pruning for Bushy Growth
Pruning transforms lanky rubber plants into full, lush specimens while controlling size and enhancing appearance. Without occasional trimming, rubber plants often grow tall and sparse, with leaves clustered mainly at branch tips.
The best time to prune comes during early spring, just as growth resumes after winter dormancy. This timing allows the plant to quickly heal cuts and respond with robust new growth. Avoid major pruning during fall and winter when slower growth means slower healing.
Before making any cuts, gather proper tools: sharp, clean pruning shears or a knife disinfected with rubbing alcohol prevents introducing pathogens. Keep paper towels handy to deal with the milky latex sap that flows from cut surfaces.
This sap contains compounds that can irritate skin and eyes, so wear gloves during pruning. If you’re sensitive to latex, consider wearing long sleeves and eye protection as well. The sap also stains fabrics and surfaces, so cover nearby items before beginning.
To encourage branching, make cuts just above a leaf node (the slight bump where leaves emerge from the stem). The plant typically responds by producing two new growth points, creating a fuller appearance. For controlling height, trim the top growth point (apical meristem), which signals the plant to direct energy into side branches rather than upward growth.
After pruning, the cut surfaces will leak sap. Allow this to dry naturally or dab it with paper towels. Some gardeners dust cuts with cinnamon as a natural fungicide to prevent potential infection during healing, though this step remains optional with clean cutting tools.
Training Your Plant’s Growth Pattern
Beyond pruning, several training techniques help create your ideal rubber plant shape. For tree-like specimens, remove lower leaves and branches while allowing upper growth to develop naturally. For bushier plants, regular pinching of new growth points encourages multiple branches to form.
Staking provides essential support for larger plants or those trained to a single trunk. A sturdy wooden or bamboo stake inserted carefully into the soil (avoiding major roots) gives the plant structure to grow against. Secure the trunk to the stake using soft plant ties or strips of cloth that won’t cut into the stem as it grows.
To prevent lopsided growth, rotate your rubber plant a quarter turn weekly. Plants naturally grow toward light sources, so regular rotation ensures even development on all sides. This simple habit prevents the awkward leaning that often occurs in stationary plants.
Rubber plants respond remarkably well to these training efforts during their active growing phases. With consistent attention during the first few years, you can develop almost any form you prefer—from single-stemmed trees to multi-branched bushes.
Secret #7: Propagation: Creating New Rubber Plants
Step-by-Step Air Layering Method
Air layering offers the most reliable method for propagating larger rubber plants, especially when you want to create a new plant while reducing the parent plant’s height. This technique encourages roots to form on a stem while still attached to the parent plant, ensuring a higher success rate than traditional cuttings.
The process works best on stems at least 1/2 inch in diameter and during spring or early summer when the plant actively grows. Select a point on the stem where you’d like roots to form—typically 12-18 inches below the top of a tall plant you wish to shorten.
To perform air layering:
- Gather your materials: sharp knife, sphagnum moss (moistened), plastic wrap, twine or plant tape, and rooting hormone (optional but helpful).
- Make an upward cut about 1/3 of the way through the stem. Insert a toothpick or small piece of wood to keep the cut open.
- Apply rooting hormone to the exposed inner tissue if available.
- Wrap moistened sphagnum moss around the cut area, making a ball about the size of a tennis ball.
- Wrap the moss ball with plastic wrap, sealing the edges above and below the moss to create a humid environment. Secure with plant tape or twine.
- Wait patiently. Root formation typically takes 4-8 weeks, visible as white roots appearing through the moss.
- Once you see substantial root development, cut below the rooted section and pot your new plant in appropriate soil.
This method boasts success rates over 90% when performed correctly and allows you to create substantial new plants immediately rather than waiting for small cuttings to grow.
Stem Cutting Propagation
For creating multiple plants or when working with smaller specimens, stem cuttings provide a straightforward propagation method. The ideal time for taking cuttings falls during late spring through early summer when the plant grows actively.
Select a healthy section of the stem with at least two leaves. Using a sharp, clean knife, cut a 4-6-inch section. Remove the bottom leaf to expose the node (the point where the leaf attached), as roots develop from these nodes.
Allow the cutting to dry for 1-2 hours so the latex sap forms a seal over the cut end, reducing the risk of rot. Dip the cut end in rooting hormone if available, though rubber plants often root successfully without it.
You now face a choice: water propagation or soil propagation. Water propagation lets you monitor root development visually—simply place the cutting in a container of water, ensuring the node is submerged while keeping leaves above water. Change the water weekly to prevent stagnation. Roots typically appear within 3-4 weeks.
For soil propagation, plant the cutting in a small pot filled with moistened potting mix (the same mix recommended for mature plants works well). Cover the pot with a clear plastic bag to create a miniature greenhouse, removing it occasionally to prevent excess moisture buildup. Keep the soil consistently moist but never soggy.
Regardless of method, place your cuttings in bright indirect light and maintain warm temperatures (70-80°F/21-27°C) for optimal rooting. Avoid direct sunlight, which can stress cuttings before they develop roots. Once roots reach 1-2 inches long in water propagation, transition to soil. For soil-propagated cuttings, gentle resistance when tugged indicates root formation.
Secret #8: Dealing with Common Rubber Plant Problems
Pest Identification and Treatment
Despite their relatively pest-resistant nature, rubber plants occasionally attract several common houseplant pests. Early identification and prompt treatment prevent minor infestations from becoming major problems.
Spider mites—nearly microscopic arachnids that cause stippled, discolored leaves and fine webbing in severe cases—thrive in dry conditions. Increase humidity and regularly wipe leaves with a damp cloth as a preventative measure. For active infestations, spray with insecticidal soap or neem oil solution, focusing on leaf undersides where mites typically hide. Repeat treatments weekly for 3-4 weeks to break their life cycle.
Mealybugs appear as small white, cottony clusters, often found in leaf crevices and stem joints. Their presence often coincides with sticky residue on leaves or surrounding surfaces. Isolate infected plants immediately to prevent spread. For minor infestations, dab each visible mealybug with a cotton swab soaked in 70% isopropyl alcohol. More extensive problems require insecticidal soap or neem oil applications, repeated weekly until resolved.
Scale insects create small, immobile bumps along stems and leaf undersides that may initially resemble plant features rather than pests. Their hard protective covering makes treatment challenging. For light infestations, scrape them off gently with a fingernail or soft-bristled toothbrush. More severe cases require horticultural oil, which suffocates the insects by coating their breathing apparatus.
Neem oil deserves special mention as an effective organic treatment for multiple pest issues. This natural insecticide disrupts pest life cycles rather than acting as an immediate poison. Mix 2 teaspoons neem oil with 1 teaspoon mild liquid soap in 1 quart of water, then spray thoroughly, including leaf undersides. Apply in evening hours to prevent leaf burn, and repeat weekly for 3-4 weeks.
Disease Prevention and Management
Compared to pests, diseases affect rubber plants less frequently, but they can cause significant damage when they occur. Most issues relate to improper growing conditions rather than actual pathogens.
Root rot represents the most common and serious disease, typically resulting from overwatering or poor drainage. Early symptoms include yellowing leaves, wilting despite moist soil, and in advanced cases, a foul smell from the soil. Treatment requires immediate action: remove the plant from its pot, wash away as much soil as possible, and trim away any soft, brown, or black roots with sterilized scissors. Repot in fresh, well-draining soil in a clean pot, and reduce watering frequency going forward.
Bacterial leaf spot creates water-soaked spots that eventually turn brown or black, often with yellow halos. This condition spreads through water splashing from infected leaves to healthy ones. Remove affected leaves immediately, improve air circulation around the plant, and avoid overhead watering. In severe cases, copper-based bactericides offer effective treatment when used according to package directions.
Fungal issues typically manifest as powdery white patches or dark, spreading spots on leaves. Improve air circulation, reduce humidity (counterintuitively to general rubber plant care), and treat with a fungicide formulated for houseplants. Neem oil’s natural antifungal properties make it useful for minor fungal problems as well.
Leaf Issues Decoded
Leaf problems often provide the first indication that something’s amiss with your rubber plant. Learning to interpret these signals helps address issues before they become serious.
Yellow leaves most commonly indicate overwatering, though extreme underwatering can cause similar symptoms. Check soil moisture first—if consistently wet or soggy, reduce watering frequency and ensure proper drainage. Yellow leaves might also signal nutrient deficiencies (particularly nitrogen) or insufficient light. Once you’ve corrected the underlying issue, yellow leaves won’t regain their green color, so removing them improves the plant’s appearance.
Brown edges or tips usually indicate low humidity or water quality issues. Increasing humidity through methods discussed earlier often resolves the problem for new growth, though damaged leaves won’t recover. If brown edges persist despite adequate humidity, fluoride or chlorine in tap water might be responsible. Switching to filtered or distilled water often resolves this issue.
Dropping leaves concerns many rubber plant owners, but doesn’t always indicate serious problems. Seasonal leaf drop, particularly in fall and winter, occurs naturally as the plant adjusts to lower light levels. More concerning is sudden leaf drop, typically triggered by environmental shocks—drafts, temperature fluctuations, relocation, or dramatic changes in light conditions. Stabilize your plant’s environment and minimize changes, particularly during winter dormancy.
Curling leaves usually signal improper watering (curling downward often indicates overwatering, while curling upward suggests underwatering). They may also result from pest infestations, particularly spider mites, so examine leaf undersides carefully if curling appears without obvious watering issues.
Secret #9: Repotting for Continued Growth Success
When to Repot Your Rubber Plant
Unlike some houseplants that demand annual repotting, rubber plants typically need this attention only every 2-3 years. Rather than following a strict schedule, watch for signs that your plant has outgrown its current home.
The most reliable indicator? Roots circling the pot’s interior or growing through drainage holes. Other signs include significantly faster drying times between waterings, slowed growth despite proper care, or roots pushing the plant upward in its pot. Sometimes, the soil simply appears depleted, breaking down into fine particles that compact easily and may develop a crusty surface.
Timing matters when repotting. Early spring, just as new growth begins, provides the optimal window. This timing gives your plant the entire growing season to establish itself in its new container. Avoid repotting during fall and winter dormancy when the plant lacks energy for root development.
As a general guideline, younger rubber plants typically need repotting every 1-2 years as they grow vigorously, while mature specimens can often remain in the same container for 3-5 years with just refreshed topsoil.
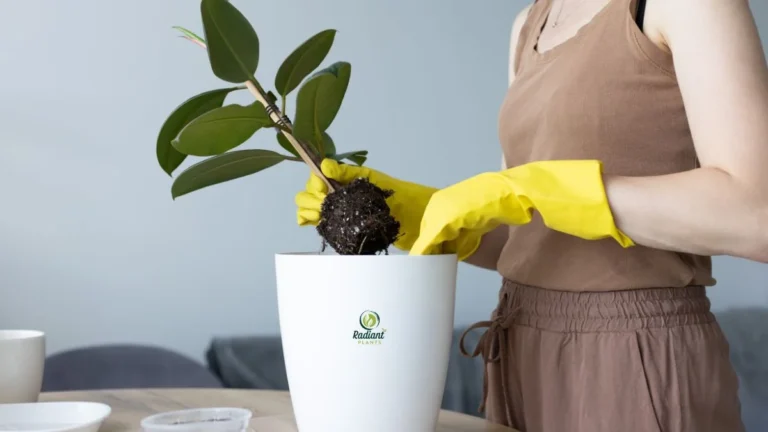
The Step-by-Step Repotting Process
Successful repotting requires preparation and careful execution. Gather all materials before starting: your new pot (only 1-2 inches larger in diameter than the current one), fresh potting mix, a trowel or large spoon, scissors or pruning shears, and gloves to protect from sap.
The repotting process follows these steps:
- Prepare the new pot by covering drainage holes with mesh or broken pottery pieces to prevent soil loss while maintaining drainage. Add a layer of fresh potting mix to the bottom.
- Water your rubber plant a day before repotting. This hydrates the plant for the coming stress and makes the root ball easier to remove from its current pot.
- Carefully remove the plant from its existing pot. Gently squeeze flexible containers or lay rigid pots on their side, tapping the rim against a solid surface while supporting the plant base.
- Examine the root ball. Healthy roots appear firm and white or light tan. Gently loosen the outer roots, especially if they’ve formed a tight circle (known as being “rootbound”).
- Prune any roots that appear black, mushy, or dead using clean scissors. If extensive rot appears, you may need to wash away all soil and perform more significant root pruning before repotting.
- Position the plant in its new pot so the top of the root ball sits about 1 inch below the pot’s rim, allowing space for watering. Add fresh soil around the sides, gently tamping down to eliminate air pockets without compacting too firmly.
- Water thoroughly until liquid flows from drainage holes, which helps settle soil around roots. You might need to add more soil if significant settling occurs.
Following repotting, place your rubber plant in a location with bright indirect light but not intense direct sun. Skip fertilizing for at least a month to allow root recovery. The plant might show some stress signs—perhaps dropping a few leaves or slowing growth temporarily—but should resume normal growth within a few weeks.
Secret #10: Integrating Your Rubber Plant into Your Home Decor
Design Ideas for Showcasing Your Rubber Plant
With their dramatic foliage and architectural growth habit, rubber plants naturally draw attention in any space. Their versatility allows them to complement virtually any design style, from minimalist modern to eclectic bohemian.
Location selection depends partly on plant size. Smaller rubber plants (under 2 feet) work beautifully atop consoles, bookshelves, or as table centerpieces. Medium specimens (2-4 feet) make outstanding floor plants beside seating areas or as corner accents. Larger rubber trees (4+ feet) can serve as stunning focal points, room dividers, or statement pieces in areas with high ceilings.
The container you select dramatically impacts the overall aesthetic. For contemporary spaces, matte black or white ceramic pots with clean lines emphasize the plant’s modern feel. Natural materials like terracotta, concrete, or woven baskets complement bohemian or rustic interiors. Metallics—particularly brass or copper—add warmth and elegance to more traditional settings.
Consider creating plant vignettes by grouping your rubber plant with complementary plants of varying heights and textures. Trailing pothos or philodendron, upright snake plants, and delicate ferns create appealing textural contrasts while maintaining a cohesive tropical theme.
Elevating your rubber plant, either on a plant stand or decorative stool, draws attention while creating visual space beneath. This approach works particularly well for medium-sized specimens that might otherwise get lost among furniture pieces.
Health Benefits of Living with Rubber Plants
Beyond their aesthetic appeal, rubber plants contribute meaningfully to your home’s environment and potentially your well-being. NASA’s Clean Air Study identified rubber plants as efficient air purifiers that remove toxins like formaldehyde, xylene, and toluene from indoor air. Their large leaf surface area excels at this filtering process, particularly in enclosed spaces like apartments or offices.
The psychological benefits of indoor plants are receiving increasing scientific attention. Research suggests that interacting with houseplants reduces stress hormones, lowers blood pressure, and improves concentration and productivity. The simple act of caring for plants—even easy-care varieties like rubber plants—provides routine, purpose, and connection to natural cycles often missing in modern life.
Rubber plants specifically contribute to biophilic design—an approach that incorporates natural elements into human-made environments. Their substantial presence satisfies our innate need for connection with nature, even within entirely urban settings. This design philosophy has gained traction in healthcare facilities, workplaces, and homes for its measured positive impact on human well-being.
Consider your rubber plant not merely decoration but a living component of a healthier, more balanced home environment. Its presence quietly works to improve both your physical surroundings and psychological state—a remarkable return on the modest investment of care it requires.
Conclusion: Your Path to Rubber Plant Success
The journey of growing a thriving rubber plant is both an art and a science. By implementing these ten secrets into your care routine, you’re well on your way to becoming the proud parent of a spectacular Ficus elastica. Remember that patience is key—rubber plants reward consistent care with years of growth and beauty.
The relationship between plant and caretaker flows both ways. As you provide your rubber plant with appropriate light, water, and nutrients, it returns the favor by purifying your air, enhancing your living space, and bringing a living connection to nature into your home. This exchange embodies the essence of successful houseplant keeping.
Start small by implementing the most critical aspects first: proper watering, appropriate light, and suitable soil. As you grow more comfortable with these fundamentals, gradually incorporate the more specialized techniques like strategic pruning, humidity management, and occasional fertilization.
Document your plant’s growth through photographs taken every few months. This visual record not only provides satisfaction as you witness your care translated into growth but also helps identify patterns related to seasonal changes or responses to care adjustments. Many plant enthusiasts find that this documentation becomes a cherished timeline of their developing relationship with their plants.
Your rubber plant journey continues beyond this guide. Join online plant communities, visit local nurseries, and connect with fellow plant enthusiasts to share experiences and continue learning. The horticultural world constantly evolves with new varieties, care techniques, and understanding of these remarkable organisms.
The most successful plant parents approach cultivation with curiosity, flexibility, and genuine appreciation for the living being in their care. Your rubber plant doesn’t demand perfection—just consistent attention and willingness to learn from both successes and occasional setbacks. Begin implementing these secrets today, and watch as your rubber plant transforms into the statement piece your home deserves.
Frequently Asked Questions About Rubber Plants
Is a rubber plant good for beginners?
Yes, rubber plants rank among the better options for beginner indoor gardeners. Their forgiving nature means they won’t immediately collapse if you occasionally forget a water or place them in less-than-perfect light. The visual cues they provide—like drooping when thirsty or stretching toward light sources—help you learn to interpret plant needs without requiring expert knowledge. Unlike some houseplants that demand precise humidity levels or special care, rubber plants adapt reasonably well to average home conditions. Their moderate growth rate also provides the satisfaction of visible progress without overwhelming new plant parents with constant maintenance needs.
How fast do rubber plants grow indoors?
Under optimal conditions, expect your indoor rubber plant to grow 1-2 feet annually during its active growth phase. This growth concentrates primarily during spring and summer months when longer daylight hours and warmer temperatures support development. During fall and winter, growth typically slows considerably or pauses entirely as the plant enters a natural dormancy period. Growth rates also depend on variety—’Robusta’ typically grows most vigorously, while variegated types like ‘Tineke’ and ‘Ruby’ generally develop more slowly. Remember that consistent conditions usually produce better growth than “pushing” the plant with excessive fertilizer, which often creates weak, leggy growth rather than healthy development.
Are rubber plants toxic to pets and children?
Rubber plants do contain toxic compounds in their sap that make them potentially harmful if ingested by pets or children. The milky latex contains caoutchouc, a substance that can cause digestive irritation if consumed and skin irritation upon contact. Cats and dogs typically experience drooling, vomiting, or diarrhea if they chew on rubber plant leaves. The good news? Most pets naturally avoid these plants due to their bitter taste. To be safe, position your plant beyond the reach of curious pets and young children, particularly if they tend to mouth or chew unfamiliar objects. When pruning, wear gloves to prevent skin irritation from the sap, and wash hands thoroughly afterward, even if using gloves.
How do I make my rubber plant bushy instead of tall?
Creating a bushy rubber plant requires strategic intervention, as these plants naturally grow upward with a single stem. The key technique involves pruning the top growth point (apical meristem), which breaks the plant’s upward growth pattern and triggers branching hormones. Make this cut just above a leaf node during spring for best results. Each cut typically produces 2-3 new growth points, creating a fuller appearance. Regularly rotate your plant to ensure even light exposure on all sides, preventing the one-sided stretching that creates asymmetrical growth. Adequate lighting also plays a crucial role—insufficient light leads to leggy, sparse growth regardless of pruning efforts. Finally, maintain proper fertilization during the growing season to support multiple growth points with sufficient nutrients.
Why are my rubber plant’s leaves dropping?
Leaf drop in rubber plants typically signals environmental stress rather than disease. Sudden changes in temperature, particularly cold drafts or exposure to temperatures below 55°F (13°C), commonly trigger protective leaf shedding. Improper watering—both overwatering and underwatering—ranks as another frequent cause; check soil moisture levels by inserting your finger 2 inches into the soil to determine whether inconsistent watering might be the culprit. Significant light changes, like moving from a bright location to a dim one or vice versa without acclimatization, can also shock the plant into dropping leaves. Normal seasonal leaf drop also occurs, particularly in fall as light levels decrease; this typically affects lower, older leaves first and shouldn’t cause alarm if the plant otherwise appears healthy.
How do I fix yellow leaves on my rubber plant?
Yellow leaves most commonly indicate overwatering, particularly when multiple leaves yellow simultaneously from the bottom up. Check your soil drainage and watering frequency first—the soil should dry out in the top 2 inches before you water again. If overwatering isn’t the issue, examine light conditions; insufficient light gradually causes lower leaves to yellow and drop as the plant redirects energy to leaves receiving adequate light. Nutrient deficiency, particularly nitrogen shortage, might cause general yellowing across all leaves; if your plant hasn’t been fertilized in several months during the growing season, a balanced houseplant fertilizer might resolve the issue. Remember that once leaves turn yellow, they won’t revert to green; focus on preventing yellowing in new growth by addressing the underlying cause rather than trying to “fix” already yellowed foliage.
How to Care for the Rubber Tree
![Lighting needs for [Indoor Tree Plants] from bright windows to low-light corners](https://www.radiantplants.com/wp-content/uploads/2025/07/How-to-Choose-the-Right-Indoor-Tree-Plant-for-Your-Space-768x512.webp)


5 Comments