How do you plant hydrangeas: Expert Guide for Stunning Blooms
How do you plant hydrangeas? It begins with selecting the ideal location, preparing rich, well-draining soil, and planting at the same depth as the nursery pot. Hydrangeas thrive when you give them morning sun, afternoon shade, and consistent moisture—three essentials that directly influence bloom size and color. According to horticulture studies from the University of Georgia, proper soil preparation increases hydrangea survival and blooming performance by more than 40%, making the planting stage the most important step.
In this guide, you’ll learn exactly how to plant hydrangeas for stunning blooms, from timing and soil prep to perfect planting depth and first-year care. Follow these expert steps, and you’ll set your hydrangeas up for long-lasting, vibrant growth.
Table of Contents
In This Article
What You Need Before Planting Hydrangeas
Before answering how do you plant hydrangeas, you need the right materials, soil foundation, and hydrangea type choice. Preparation is the biggest factor that determines whether your hydrangeas will produce full, vibrant blooms or struggle through the season. By gathering the correct tools, choosing the right variety, and setting up ideal soil conditions, you create a strong environment for long-term success.
Choosing the Right Tools & Supplies
Planting hydrangeas doesn’t require complex equipment, but using proper hydrangea planting supplies makes the process smoother and ensures healthier root establishment. At minimum, you’ll need a shovel, garden gloves, compost or organic matter, a watering can or hose with gentle flow, and 2–3 inches of organic mulch. These basic items help you dig accurately, improve soil quality, and lock in the moisture hydrangeas love.
For example, if you’re planting in clay-heavy soil, adding compost and pine bark fine-tunes the drainage. If you’re planting in sandy soil, compost boosts water retention and prevents hydrangeas from drying out. Each material plays a direct role in solving how do you plant hydrangeas based on your local soil conditions.
Essential hydrangea planting supplies include compost, organic mulch, a shovel, and a watering can. These tools help prepare healthy soil, protect moisture, and support strong root development—key steps for anyone asking “how do you plant hydrangeas” successfully in any climate.
Understanding Hydrangea Types (Panicle, Mophead, Smooth, Oakleaf)
Choosing the correct type of hydrangea matters just as much as choosing the right planting location. Each type has specific sunlight, soil, and climate needs that affect how you plant it:
- Mophead (Hydrangea macrophylla): Best for partial shade; blooms are influenced heavily by soil pH.
- Panicle (Hydrangea paniculata): Tolerates more sun and thrives in cooler US/CA regions.
- Smooth (Hydrangea arborescens): Known for reliability; ideal for beginners learning how do you plant hydrangeas with low maintenance.
- Oakleaf (Hydrangea quercifolia): Loves shade and provides bold foliage color in fall.
Knowing which type you have helps you adjust planting depth, spacing, and sunlight exposure. For instance, planting a Mophead in full sun often leads to leaf scorch, while Panicle hydrangeas thrive in these brighter conditions.
The hydrangea type you choose—Mophead, Panicle, Smooth, or Oakleaf—affects sunlight, soil, and spacing needs. Understanding your plant variety ensures you follow the right steps for “how do you plant hydrangeas” based on bloom style and climate.
Soil & Drainage Requirements Explained
Hydrangeas grow best in moist, rich, well-draining soil. Poor drainage is one of the top reasons new hydrangeas fail, even when planting steps are correct. The ideal soil should feel loose, crumbly, and enriched with organic matter. This structure helps roots spread easily while holding enough moisture to support consistent hydration.
If the soil stays soggy after watering, elevate the planting area or mix in pine bark and compost to improve texture. If the soil dries too fast, add compost and leaf mold to improve water retention. These adjustments help answer how to plant hydrangeas in regions with challenging soil—especially in sandy coastal areas or dense clay inland regions.
For more detailed soil troubleshooting and ongoing care, visit our internal guide:
👉 Plant Care Guide – Radiant Plants
Hydrangeas need rich, well-draining soil with added compost to prevent waterlogging. Improving your soil’s structure ensures stronger root growth and healthier blooms—an essential step in mastering “how do you plant hydrangeas” successfully.
When Is the Best Time to Plant Hydrangeas?
Many gardeners ask how do you plant hydrangeas. Timing is your first essential step, and choosing the right planting window can make the difference between slow growth and lush, abundant blooms. Hydrangeas prefer mild temperatures, steady soil moisture, and stress-free establishment—conditions most common in spring and early fall. Whether you’re planting in the U.S. or Canada, aligning your timing with your climate zone is crucial for long-term success.
🔍 Snippet Tip
The best time to plant hydrangeas is early spring or early fall, when temperatures are cool and soil moisture is stable. Planting outside heatwaves and frost periods ensures stronger root development and better blooms in the first year.
For more planting guidance, see: How to Repot Plants: Easy Steps for Indoor Beauties
USDA Zones (3–10) Planting Calendar
Hydrangeas grow across a wide range of climates, but the ideal planting month depends entirely on your USDA zone. Since gardeners often wonder how do you plant hydrangeas in colder or hotter states, this zone-based guide clarifies what to expect:
- Zones 3–5 (Northern U.S.)
Plant late spring after the final frost. Hydrangeas need warm soil to begin root development, especially mophead and smooth varieties. - Zones 6–7 (Mid-Atlantic, Midwest)
The best window is early spring or early fall—avoid summer heatwaves that can shock new transplants. - Zones 8–10 (Southern U.S.)
Plants fall through early winter. In these areas, spring planting often exposes young hydrangeas to extreme heat too quickly.
🔍 Snippet Tip
Use your USDA zone to choose your planting month. Cooler zones plant later in spring; warmer zones plant earlier in fall. Matching planting time to your climate reduces transplant stress and improves first-year bloom performance.
Best Planting Time for Canadian Regions
Canada’s regions vary widely in climate, making timing even more essential. Here’s how to time planting by area:
- British Columbia (Coastal, Zone 7–9)
Plant early spring or early fall, avoiding heavy winter rains. - Ontario & Quebec (Zone 4–6)
Plant late spring, once the soil thaws completely. Fall is acceptable if you plant at least 6 weeks before the first frost. - Prairie Provinces (Zone 2–4)
Limit planting to late spring; fall planting is risky due to early frosts. - Atlantic Canada (Zone 5–6)
Plant mid-to-late spring, when the soil is workable and temperatures stabilize.
🔍 Snippet Tip
In Canada, the best time to plant hydrangeas varies by region. Most provinces benefit from late spring planting to avoid frost damage and ensure strong root establishment in the first growing season.
Weather Conditions to Avoid
Hydrangeas are sensitive during their establishment phase. Even if you’re ready and wondering how do you plant hydrangeas correctly, planting during the bad weather can stunt or damage your new shrub.
Avoid planting during:
- Hard frost or frozen soil
- Extreme heat (85°F+/30°C+) or heatwaves
- Periods of heavy rainfall or waterlogged soil
- Strong winds that dry out transplants
Ideal planting days are cool, cloudy, and slightly moist—conditions that help roots settle in naturally.
🔍 Snippet Tip
Avoid planting hydrangeas during frost, heatwaves, or heavy rains. Cool, overcast days with mild soil moisture give new transplants the best chance for quick, strong root establishment.
Where to Plant Hydrangeas for the Best Blooming Results
A major part of solving how do you plant hydrangeas is choosing the right spot. Hydrangeas are highly responsive to their environment—light, soil, and spacing will each influence bloom size, color vibrancy, and overall plant health. Selecting the ideal location ensures the plant can root deeply, grow evenly, and flower consistently year after year.
🔍 Snippet Tip
The best place to plant hydrangeas is in a location with morning sun, afternoon shade, and rich, well-drained soil. The right spot prevents leaf burn, improves bloom production, and supports healthy root development.
For location-based planting help, see How Do You Repot Aloe Plants for Healthy New Growth?
Sun vs Shade Requirements
Hydrangeas love light—but not too much of it. Understanding sunlight needs is essential for anyone wondering how do you plant hydrangeas in a way that supports long-term blooming.
Here’s what different hydrangea types prefer:
- Mophead & Lacecap Hydrangeas
Morning sun + afternoon shade. These types scorch easily in hotter climates. - Panicle Hydrangeas (Hydrangea paniculata)
Thrive in full sun (6+ hours) and are the best choice for bright, open landscapes. - Smooth Hydrangeas (H. arborescens)
Prefer partial shade but tolerate more sun in cooler regions. - Oakleaf Hydrangeas
Do well in dappled shade and woodland-style settings.
🔍 Snippet Tip
Mophead hydrangeas need morning sun and afternoon shade, while panicle types can handle full sun. Matching your hydrangea variety to the right light conditions ensures stronger blooms and prevents leaf burn.
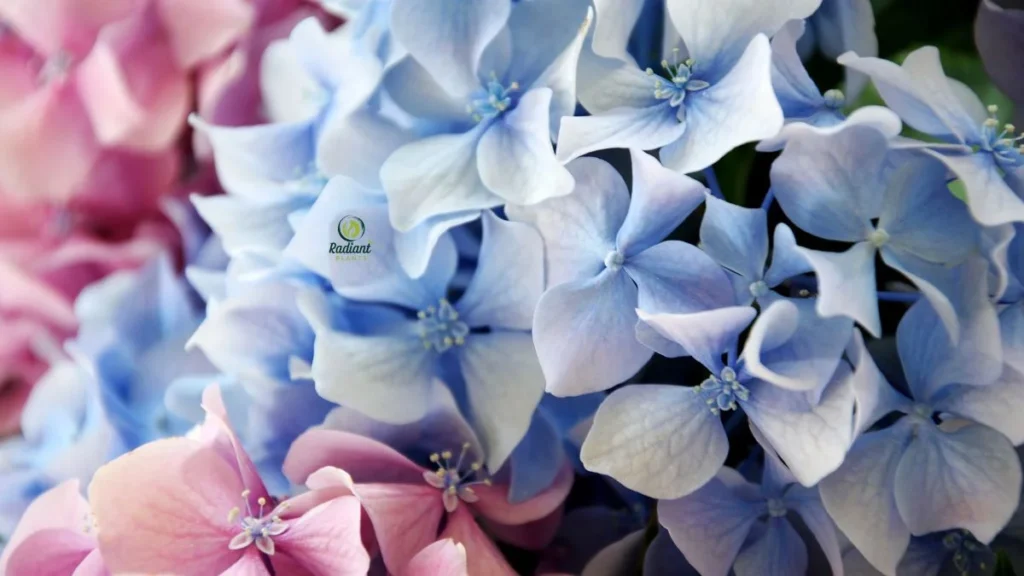
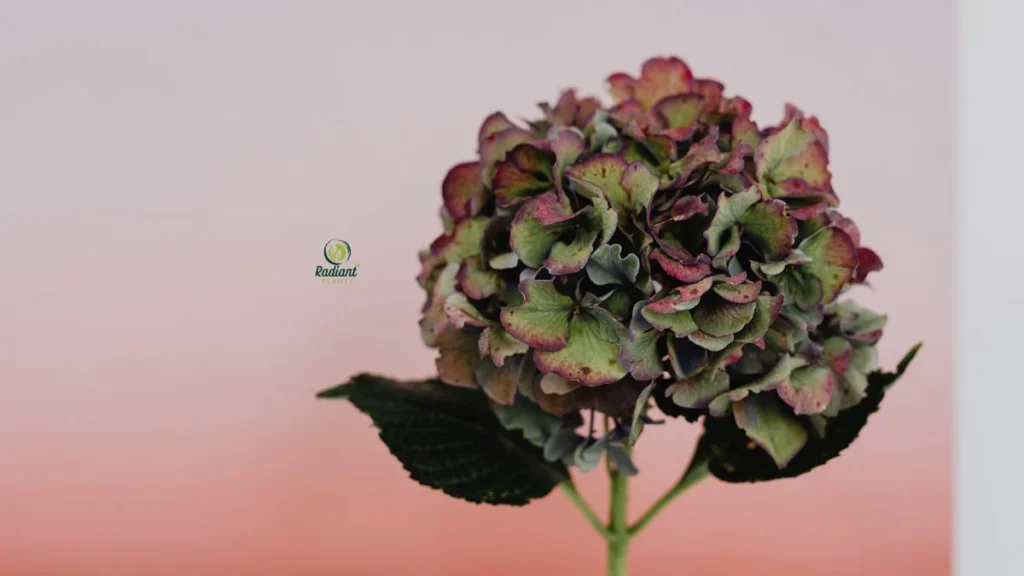
Soil pH & Color Change (Blue vs Pink Blooms)
Soil pH plays a dramatic role in hydrangea flower color, making it a key part of deciding where to plant. If you’re exploring how do you plant hydrangeas for specific bloom colors, soil chemistry matters.
- Acidic Soil (pH below 6.0) → Blue blooms
- Neutral to Alkaline Soil (pH 6.0–7.5) → Pink or rose blooms
Panicle and white mophead hydrangeas do not change color based on pH, but bigleaf hydrangeas (H. macrophylla) do.
pH location example:
Planting near concrete foundations often leads to pink blooms because alkaline runoff raises soil pH.
🔍 Snippet Tip
Hydrangea color changes depend on soil pH. Acidic soil produces blue blooms, while alkaline soil leads to pink. Test the soil before planting to choose the ideal location for your desired color. Bigleaf hydrangeas respond most dramatically to pH changes.
Spacing Guidelines for Healthy Growth
Correct spacing is one of the most overlooked steps when beginners ask how do you plant hydrangeas successfully. Good air circulation prevents disease, supports stronger stems, and allows each plant to reach its full blooming potential.
General spacing rules:
- Mophead & Smooth Hydrangeas: 3–5 feet apart
- Panicle Hydrangeas: 5–8 feet apart
- Oakleaf Hydrangeas: 6–8 feet apart (they spread widely)
Always consider the mature size, not the nursery pot size.
🔍 Snippet Tip
Space hydrangeas according to their mature size—typically 3–8 feet apart. Proper spacing reduces fungal problems, improves air circulation, and ensures each plant has room to grow full, healthy blooms.
Step-by-Step Guide: How to Plant Hydrangeas Correctly
Here is the exact process for how do you plant hydrangeas—from digging the hole to watering—so your plants establish quickly and grow into full, blooming shrubs. Whether you’re working with mophead, panicle, smooth, or oakleaf hydrangeas, following this structured planting method ensures healthy root development and strong flowering in the first season.
🔍 Snippet Tip
To plant hydrangeas correctly, prepare rich soil, dig a hole twice as wide as the rootball, set the plant at the same depth as its container, backfill gently, mulch the base, and water deeply. Proper planting ensures strong root establishment and better blooms.
Step 1 – Prepare the Soil (Compost, Amendments, Drainage)
Soil preparation is the backbone of good hydrangea planting. Before anything else, loosen the soil 12–15 inches deep and mix in compost to improve fertility and moisture retention. Hydrangeas thrive in well-draining, organic-rich soil, meaning clay soil should be amended with pine bark or perlite, while sandy soils need additional compost.
If you’re asking how do you plant hydrangeas in clay-heavy areas, focus on improving drainage. Poorly drained soil causes root rot and stunted growth.
For location-based planting help, see Root Rot Treatment: 7 Proven Ways to Stop the Spread
🔍 Snippet Tip
Hydrangeas grow best in loose, fertile, well-draining soil. Add compost for nutrients, pine bark for structure, and avoid waterlogged areas. Good soil prep improves bloom density and overall plant health.
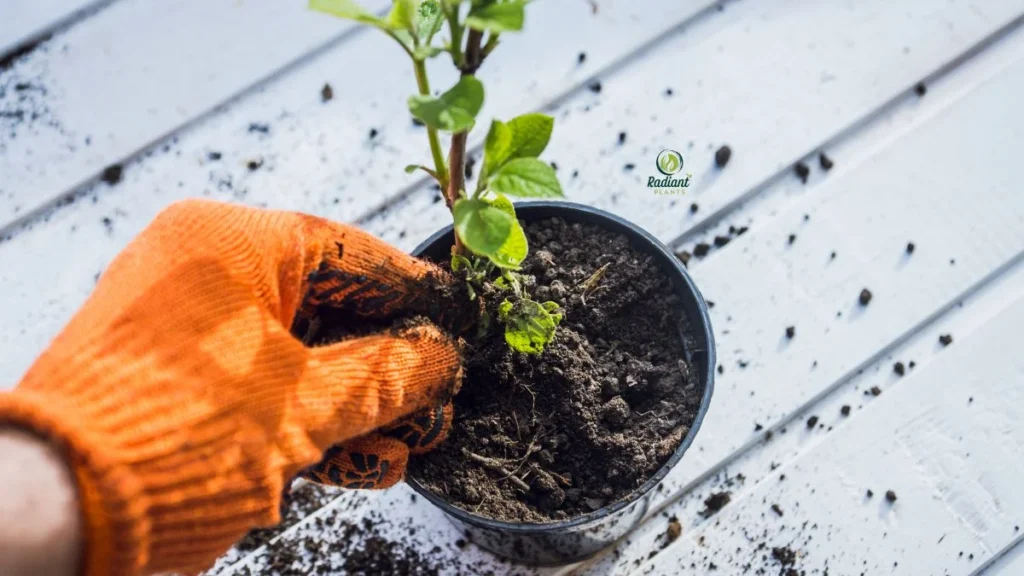
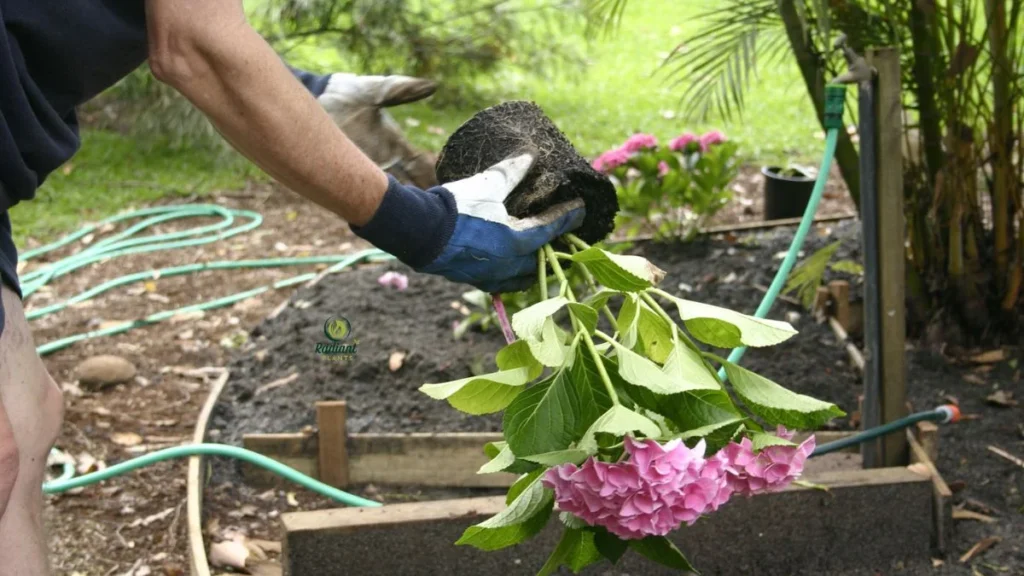
Step 2 – Dig the Perfect Planting Hole
A proper planting hole prevents root compression and promotes fast establishment. Dig a hole two times wider than the rootball but no deeper than the plant sat in its nursery pot. This encourages outward root growth instead of downward stress.
Example:
If your hydrangea’s rootball is 10 inches wide, your hole should be roughly 20–22 inches wide.
Avoid digging deeper and filling with fluffy soil—the plant may sink over time.
🔍 Snippet Tip
Dig hydrangea planting holes twice as wide as the rootball and the same depth as the nursery pot. This prevents sinking and encourages strong lateral root growth.
Step 3 – Position the Hydrangea at the Correct Depth
Planting depth is one of the biggest mistakes new gardeners make. Set the hydrangea at the exact level it was growing in its container—never deeper. The crown (where the stems meet the roots) must stay slightly above soil level.
If your hydrangea sits too low, the crown may rot. Too high, and the roots may dry out.
🔍 Snippet Tip
Keep hydrangeas at the same soil level as their nursery pot. Planting too deep suffocates the crown, while planting too shallow exposes roots. Proper depth protects both moisture balance and plant health.
Step 4 – Backfill, Firm, and Mulch
Backfill the hole using native soil mixed with compost. Gently press the soil to eliminate air pockets without compacting it. Once the plant is stable, apply 2–3 inches of mulch around the base—keeping mulch 3–4 inches away from the stems.
Mulch protects roots, stabilizes moisture, and prevents weeds from competing with your hydrangea.
🔍 Snippet Tip
Backfill with a mix of native soil and compost. Firm the soil gently and add a 2–3 inch layer of mulch, keeping it away from the stems. Mulching helps regulate moisture and keeps roots cool during hot weather.
Step 5 – Watering Immediately After Planting
Hydrangeas need a deep initial watering to remove air pockets and settle the soil. After planting, water slowly and thoroughly until the entire rootball is soaked. This step is especially crucial if you’re learning how do you plant hydrangeas in warm climates where the soil dries quickly.
For the first week, water every 2–3 days depending on the weather.
🔍 Snippet Tip
Water hydrangeas deeply right after planting to hydrate the rootball and eliminate air pockets. Hydrangeas prefer consistent moisture—never let the soil fully dry during the first two weeks.
Step 6 – First 30 Days Care Schedule
The first month determines whether your hydrangea establishes quickly or struggles. Follow this care schedule:
- Water: 3x weekly (more in hot climates)
- Shade: Provide temporary shade cloth if the sun is harsh
- Mulch Check: Refresh mulch if it thins
- No Fertilizer: Wait until the plant shows new growth
- Monitor Moisture: Soil should stay evenly moist, not soggy
This 30-day rhythm captures the essentials of how do you plant hydrangeas successfully and sets the foundation for long-term blooming.
🔍 Snippet Tip
During the first 30 days, water consistently, provide light shade if needed, avoid fertilizer, and maintain mulch. Stable moisture and gentle conditions help hydrangeas establish quickly and prepare for strong blooming.
First-Year Care: How to Keep Hydrangeas Thriving
After mastering how do you plant hydrangeas, proper care ensures continued success. The first year is the most crucial stage because hydrangeas focus on establishing strong roots, adapting to soil conditions, and adjusting to your climate. Your watering, fertilizing, and maintenance habits during this period directly affect bloom quality in the seasons that follow.
🔍 Snippet Tip
In the first year, hydrangeas need consistent watering, light fertilization, mulching, and early troubleshooting. Steady care during the first growing season helps the plant develop deep roots and prepares it for abundant blooms in the second year.
Watering Schedule by Season
Hydrangeas require predictable moisture in their first year to prevent wilting and root stress. Your approach should match seasonal temperatures and rainfall.
Spring:
Water 2–3 times per week until the plant shows new growth. Spring winds can dry the soil faster than you expect.
Summer:
This is the most demanding season. Water deeply every 1–2 days during heat waves. Morning watering is best to prevent fungal problems.
Fall:
Reduce watering to 1–2 times per week as temperatures cool and growth slows. This helps prepare the hydrangea for dormancy.
Winter:
Dormant hydrangeas in mild climates may need occasional watering. Frozen soils in cold regions act as natural protection.
Hot or sunny climates—especially USDA Zones 7–10—require extra attention for mophead and lacecap hydrangeas.
🔍 Snippet Tip
Water hydrangeas 2–3 times weekly in spring, daily to every other day in summer heat, and less in fall. Consistent moisture prevents wilting and supports strong root development in the first year. Always water deeply rather than lightly.
When & How to Fertilize Hydrangeas
First-year hydrangeas do best with controlled feeding. Too much fertilizer pushes leafy growth instead of strong roots.
Best Fertilizing Timeline:
- Early Spring: Apply a slow-release, balanced fertilizer (10-10-10 or 12-4-8).
- Mid-Summer: Light optional feeding for panicle or smooth hydrangeas.
- Do NOT fertilize after August: It can trigger new growth that freezes in winter.
Variety-specific tip:
Bigleaf hydrangeas prefer lighter fertilization because they are more sensitive to salt buildup.
If you’re managing how do you plant hydrangeas for specific bloom color, adjust soil pH (not fertilizer).
Best Fertilizer for Indoor Plants: A Simple How-To Guide
🔍 Snippet Tip
Fertilize hydrangeas lightly in early spring with a slow-release formula. Avoid heavy feeding, especially in the first year, to prevent weak growth. Stop fertilizing by late summer.
Mulching, Weed Control & Soil Moisture
Mulching is essential during the first year because it stabilizes soil temperature and protects shallow roots. Apply a 2–3 inch mulch layer using shredded bark, pine needles, or leaf compost.
Benefits of mulch:
- Keeps roots cool in summer
- Retains moisture
- Prevents weed competition
- Encourages beneficial soil microbes
Keep mulch 3–4 inches away from the base to avoid stem rot.
Weed Control:
Remove weeds weekly by hand. Avoid aggressive tools that may damage hydrangea roots in their establishment period.
🔍 Snippet Tip
Mulch hydrangeas with 2–3 inches of organic material to retain moisture and prevent weeds. Keep mulch away from stems to avoid rot. This step is critical for first-year root development.
Early Troubleshooting (Wilting, Yellow Leaves)
New hydrangeas often show stress signs as they adapt. Here’s how to respond quickly:
Wilting (morning or evening):
Usually indicates underwatering. Increase frequency and ensure mulch is in place.
Wilting at midday only:
Normal for hydrangeas. Leaves bounce back as temperatures cool.
Yellow Leaves:
Often linked to:
- Overwatering
- Poor drainage
- Nutrient deficiency
- Soil pH imbalance in bigleaf hydrangeas
Leaf Spots or Browning:
Common during humid periods—improve airflow, remove affected leaves, and avoid overhead watering.
If you’re following a full guide on how do you plant hydrangeas, early troubleshooting ensures your planting efforts pay off.
🔍 Snippet Tip
Wilting usually means the plant needs more water, while yellow leaves often signal drainage issues or nutrient imbalance. Address problems early by adjusting watering, improving soil conditions, and checking mulch levels. Early intervention strengthens first-year hydrangea health.
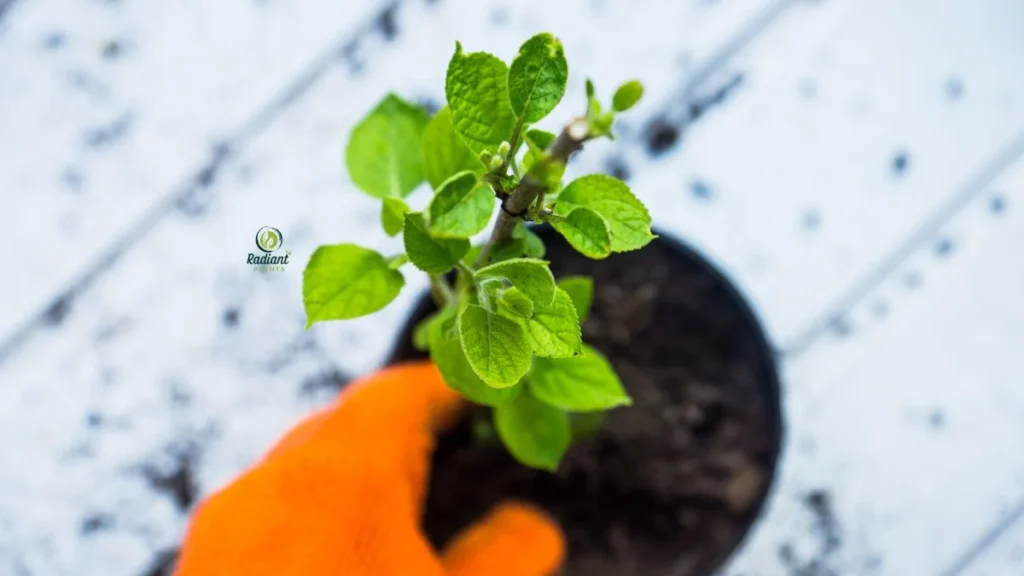
Planting Hydrangeas in Pots or Containers

Some gardeners searching for how do you plant hydrangeas want container options—especially those with balconies, patios, or small urban gardens. Hydrangeas grow beautifully in pots when given the right soil mix, container size, and seasonal care. In fact, container hydrangeas often bloom more reliably because their environment is easier to control, from soil acidity to watering frequency.
🔍 Snippet Tip
Hydrangeas grow well in containers when planted in a large pot, filled with rich, well-draining soil, and watered consistently. Potted hydrangeas need slightly more care than in-ground plants, but reward you with manageable growth and vibrant blooms.
Learn more in Flowering Daisy Plants: Beautiful Types & Care Tips.
Best Pot Size & Material
Choosing the correct container is the foundation of successful potted hydrangeas. Unlike many shrubs, hydrangeas have fast-growing root systems that require space to expand.
Ideal Pot Size:
- Minimum: 16–20 inches in diameter
- Optimal: 20–24 inches for bigleaf and panicle hydrangeas
- Depth: At least 16 inches deep to support strong root anchoring
Best Materials:
- Ceramic or terracotta: Great for airflow, but dries faster
- Plastic or resin: Retains moisture longer; ideal for hot climates
- Wooden planters: Provide natural insulation
Drainage is non-negotiable:
Your pot must have multiple drainage holes. Hydrangeas cannot tolerate standing water, especially in containers where soil compaction happens faster.
🔍 Snippet Tip
Choose a 16–24-inch pot with multiple drainage holes. Resin pots work best for hot climates, while terracotta is ideal for cooler regions. Larger pots reduce watering frequency and support stronger, healthier hydrangea roots.
Soil Mix for Containers
Container hydrangeas rely entirely on the potting mix you choose, so quality matters more here than in garden beds. Hydrangeas prefer moist, fertile, well-draining soil—not heavy garden soil.
Best Soil Mix:
- 50% high-quality potting mix
- 30% compost
- 20% perlite or pine bark fines
You can also use a potting mix formulated for acid-loving plants if you want blue blooms. For pink blooms, use a neutral mix and add lime sparingly.
Avoid garden soil:
It compacts easily, reduces airflow, and increases the risk of root rot.
Pro tip:
Add a 1-inch layer of pine bark at the bottom for added drainage.
🔍 Snippet Tip (50 words)
Use a blend of potting soil, compost, and perlite for container hydrangeas. This prevents compaction, improves drainage, and creates the ideal environment for strong root development. Avoid using garden soil in pots as it becomes too dense.
Watering & Winter Protection for Potted Hydrangeas
Potted hydrangeas dry out faster than in-ground plants, so watering consistency is essential—especially in the first year.
Watering Guidelines:
- Check the soil daily in summer
- Water when the top 1–2 inches feel dry
- Water until moisture drains from the bottom
- Avoid letting water sit in saucers
Bigleaf hydrangeas (H. macrophylla) may wilt quickly in heat but recover after evening temperatures drop.
Fertilizing:
Feed lightly once in early spring and again in mid-summer for panicle or smooth hydrangeas.
Winter Protection:
Container hydrangeas are more prone to root freezing because pots offer less insulation than soil.
To protect them:
- Move pots against a house wall for warmth
- Wrap containers with burlap or bubble wrap
- Add 4–5 inches of mulch on top of the soil
- In very cold zones, overwinter the pot in an unheated garage
Example:
Gardeners in USDA Zone 5 often bring potted hydrangeas indoors into a cold garage once leaves fall.
🔍 Snippet Tip
Water container hydrangeas whenever the top inch of soil feels dry. Protect them in winter by moving pots to sheltered areas and wrapping containers for insulation. Potted hydrangeas need more attention but reward you with reliable, vivid blooms each season.
Common Planting Mistakes to Avoid
Even when you understand how do you plant hydrangeas, a few common mistakes can still affect their growth, bloom quality, and long-term health. Avoid these pitfalls to give your hydrangeas the strongest possible start, whether you’re planting in the ground or in containers. Avoid these mistakes that often complicate how to plant hydrangeas.
Planting Too Deep or Too Shallow
One of the biggest errors gardeners make is planting hydrangeas at the wrong depth. Hydrangeas need their rootball positioned level with the surrounding soil; burying the crown too deeply suffocates the roots, while planting too shallow exposes them to air and rapid drying.
A good rule is to place the plant so the top of the rootball is exactly flush with ground level. If you’re unsure, position it slightly higher—hydrangeas prefer being lifted rather than sunken.
Example:
If you dig a hole that settles after watering, your hydrangea might sink an extra inch. To avoid this, firm the soil gently but don’t compact it.
Snippet :
Plant hydrangeas with the rootball perfectly level with the soil surface. Planting too deep suffocates the roots, while planting too shallow exposes them to air, causing dryness and stress. Always double-check the planting depth before backfilling to ensure long-term health and strong blooming.
Choosing the Wrong Location
Hydrangeas thrive in partial shade, not full sun or deep shade. If you place them in a location with too much direct afternoon sun, the leaves wilt and flowers scorch. If planted in too much shade, bloom production drops significantly.
Choose a spot with morning sun and afternoon shade, especially in warm climates. Consider the mature size—hydrangeas spread between 3 to 8 feet, depending on the variety.
Example:
A ‘Bigleaf Hydrangea’ planted against a west-facing wall often wilts daily in summer because the reflected heat is too intense.
Snippet :
Hydrangeas prefer morning sun and afternoon shade. Planting them in full sun causes leaf scorch and wilting, while deep shade reduces blooms. Choose a protected location with bright, filtered light to support healthy growth and consistent flowering.
Overwatering or Poor Drainage
Hydrangeas love moisture but despise standing water. Overwatering or planting in compacted or clay-heavy soil leads to root rot, yellowing, and reduced flowering. Proper drainage is essential for success.
Aim for soil that stays lightly moist—not soggy. If your soil is clay-heavy, amend it with compost and perlite to improve airflow.
Example:
A hydrangea planted near a downspout may appear “thirsty” at first, but the constant runoff quickly leads to root suffocation.
Snippet :
Hydrangeas need moist, well-draining soil. Overwatering or planting in poorly drained areas leads to root rot and yellowing leaves. Improve drainage with compost or perlite, and avoid locations where water pools after rain.
Using the Wrong Fertilizer
Too much fertilizer—or the wrong type—can damage your hydrangea’s roots and overstimulate leaf growth at the expense of blooms. Hydrangeas prefer a balanced, slow-release fertilizer, such as 10-10-10 or 12-4-8.
Avoid high-nitrogen lawn fertilizers, which cause explosive leaf growth but very few flowers.
Example:
If your hydrangea has huge leaves but no blooms, you may be using fertilizer with too much nitrogen.
Snippet :
Hydrangeas benefit from a balanced, slow-release fertilizer. Avoid high-nitrogen formulas, which trigger leaf growth but reduce flowering. Apply fertilizer sparingly in spring to support steady, healthy development.
👉 For more support on building healthy soil, check out our full guide here: Indoor Plant Fertilizer: When and How to Apply It Right.
Hydrangea Planting Checklist (Printable Summary)
A hydrangea planting checklist helps you stay organized from the moment you choose a location to the first year of ongoing care. A quick recap for anyone asking how do you plant hydrangeas. Whether you’re planting a single shrub or designing a full garden border, this printable-style guide keeps your workflow simple, clear, and effective.
Below, you’ll find the three essential checklists: Materials, Planting Steps, and First-Year Care—each designed to eliminate guesswork and help your hydrangeas thrive from day one.
Materials Checklist
Before planting, gather everything you need so the process goes smoothly, and your hydrangeas settle into ideal conditions. Having the right tools prevents mistakes such as planting too deeply, using the wrong soil mix, or struggling with poor drainage.
Materials You Need:
- ✔️ Hydrangea plant (healthy rootball, no yellowing leaves)
- ✔️ Compost or organic matter
- ✔️ Slow-release fertilizer (balanced, e.g., 10-10-10)
- ✔️ Mulch (pine bark, shredded wood, or straw)
- ✔️ Garden gloves
- ✔️ Hand trowel or shovel
- ✔️ Watering can or hose with gentle flow
- ✔️ Soil amendments (perlite, peat moss, or sand based on soil type)
Snippet :
Prepare all materials before planting to ensure a smooth process. Gather compost, mulch, a balanced fertilizer, and a hydrangea with a healthy rootball. Proper tools and soil amendments help prevent planting mistakes and support strong early growth.
Planting Steps Checklist
Use this step-by-step list as a quick-reference guide, especially if you’re planting multiple hydrangeas. It follows the exact method recommended for anyone learning how do you plant hydrangeas.
Step-by-Step Checklist:
- ✔️ Choose a location with morning sun and afternoon shade
- ✔️ Test soil drainage
- ✔️ Add compost to enrich soil
- ✔️ Dig a hole 2× wider than the rootball
- ✔️ Ensure hole depth matches the rootball height
- ✔️ Position the hydrangea so the rootball is level with the soil surface
- ✔️ Backfill with enriched soil, gently firming
- ✔️ Add a 2–3 inch layer of mulch
- ✔️ Water deeply to settle the soil
Example:
If you’re planting a ‘Bigleaf Hydrangea,’ keeping the crown level with the ground is critical—planting even 1–2 inches too deep can stunt growth and reduce blooming.
Snippet :
Follow this quick planting checklist to ensure proper depth, drainage, and soil structure. Dig a hole twice as wide, keep the rootball level with the ground, and finish with deep watering and mulch. This method creates ideal conditions for healthy hydrangea establishment.
First-Year Care Checklist
The first year is the most important period for hydrangea growth. Consistent care ensures your plants develop a strong root system, resist stress, and produce abundant blooms in future seasons.
Care Checklist:
- ✔️ Water 2–3 times weekly (adjust seasonally)
- ✔️ Maintain 2–3 inches of mulch
- ✔️ Apply slow-release fertilizer in early spring
- ✔️ Protect from strong afternoon sun in summer
- ✔️ Watch for early stress: wilting, yellow leaves, drooping
- ✔️ Keep soil evenly moist—never soggy
- ✔️ Avoid pruning heavily in the first year
Example:
A young hydrangea may wilt slightly on a hot afternoon, even with proper watering. This is normal—check moisture, mulch well, and wait for evening recovery.
Snippet :
Consistent care during the first year determines long-term hydrangea health. Water regularly, maintain mulch, fertilize lightly, and monitor for drought or stress. Avoid heavy pruning so the plant can build strong roots and adapt to its new environment.
👉 For deeper care tips, explore this related guide: Pothos Plant Care: 7 Common Mistakes and How to Avoid Them.
FAQs: How Do You Plant Hydrangeas?
How do you plant hydrangeas for the best results?
Plant hydrangeas in well-draining soil enriched with compost. Dig a hole twice as wide as the rootball and keep the crown level with the soil surface. Water deeply and add mulch to maintain moisture. Proper placement and soil preparation are the foundations of strong growth and long-lasting blooms.
Where should I plant hydrangeas for maximum blooming?
Choose a spot with morning sun and afternoon shade. Hydrangeas thrive in locations with filtered light, rich soil, and good drainage. Avoid areas with harsh afternoon sun or waterlogged soil. The right location ensures bigger, brighter blooms and answers a big part of how do you plant hydrangeas successfully.
What type of soil do hydrangeas need when planting?
Hydrangeas prefer moist, well-draining soil rich in organic matter. Compost boosts nutrients and structure, while mulch helps retain moisture. Soil pH also affects bloom color—acidic soil turns flowers blue, and alkaline soil creates pink blooms. These soil factors are essential for understanding how to plant hydrangeas properly.
How deep should you plant hydrangeas?
Plant hydrangeas so the top of the rootball sits level with the surrounding soil—not deeper. Dig a hole twice the width of the rootball to allow roots to spread. Planting too deeply restricts airflow and can stunt growth. Proper planting depth is a key step in how do you plant hydrangeas.
Do hydrangeas need a lot of water after planting?
Yes—newly planted hydrangeas need consistent moisture. Water deeply right after planting and continue 2–3 times weekly during the first few months. Keep soil moist but never soggy. Regular watering during the establishment stage ensures healthy roots and is essential in mastering how do you plant hydrangeas.
Can I plant hydrangeas in full sun?
Hydrangeas can tolerate full sun in cooler climates, but in warmer regions, they need afternoon shade to prevent wilting. If you’re researching how do you plant hydrangeas, remember that sunlight exposure directly affects bloom quality, leaf health, and hydration needs
Mastering how do you plant hydrangeas comes down to choosing the right location, preparing rich soil, planting at the correct depth, and giving your new shrubs consistent first-year care. With the steps in this guide, you’re now ready to grow fuller blooms, healthier roots, and long-lasting hydrangea beauty in any garden.
For more ways to support plant growth, explore our guide on Grow Lights for Indoor Plants: Stunning Results Made Easy. And if you want daily plant tips, inspiring ideas, and care visuals, make sure to follow us on social media for continuous gardening inspiration.